

TIG welding aluminum presents unique challenges that can lead to common problems like porosity, cracking, and poor fusion. By understanding these issues and their causes, welders can troubleshoot effectively and improve their welding results. This guide covers the most frequent aluminum TIG welding problems and practical solutions to help you weld confidently.
Key Takeaways
- Proper cleaning is essential: Aluminum must be thoroughly cleaned to prevent contamination and defects.
- Correct shielding gas and flow rate: Using the right gas and flow ensures a stable arc and prevents porosity.
- Control heat input: Too much heat causes warping and cracking, while too little results in poor fusion.
- Choose the right filler rod: Matching the filler material to the base aluminum prevents weak welds and cracking.
- Maintain consistent technique: Steady hand and consistent travel speed improve weld quality and reduce defects.
- Address common issues early: Recognizing signs of problems allows for quick adjustments and better results.
Quick Answers to Common Questions
Question 1?
Why does aluminum often develop porosity during TIG welding?
Porosity usually results from contamination, inadequate shielding gas coverage, or a dirty surface. Ensuring thorough cleaning and proper shielding helps prevent this issue.
Question 2?
How can I prevent cracking when TIG welding aluminum?
Control heat input, use appropriate filler materials, preheat if needed, and cool the weld slowly to minimize residual stresses and cracking.
Question 3?
What causes poor fusion in aluminum TIG welds?
Poor fusion is often caused by insufficient amperage, improper torch angle, or inconsistent technique. Adjusting parameters and practicing steady motion can improve fusion.
Question 4?
How do I reduce warping and distortion in aluminum welding?
Manage heat input carefully, alternate sides, clamp parts securely, and use fixtures to keep parts aligned during welding.
Question 5?
What should I do if I notice excessive spatter during welding?
Adjust gas flow, lower amperage, maintain proper torch angle, and ensure continuous shielding coverage to minimize spatter and blow-through.
📑 Table of Contents
Introduction
Welding aluminum with TIG (Tungsten Inert Gas) is a skill that offers clean, precise, and high-quality welds. However, many welders face common problems that can make aluminum welding frustrating and lead to weak or defective joints. These issues often stem from improper preparation, technique, or equipment settings.
If you’ve ever experienced porosity, cracking, or poor fusion while TIG welding aluminum, don’t worry. Understanding the root causes of these problems is key to overcoming them. In this guide, we’ll explore the most frequent aluminum TIG welding problems, their causes, and practical tips to fix and prevent them, helping you become a more confident and successful aluminum welder.
Understanding the Unique Challenges of TIG Welding Aluminum
Why Aluminum is Difficult to Weld
Aluminum has properties that make it tricky to weld. It oxidizes quickly, forming a thick oxide layer that melts at a higher temperature than the base metal. This oxide layer can cause contamination, weak welds, and defects if not properly removed.
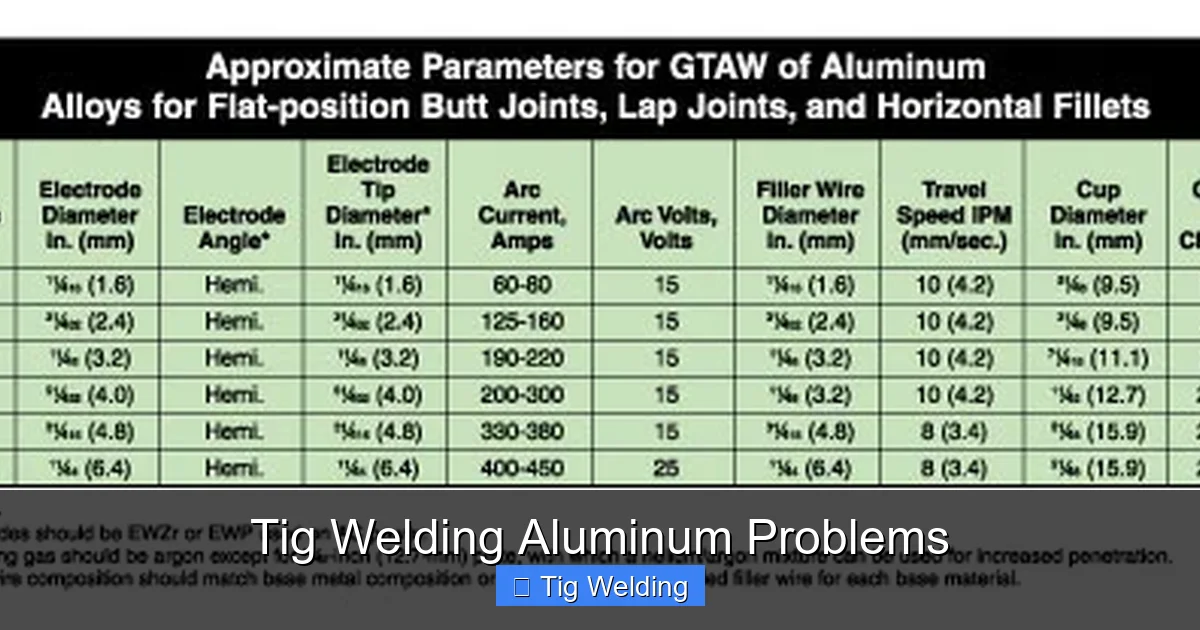
Visual guide about Tig Welding Aluminum Problems
Image source: i.pinimg.com
Additionally, aluminum conducts heat very well. This means it dissipates heat rapidly, making it challenging to control heat input. Too much heat causes warping and cracking, while too little leads to incomplete fusion.
Proper techniques, equipment, and preparation are essential for successful TIG welding on aluminum. Now, let’s look at the common problems faced and their solutions.
Common TIG Welding Aluminum Problems
1. Porosity in the Weld
Porosity appears as tiny holes or cavities in the weld bead. It is one of the most common problems in aluminum TIG welding and can weaken the joint significantly.
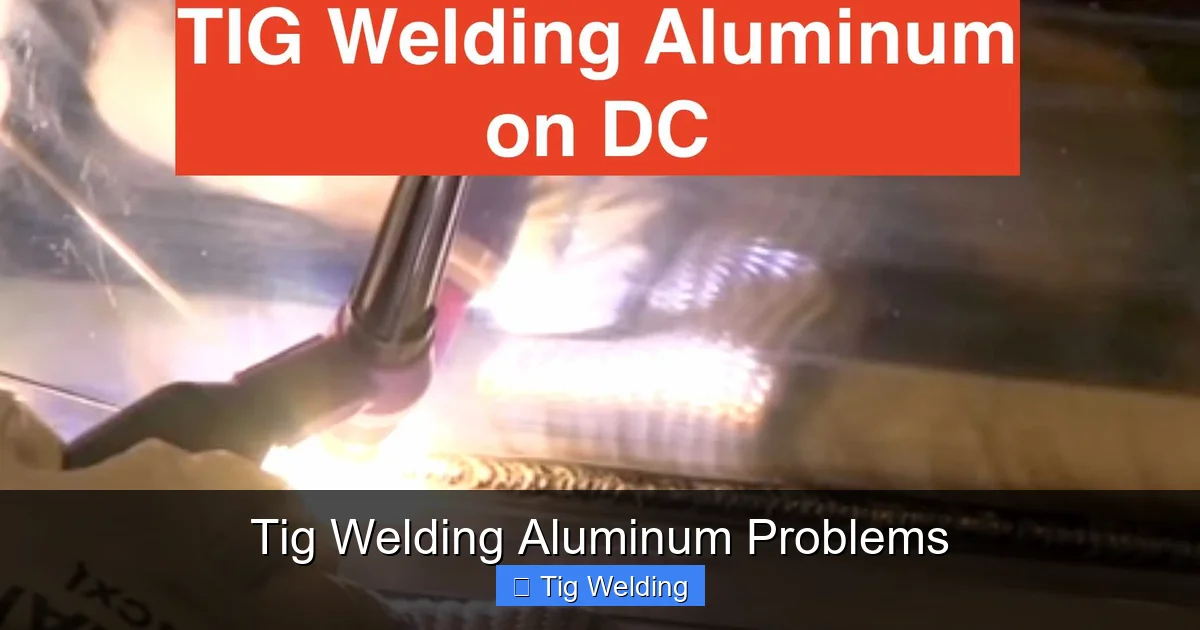
Visual guide about Tig Welding Aluminum Problems
Image source: weldingtipsandtricks.com
2. Cracking in the Weld or Heat-Affected Zone
Cracks can occur during cooling or due to residual stresses. Aluminum’s high thermal expansion makes cracking a frequent concern, especially when welding thick sections or with improper heat control.
3. Poor Fusion or Underfill
When the weld doesn’t fuse properly with the base metal, or the weld bead looks shallow, it’s called poor fusion. This weakens the weld and can lead to failure.
4. Oxide Contamination (Black or Dull Welds)
Oxide contamination results in dark, dull welds with poor appearance and inferior strength. It’s caused by not cleaning the aluminum surface or inadequate shielding gas coverage.
5. Warping and Distortion
Aluminum’s high thermal conductivity causes it to warp easily if heat input isn’t managed carefully. Warping can distort the parts and make assembly difficult.
6. Excessive Spatter and Blow-Through
Spatter and blow-through are common when the shielding gas isn’t adequate or the amperage is too high, causing molten metal to escape or create a mess.
Practical Solutions and Tips for Common Problems
1. Preventing Porosity
- Use pure or high-quality shielding gas: 100% argon or helium-argon mixes work best for aluminum.
- Optimize flow rate: Typically 15-20 CFM, but adjust based on conditions to prevent contamination.
- Ensure thorough cleaning: Remove oxide and contaminants using a stainless steel wire brush or chemical cleaner before welding.
- Maintain a consistent technique: Steady travel speed and arc length minimize turbulence and porosity.
2. Avoiding Cracks
- Control heat input: Use lower amperage and quicker travel speed to prevent excessive heat buildup.
- Preheat if necessary: For thick sections, preheating reduces thermal stresses.
- Use appropriate filler: Match the filler alloy to the base metal to reduce cracking risk.
- Implement proper cooling: Allow the weld to cool slowly and avoid rapid cooling or quenching.
3. Achieving Good Fusion
- Adjust amperage: Use enough current to melt the base and filler metal thoroughly.
- Maintain correct torch angle and distance: Keep the tungsten close but not touching, at about 1/8 inch from the workpiece.
- Use a consistent technique: Steady hand and even travel speed ensure proper fusion.
- Practice good torch control: Avoid dwell time or excessive hesitation that can cause cold welds.
4. Eliminating Oxide Contamination
- Properly clean aluminum: Use a dedicated stainless steel wire brush for aluminum to remove oxide layers.
- Ensure adequate shielding gas coverage: Keep the torch moving smoothly to prevent gaps in shielding.
- Use fresh shielding gas: Old or contaminated gas can cause oxidation and dull welds.
- Consider using a backing gas: To protect the backside of welds from oxidation and porosity.
5. Reducing Warping and Distortion
- Control heat input: Use lower amperage, shorter weld passes, and interpass cooling.
- Weld in sequence: Alternate sides or sections to balance heat distribution.
- Clamp parts securely: Minimize movement during welding.
- Use fixtures or jigs: To hold parts in proper alignment and reduce distortion.
6. Managing Spatter and Blow-Through
- Adjust gas flow: Increase flow slightly if spatter occurs.
- Optimize amperage: Use the lowest effective current for the thickness.
- Maintain proper torch angle and distance: Keep the torch steady and at the correct distance.
- Use proper shielding techniques: Shield the weld area continuously to prevent blow-through.
Additional Tips for Successful Aluminum TIG Welding
- Use the right equipment: A high-frequency start and a good power source help maintain stable arcs.
- Practice torch control: Smooth, steady motions improve weld quality and reduce problems.
- Preheat thick sections: Preheating reduces thermal stresses and improves weld penetration.
- Choose compatible filler rods: Use 4043 or 5356 depending on strength and corrosion requirements.
- Inspect your work: Regularly check for signs of defects and adjust your technique accordingly.
Conclusion
Welding aluminum with TIG can be challenging, but understanding common problems and their causes makes a big difference. From porosity and cracking to warping and poor fusion, each issue has practical solutions that can be applied with patience and practice. Mastering proper cleaning, shielding, heat control, and technique will help you produce strong, clean welds on aluminum every time.
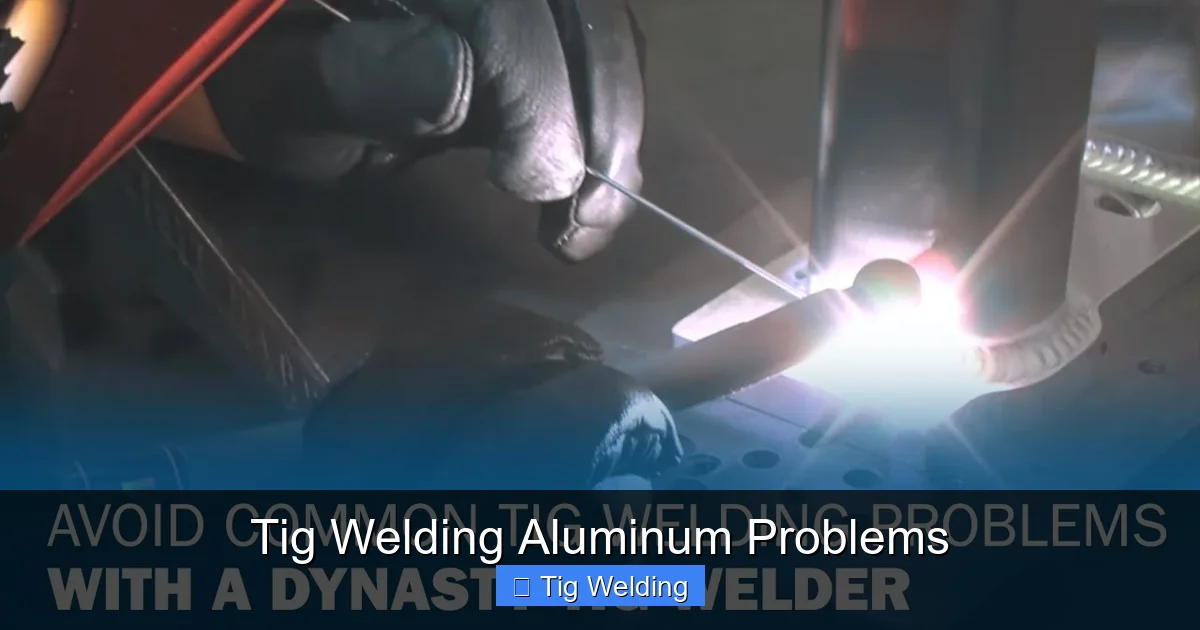
Visual guide about Tig Welding Aluminum Problems
Image source: i.ytimg.com
Remember, practice and attention to detail are key. With experience, you’ll troubleshoot problems more quickly and develop your skills for professional-quality aluminum TIG welds. Happy welding!
Frequently Asked Questions
What is the main cause of porosity in TIG welding aluminum?
Porosity mainly occurs due to contamination from dirt, oil, or oxide layers on the aluminum surface, combined with inadequate shielding gas coverage. Proper cleaning and gas flow help prevent it.
How does heat input affect aluminum welding problems?
Too much heat can cause warping, cracking, and oxidation, while too little results in poor fusion. Controlling heat input through amperage and travel speed is vital for quality welds.
What type of shielding gas is best for TIG welding aluminum?
Pure argon is most commonly used, but helium-argon mixes can improve arc stability and heat input, especially on thicker materials. Ensure the gas is clean and flows correctly.
Why does aluminum crack after welding?
Cracking can be caused by residual stresses, excessive heat, rapid cooling, or incompatible filler materials. Proper technique and cooling methods help prevent cracks.
How can I improve the appearance of my aluminum TIG welds?
Use clean, high-quality filler rods, maintain proper shielding, control heat input, and practice steady torch movement for smooth, shiny welds.
What tools or equipment are essential for successful aluminum TIG welding?
A good TIG welder with stable high-frequency start, quality tungsten electrodes, appropriate filler rods, and proper shielding gas setup are crucial for achieving great results.