

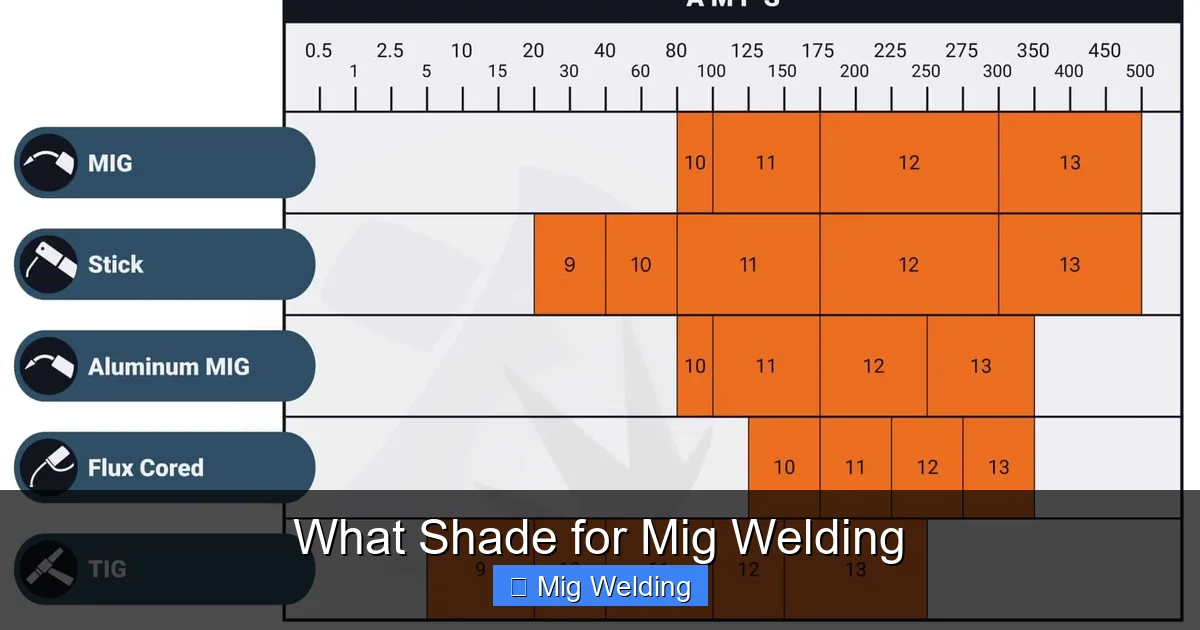
Choosing the correct shade for MIG welding is essential for safety and visibility. This guide explains how to select the right welding helmet shade, understand shade numbers, and improve your welding experience with practical tips and troubleshooting advice.
What Shade for MIG Welding: A Complete How-To Guide
If you’re into MIG welding, choosing the right shade for your welding helmet is crucial. It protects your eyes from dangerous UV and IR rays while giving you a clear view of your work. But with so many shade options available, it can be confusing to know which one is right for you. In this guide, you’ll learn how to select the proper shade for MIG welding, understand shade numbers, and get expert tips to make your welding safer and more efficient.
Key Takeaways
- Understanding Shade Numbers: Shade numbers indicate the darkness level of the welding helmet lens, essential for protection.
- Matching Shade to Welding Process: Different MIG welding tasks require different shades based on process and amperage.
- Safety First: Always select a shade that protects your eyes from harmful UV and IR rays.
- Adjustability Matters: Use adjustable helmets for versatile shading options suited for various welding conditions.
- Practical Tips: Test your helmet in a safe environment to ensure proper visibility and protection.
- Troubleshooting: If you experience eye strain or glare, consider increasing the shade level or upgrading your helmet.
Understanding the Importance of the Right Shade
MIG welding involves intense light and radiation that can harm your eyes. Without proper protection, you risk flash burns, eye strain, or long-term damage. The right shade filter blocks harmful rays while allowing you to see your weld pool clearly. Choosing the wrong shade can cause discomfort, reduce visibility, or compromise safety.
How Shade Numbers Work
Welding helmets come with a shade number, which indicates how dark the lens is. The higher the number, the darker the lens. Shade numbers typically range from 3 to 14. For MIG welding, most tasks fall between shades 8 and 13.

Visual guide about What Shade for Mig Welding
Image source: weldinghelmetreviews.com
Understanding Shade Number Recommendations
- Shade 8-10: Suitable for low-amperage MIG welding, such as thin metals or hobbyist projects.
- Shade 11-13: Ideal for high-amperage MIG welding, thicker metals, or professional applications.
- Shade 14: Used in very high amperage welding or specialized processes.
Factors to Consider When Choosing a Shade for MIG Welding
1. Welding Process and Amperage
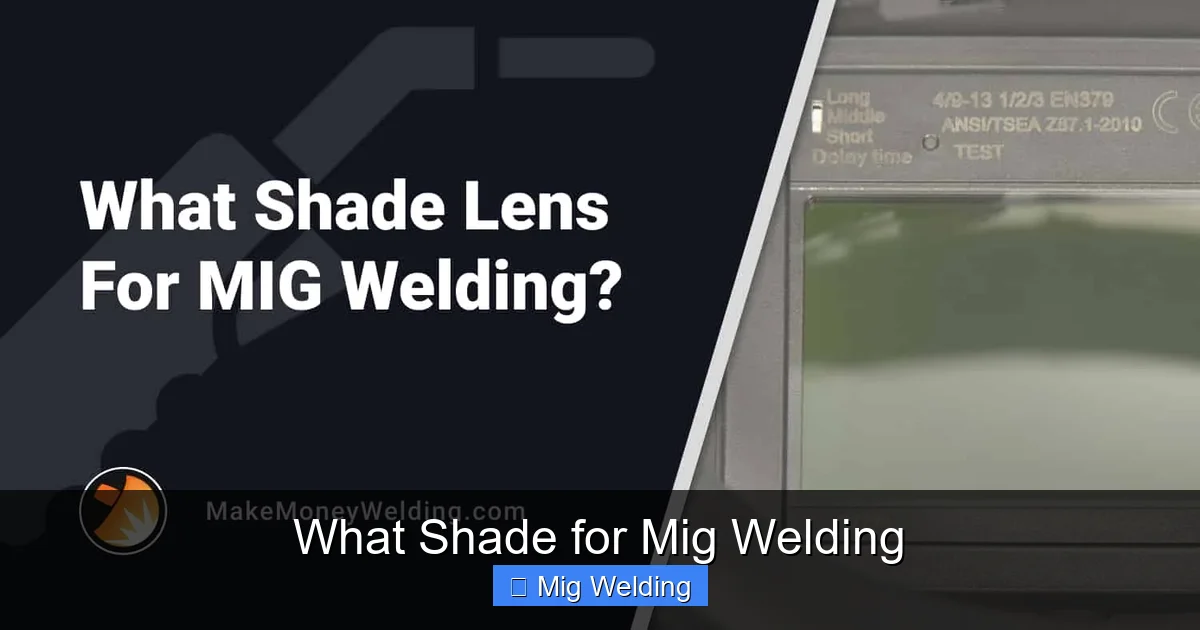
The type of MIG welding you’re doing and the current level directly influence the shade you need. Higher amperages produce brighter arcs, requiring a darker lens.
Visual guide about What Shade for Mig Welding
Image source: makemoneywelding.com
2. Material Thickness
Thicker materials typically require higher amperage, meaning you’ll need a darker shade for protection. For thin metals, a lighter shade may suffice.
3. Welding Environment
If you’re welding outdoors or in bright conditions, consider a darker shade to reduce glare and improve visibility.
4. Personal Comfort and Visibility
Ensure your helmet provides good clarity. If you find the weld difficult to see, try a lighter shade or an auto-darkening helmet with adjustable settings.
Choosing Between Fixed Shade and Auto-Darkening Helmets
Fixed shade helmets require you to manually flip or switch lenses, while auto-darkening helmets automatically adjust based on the arc. Auto-darkening helmets are more convenient and safer, especially for beginners.

Visual guide about What Shade for Mig Welding
Image source: weldingmania.com
Advantages of Auto-Darkening Helmets:
- Adjusts instantly to arc light
- Allows continuous visibility when not welding
- More comfortable and reduces neck strain
Practical Tips for Selecting the Correct Shade
- Consult the Manufacturer’s Recommendations: Always follow the guidelines provided for your specific welding equipment.
- Test Your Helmet: Before starting a project, test your helmet on scrap metal to see if the visibility and protection are adequate.
- Adjust for Comfort: Use helmets with adjustable shade levels to tailor protection to each job.
- Upgrade When Necessary: If you experience eye fatigue or difficulty seeing the weld pool, consider switching to a higher shade or better helmet.
Troubleshooting Common Issues
1. Eye Strain or Discomfort
If your eyes feel tired or sore after welding, your shade might be too light. Try increasing the shade number or upgrading to an auto-darkening helmet with adjustable settings.
2. Excessive Glare or Poor Visibility
This could mean the shade is too dark for the current welding conditions. Adjust the shade or ensure your helmet is functioning properly.
3. Difficulty Seeing the Weld Pool
Using a helmet with the appropriate shade and good clarity features can help. Consider testing different shades to find the best fit.
Conclusion
Choosing the correct shade for MIG welding is essential for safety, comfort, and quality results. Understand your welding process, consider environmental factors, and select an appropriate helmet with the right shade. Whether you opt for a fixed or auto-darkening helmet, always prioritize eye protection and visibility. With the right gear and knowledge, you can enjoy safe and efficient welding sessions every time.
Additional Tips for Safe MIG Welding
- Wear protective gloves and clothing to prevent burns and injuries.
- Ensure proper ventilation in your workspace to avoid fumes.
- Regularly inspect your helmet and replace damaged lenses or parts.
- Practice good welding techniques to reduce the risk of accidents.
