

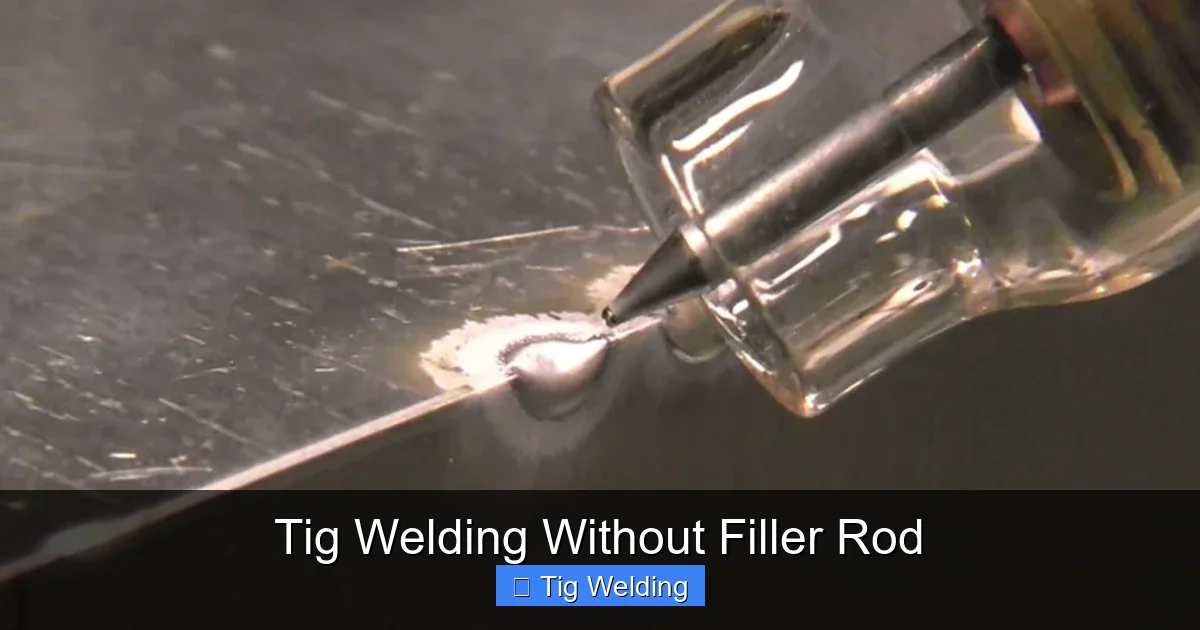
TIG welding without a filler rod, often called “autogenous welding,” is a specialized technique perfect for certain applications. This guide will teach you how to achieve strong, clean, and visually appealing welds on thin materials by melting the base metal edges together. Discover the necessary equipment, essential steps, and troubleshooting tips to successfully execute TIG welding without filler, opening up new possibilities for your fabrication projects.
Tig Welding Without Filler Rod: A Comprehensive How-To Guide
Welcome to the world of TIG welding, where precision and control are paramount. While many TIG welding projects involve adding filler rod to build up the weld and provide strength, there’s a fascinating and highly useful technique that skips this step entirely: TIG welding without filler rod, often referred to as autogenous welding. This method involves fusing the base metal edges together using only the heat from the TIG torch.
In this comprehensive guide, you’ll learn everything you need to know to master TIG welding without filler rod. We’ll cover why you might choose this technique, the specific equipment you’ll need, detailed step-by-step instructions for achieving perfect welds, and practical tips to help you succeed. Whether you’re a beginner looking to expand your TIG welding skills or an experienced welder seeking to refine your technique, this guide is for you.
Key Takeaways
- Edge Preparation is Crucial: Properly preparing the edges of the base metal is paramount for successful autogenous TIG welding, ensuring a clean fusion.
- Material Thickness Matters: This technique is best suited for thin materials (typically under 1/8 inch or 3mm) where the base metal can be melted without excessive burn-through.
- Precise Heat Control is Key: Mastering amperage control and arc length is vital to prevent burn-through and achieve a consistent, controlled melt pool.
- Joint Fit-Up is Critical: A tight, precise fit-up of the base metal edges is essential to facilitate fusion and prevent gaps that can lead to weak welds.
- Specific Applications: Autogenous TIG welding is ideal for joining thin sheet metal, creating decorative elements, and performing repairs where filler material would be detrimental.
- Practice Makes Perfect: Consistent practice is necessary to develop the dexterity and control required for this technique, especially with heat management.
Why Weld Without Filler Rod?
Before we dive into the “how,” let’s understand the “why.” There are several compelling reasons to opt for autogenous TIG welding:
- Aesthetics: For certain applications, a smooth, seamless appearance is desired. Welding without filler rod can create a cleaner, more visually appealing joint that looks almost as if the metal was never separated.
- Material Preservation: On very thin materials, adding filler rod can sometimes be challenging and might even introduce unwanted stress or imperfections. Autogenous welding allows you to work with the base metal’s inherent properties.
- Simplicity for Specific Jobs: For joining thin sheet metal edges or creating decorative features, autogenous welding can be a more straightforward and efficient approach.
- Reduced Material Costs: Naturally, not using filler rod means you save on material costs.
However, it’s important to note that this technique is generally best suited for thinner materials. Attempting to weld thicker sections without filler rod is often impractical and will result in a weak joint.
Understanding the Fundamentals of Autogenous TIG Welding
Visual guide about Tig Welding Without Filler Rod
Image source: metfab.com.au
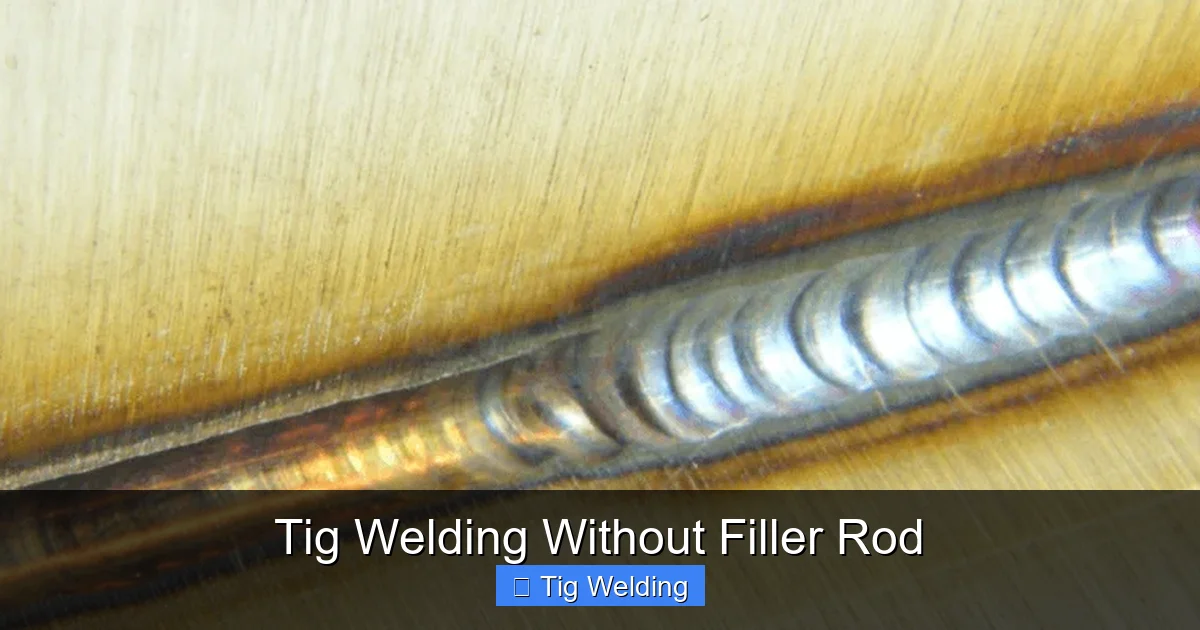
The core principle behind TIG welding without filler rod is controlling the heat input from the TIG torch precisely enough to melt the edges of the base metal without causing burn-through or excessive distortion. This requires a deep understanding of your equipment, the base metal, and a steady hand.
Essential Equipment for TIG Welding Without Filler Rod
Visual guide about Tig Welding Without Filler Rod
Image source: i.ytimg.com
While the basic TIG welding setup remains the same, there are a few considerations when preparing for autogenous welding:
Your TIG Welder
A reliable TIG welder with good amperage control is essential. You’ll need the ability to fine-tune your amperage for precise heat management. Machines with high-frequency start are beneficial for easier arc initiation.
Tungsten Electrode
For autogenous TIG welding, a sharpened pure tungsten or a zirconiated tungsten electrode is often preferred. A finely pointed tungsten electrode allows for a more focused arc, which is critical for controlling heat on thin materials. Ensure the tungsten is properly ground to a sharp point.
Shielding Gas
Pure Argon is the standard and most common shielding gas for autogenous TIG welding of most metals, especially aluminum and stainless steel. It provides excellent arc stability and cleaning action. Ensure your gas flow rate is set correctly – typically around 15-25 CFH (Cubic Feet per Hour), depending on your setup and the joint configuration.
Torch and Consumables
Use the appropriate size collet body, gas lens, and ceramic cup for your torch. A gas lens helps create a wider coverage of shielding gas, which is crucial for preventing contamination, especially when working without filler. The cup size will depend on the joint you are welding, but smaller cups can sometimes offer more control in tight spaces.
Safety Gear
This includes a welding helmet with an appropriate shade, welding gloves, a welding jacket or leathers, and sturdy footwear. Never compromise on safety.
Preparing for the Weld: The Crucial First Steps

Visual guide about Tig Welding Without Filler Rod
Image source: i.ytimg.com
Before you even strike an arc, meticulous preparation is non-negotiable. This is where the success of autogenous TIG welding is truly determined.
1. Material Selection and Thickness
As mentioned, autogenous TIG welding is primarily for thin materials, generally under 1/8 inch (3mm). Thicker materials will require filler rod to build up the weld and ensure sufficient penetration and strength. Common materials include:
- Thin gauge sheet metal (steel, stainless steel)
- Aluminum sheet
- Certain alloys
Always know the exact thickness of the material you are working with.
2. Edge Preparation
This is arguably the most critical step. The edges of the material must be clean, free of any contaminants, and prepared to create a tight fit-up.
Cleaning the Metal
- Degreasing: Use a specialized metal cleaner or acetone to remove any oils, grease, or dirt. This is especially important for aluminum, as any oil contamination can cause weld porosity.
- Grinding/Sanding: For steel and stainless steel, you can use a grinder or sandpaper to remove mill scale, rust, or any surface imperfections. For aluminum, use a dedicated stainless steel wire brush that is only used for aluminum to avoid cross-contamination.
- Deburring: Ensure there are no sharp burrs along the edges that could melt away unevenly.
Creating the Right Joint
- Butt Welds: For thin sheet metal, a square edge butt joint is common. The edges should be perfectly butted up against each other, with no gap.
- Lap Welds: In a lap joint, one piece of metal overlaps another. The top edge of the bottom piece and the bottom edge of the top piece should be clean and in direct contact.
The fit-up must be extremely precise and tight. Any gap will be difficult to bridge without filler rod and can lead to a weak weld. You might need clamps, tack welds (if you’re making them yourself, very small and precisely placed), or fixturing to hold the pieces perfectly in place.
Step-by-Step Guide to TIG Welding Without Filler Rod
Now that your material is prepped and your equipment is ready, it’s time to weld.
Step 1: Set Up Your Machine
- Amperage: This is the trickiest part and will require practice. Start with a lower amperage setting and gradually increase it until you can achieve a stable melt pool without burning through. A general starting point for 16-gauge steel might be around 30-50 amps, but this varies greatly with material and thickness. For aluminum, you might need a higher amperage and AC output for cleaning.
- AC/DC: For steel and stainless steel, you’ll typically use DCEN (Direct Current Electrode Negative). For aluminum, you’ll use AC (Alternating Current).
- Gas Flow: Set your Argon flow rate.
- Pulse: Some welders use a pulse function to control heat input, especially on very thin materials. Experiment with pulse frequency and amperage settings if your machine has this feature.
Step 2: Position Your Torch and Electrode
Hold your TIG torch at a slight angle (about 10-15 degrees) towards the direction of travel. The tungsten electrode should be about as far from the base metal as the diameter of the tungsten itself – this is often referred to as a “pencil-tip” distance. A consistent arc length is key.
Step 3: Initiate the Arc
Using your foot pedal or fingertip control, initiate the arc by bringing the tungsten close to the metal. The high-frequency start will help you establish the arc without touching the tungsten to the workpiece.
Step 4: Create the Melt Pool
As soon as the arc establishes, you’ll see the base metal begin to melt. Your goal is to create a small, consistent puddle of molten metal by carefully controlling the heat input with your amperage control.
Step 5: Move Along the Joint
This is where the finesse comes in. You need to move smoothly and steadily along the joint, allowing the leading edge of the puddle to melt the base metal ahead of it, and the trailing edge of the puddle to solidify behind you.
- Observe the Puddle: Constantly watch the weld puddle. It should be a bright, molten pool that is just large enough to fuse the edges.
- Maintain Arc Length: Keep your arc length consistent. Too long an arc will spread the heat and be harder to control; too short an arc can lead to tungsten contamination.
- Torch Movement: Move the torch in small, controlled movements – either a slight weave or a steady progression. The key is to let the heat of the arc do the work of fusing the edges.
- Controlling Burn-Through: If you see the puddle starting to get too large or thin, momentarily back off the amperage (if using a foot pedal) or slightly move the torch forward to cool the area. Conversely, if the puddle isn’t forming, you may need to increase amperage or linger slightly longer.
Step 6: Complete the Weld
Continue moving along the joint until you reach the end. When finishing the weld, slowly decrease the amperage to fill the crater and prevent cracking. This is often done by easing off the foot pedal or using a crater fill function if your machine has one.
Step 7: Post-Weld Cleaning
Once the weld has cooled sufficiently, clean off any residual oxides or discoloration with a stainless steel wire brush. For aluminum, you might use a wire brush and then a degreaser.
Practical Tips for Success
Here are some extra pointers to help you excel at TIG welding without filler rod:
- Practice on Scrap Material: Before tackling your actual project, practice on identical scrap pieces. This is the best way to dial in your amperage settings and develop your technique.
- Start with a Tack Weld (If Necessary): For longer seams, you might use very small, precise tack welds to hold the pieces together. Be sure these tack welds are well-executed and don’t create a weak point.
- Use Fixturing: If possible, use clamps or jigs to ensure the material stays perfectly aligned during the welding process. This is especially important for thin sheet metal that can warp easily.
- Consider AC Waveform Control (for Aluminum): If you’re welding aluminum, experiment with AC balance and frequency settings on your welder. Adjusting these can help with cleaning action and penetration.
- Don’t Rush: TIG welding without filler rod requires patience and a steady hand. Take your time, focus on the weld puddle, and don’t be afraid to stop and reassess if needed.
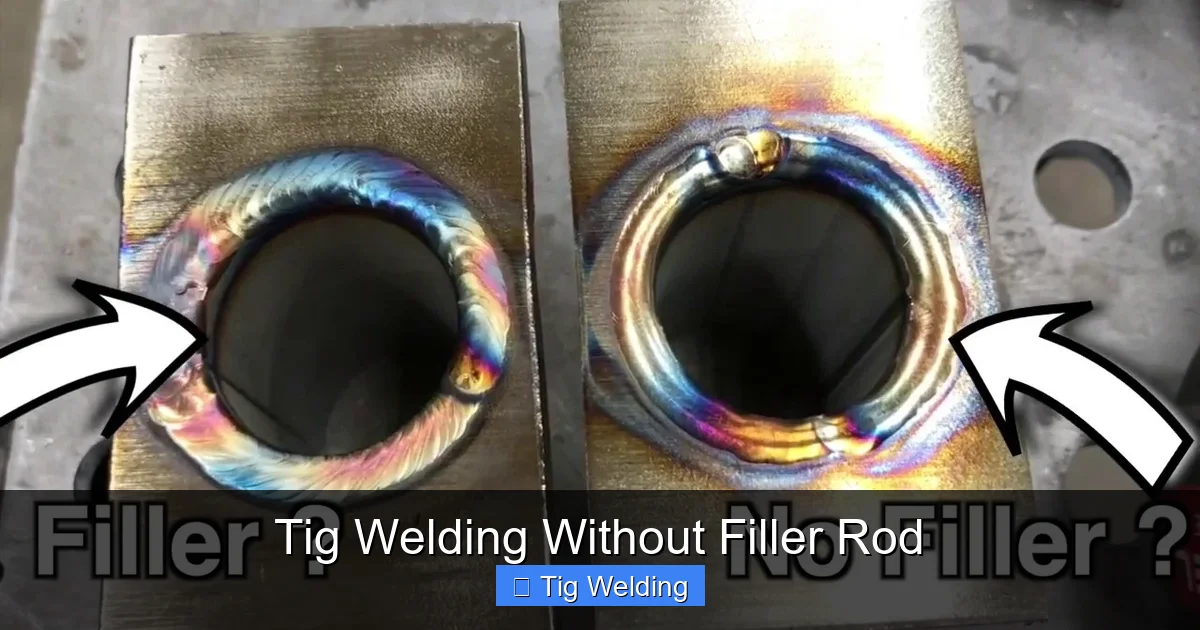
- Watch for Heat Tint: On stainless steel, excessive heat can lead to discoloration (heat tint). Aim for a light straw to light blue color; dark blue or purple indicates too much heat.
Troubleshooting Common Issues
Even with practice, you might encounter some challenges. Here’s how to address them:
Problem: Burn-Through
- Cause: Amperage is too high, arc length is too short, travel speed is too slow, or the material is too thin for the joint type.
- Solution: Lower your amperage, increase your arc length slightly, move faster, or re-evaluate if autogenous welding is suitable for the material thickness.
Problem: Poor Fusion/Incomplete Penetration
- Cause: Amperage is too low, arc length is too long, travel speed is too fast, or the joint fit-up has a gap.
- Solution: Increase your amperage, shorten your arc length, slow down your travel speed, and ensure a tight fit-up.
Problem: Weld Puddle is Unstable or Erratic
- Cause: Contaminated material, inconsistent arc length, or poor shielding gas coverage.
- Solution: Thoroughly clean the material, maintain a consistent arc length, and check your gas flow and ensure no drafts are affecting the shielding gas.
Problem: Porosity (Small Holes in the Weld)
- Cause: Material contamination (oil, grease, rust), insufficient shielding gas, or dirty tungsten.
- Solution: Clean the material meticulously, ensure adequate gas flow, and use a clean, sharpened tungsten electrode.
Conclusion
TIG welding without filler rod, or autogenous TIG welding, is a valuable skill that can produce exceptionally clean and aesthetically pleasing results, especially on thin materials. It demands precision, excellent heat control, and meticulous preparation. By understanding the fundamentals, practicing diligently, and paying close attention to your weld puddle, you can master this technique and add another dimension to your TIG welding capabilities. Remember, practice is your greatest ally. The more you weld without filler, the more intuitive it will become, allowing you to create beautiful, strong, and seamless joints.
