

Discover the art of micro TIG welding, a specialized technique for joining extremely thin materials with incredible precision. This guide will walk you through the necessary equipment, fundamental skills, and practical applications. Mastering micro TIG welding opens doors to intricate projects and delicate repairs previously thought impossible.
Welcome to the fascinating world of micro TIG welding! If you’ve ever admired intricate metalwork, delicate jewelry, or precise scientific instruments, you’ve likely seen the results of this highly specialized welding technique. Unlike traditional TIG welding, micro TIG welding focuses on joining materials that are incredibly thin – often as thin as a few thousandths of an inch.
This guide is your comprehensive introduction to micro TIG welding. We’ll cover everything you need to know to get started, from understanding the unique challenges of working with thin metals to mastering the precise techniques required for success. You’ll learn about the specialized equipment that makes this process possible, the crucial steps involved in preparing your workpiece, and how to develop the delicate touch needed to create flawless welds. By the end of this guide, you’ll have a solid foundation to confidently approach your own micro TIG welding projects.
Key Takeaways
- Precision Control is Paramount: Micro TIG welding demands meticulous control over heat input, arc length, and filler material to prevent burn-through on delicate materials.
- Specialized Equipment is Key: Utilizing a high-frequency start TIG welder with precise amperage control, specialized micro torches, and fine-gauge filler wire is crucial for success.
- Material Preparation is Critical: Thorough cleaning and deburring of ultra-thin metals are non-negotiable to ensure a clean, strong weld without contamination.
- Practice on Similar Materials: Develop your skills by practicing on scrap pieces of the same thin gauge material you intend to weld to understand its unique heat response.
- Proper Filler Material Selection: Choosing the correct filler wire, often thinner than the base metal, is vital for balancing the weld puddle and avoiding excessive build-up.
- Arc Manipulation is Subtle: Small, controlled movements of the torch and a consistent, brief filler rod dip are essential for building a precise bead.
Understanding the Challenges of Micro TIG Welding
Working with thin materials presents unique challenges that demand a different approach than standard TIG welding. The most significant hurdle is heat management. Thin metals have very little thermal mass, meaning they absorb heat quickly and can easily warp, melt, or burn through if too much heat is applied.
Think of it like trying to solder a tiny electronic component versus welding two thick steel plates. In micro TIG welding, you’re essentially performing a highly controlled melt and fuse of extremely fine edges. This requires a very low amperage output, often just a few amps, and incredibly precise control over the welding arc. Even a slight overshoot in amperage or arc length can spell disaster for your workpiece.
Another challenge is the delicate nature of the materials themselves. They can be easily damaged by excessive force, incorrect handling, or even abrasive cleaning methods. Therefore, meticulous preparation and a gentle touch are absolutely essential.
Essential Micro TIG Welding Equipment
While many of the core principles of TIG welding apply, micro TIG welding necessitates specific equipment to handle the extreme precision required. Investing in the right tools is paramount for achieving successful results.
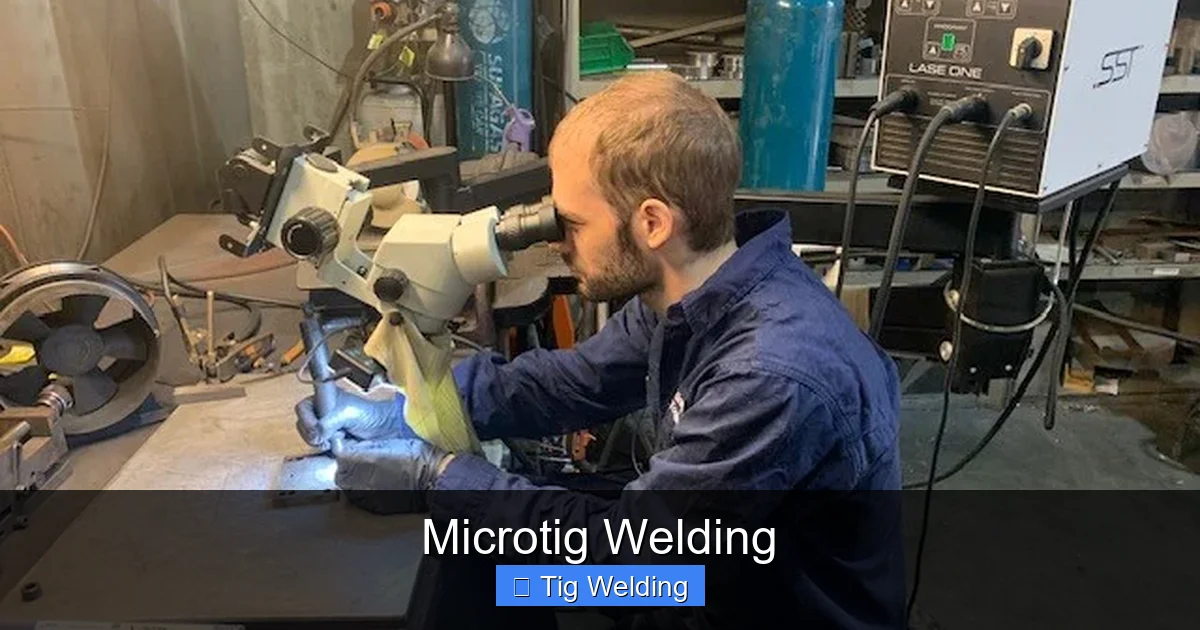
Visual guide about Microtig Welding
Image source: uniquetooling.com.au
1. The TIG Welder
You’ll need a TIG welder capable of very low amperage output. Look for machines that offer precise digital amperage control and a high-frequency start. A high-frequency start is crucial because it allows you to initiate the arc without touching the tungsten to the workpiece, preventing contamination and damage to the tungsten tip, which is vital when working with thin materials.
- Amperage Range: Aim for a welder that can reliably produce as low as 1-5 amps. Many standard TIG welders start at much higher amperages, making them unsuitable for micro TIG.
- High-Frequency Start: Essential for non-contact arc initiation.
- Pulse Functionality: While not strictly mandatory, a pulse function can be incredibly helpful. It allows you to set a peak amperage for melting and a background amperage for cooling, offering greater control over heat input.
2. The Micro Torch
Standard TIG torches are often too large and cumbersome for micro TIG welding. You’ll need a specialized micro torch or a smaller accessory torch designed for intricate work. These torches typically have smaller cups and electrode holders, allowing for better visibility and maneuverability in tight spaces.
- Small Cup Size: A smaller cup helps to contain the shielding gas effectively around the tiny weld area.
- Ergonomic Design: A comfortable and precise torch handle is important for steady control.
3. Tungsten Electrodes
Use the smallest diameter tungsten electrodes available. Typically, 0.020-inch (0.5mm) or even smaller are preferred. A finely sharpened tungsten electrode will create a focused arc, which is essential for precise heat application.
- Sharpening: Sharpen your tungsten to a very fine, needle-like point. This concentrates the arc.
- Material: Pure tungsten or lanthanated tungsten are common choices.
4. Filler Material
The filler material you use should generally be thinner than the base metal you are joining. This prevents the filler from overwhelming the weld puddle and creating an excessive bead. It’s often difficult to find filler wire that is thin enough for very fine micro TIG work, so you might consider using wire that has been drawn down to a smaller diameter by a specialized supplier.
- Diameter: Select a filler wire diameter that is approximately half the thickness of your base material, or even smaller if possible.
- Matching Alloys: Always use a filler material that matches the alloy of your base metal to ensure proper weld strength and integrity.
5. Shielding Gas
Pure Argon is the standard shielding gas for most TIG welding applications, and micro TIG welding is no exception. The key is to use a low flow rate to avoid disturbing the delicate weld puddle or blowing the molten metal away.
- Flow Rate: Start with a very low flow rate and adjust as needed. A flow meter with fine adjustment is beneficial.
6. Work Area and Ventilation
Ensure you have a clean, well-lit, and well-ventilated workspace. Proper ventilation is crucial for your health, especially when welding exotic metals or in confined spaces.
Step-by-Step Micro TIG Welding Guide
Now that you have an understanding of the equipment, let’s walk through the process of micro TIG welding. Remember, patience and practice are your greatest allies here.

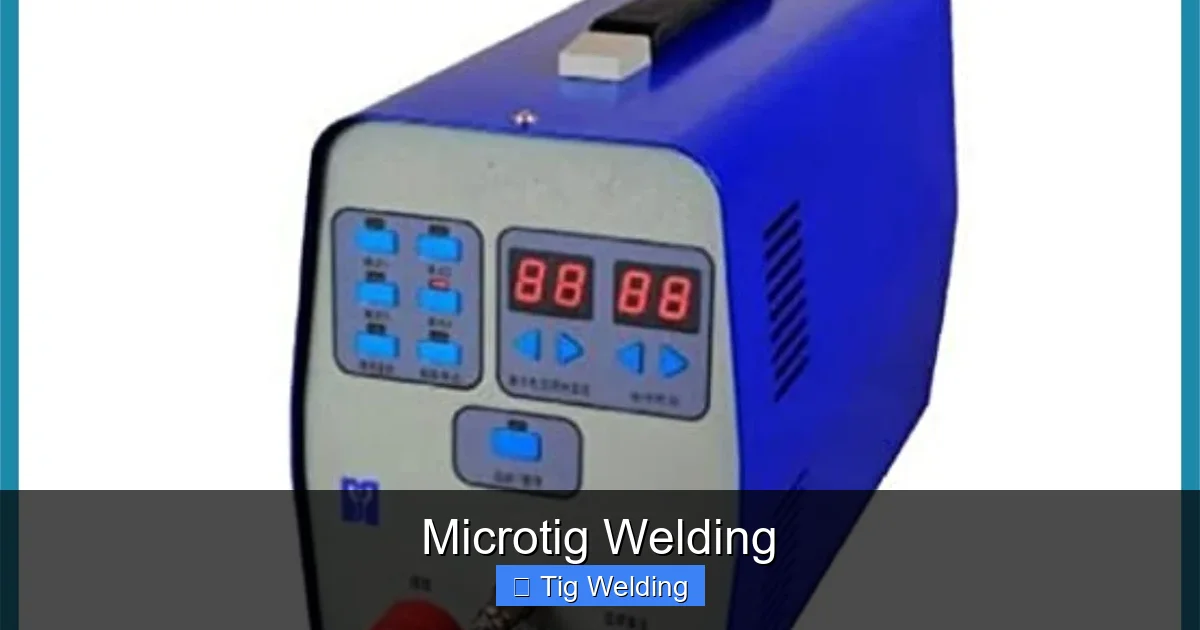
Visual guide about Microtig Welding
Image source: weldingpros.net
Step 1: Material Preparation
This is perhaps the most critical step in micro TIG welding. Even the slightest contamination can ruin a weld on thin materials. The goal is to have perfectly clean edges ready to fuse.
Cleaning
Thoroughly clean the edges of the materials you intend to weld. Use a dedicated stainless steel wire brush (never use a brush that has touched other metals) and a high-quality degreaser or solvent like acetone or isopropyl alcohol. Ensure all oils, dirt, and oxidation are removed.
Deburring
If your materials have sharp edges from cutting, very gently deburr them. You want to remove any burrs that could interfere with the weld, but avoid creating a chamfer or significantly altering the edge profile.
Fit-up
Ensure the pieces fit together precisely. There should be no gaps. A tight fit-up is essential for achieving a clean fusion weld or for properly integrating filler material.
Step 2: Setting Up Your Welder
Configure your TIG welder for micro TIG welding based on the material and thickness you are working with.
Amperage Setting
This is where you’ll experiment. For extremely thin materials like 0.005” (0.127mm) thick stainless steel or gold, you might be working with as little as 1-3 amps. For slightly thicker, but still thin, materials like 0.010” (0.254mm) steel, you might be in the 5-15 amp range. Always start low and increase incrementally.
Gas Flow
Set your argon flow rate to a minimal level, perhaps 5-10 CFH (Cubic Feet per Hour). You need just enough to shield the weld puddle without causing turbulence or blowing the metal.
Torch and Tungsten Setup
Install your micro torch and a finely sharpened, small-diameter tungsten electrode. Ensure the tungsten extends just enough from the cup to give you a good view of the arc and the weld puddle. A general rule is about 1/4 inch (6mm) of exposed tungsten.
Step 3: Initiating the Arc
With your welder set up and your workpiece in position, it’s time to strike the arc. Remember, use the high-frequency start.
Arc Initiation
Hold the torch close to the workpiece – about the thickness of a dime away. Depress the foot pedal or trigger (if applicable) to initiate the high-frequency arc. As soon as the arc starts, gently pull the tungsten away slightly to establish your desired arc length, typically around 1/16” to 1/8” (1.5mm to 3mm).
Arc Length Control
Maintaining a consistent and appropriate arc length is crucial. Too close and you risk contaminating the tungsten or creating an unstable arc. Too far and the arc won’t have enough energy to melt the material effectively.
Step 4: Creating the Weld Bead
This is where your delicate touch and practiced movements come into play.
Melting the Base Metal
For fusion welds (where no filler material is used), focus on bringing the edges of the two pieces of metal to their melting point with the arc. You are essentially creating a tiny puddle by melting the edges together. Move the torch smoothly and steadily along the joint.
Adding Filler Material (If Necessary)
If you need to add filler material, feed it into the leading edge of the molten puddle with a gentle, consistent dip. The filler rod should be held at a slight angle, almost parallel to the workpiece. Only dip enough filler material to maintain the desired bead profile. Avoid “stabbing” the filler rod into the puddle, which can introduce porosity or create an inconsistent bead.
Torch Movement
Move the torch slowly and deliberately. For straight seams, a steady, linear motion is key. For intricate shapes, you’ll be making small, controlled movements. The speed of your travel dictates how much heat is being applied; slower travel means more heat. Find the sweet spot that melts the material without burning through.
Step 5: Shielding Gas Post-Flow
Once you’ve completed the weld, keep the shielding gas flowing for a few seconds after the arc is extinguished. This is called post-flow, and it’s essential for preventing oxidation of the hot metal as it cools.
Post-Flow Duration
A general guideline is to allow post-flow for about twice the time it took to make the weld. This ensures the weld puddle is fully protected while it solidifies.
Practical Tips for Micro TIG Welding Success
Beyond the basic steps, these tips can significantly improve your micro TIG welding results.
Visual guide about Microtig Welding
Image source: jkmachines.co
- Practice, Practice, Practice: There’s no substitute for hands-on experience. Start with scrap pieces of the same material and thickness you plan to weld. Practice making tack welds, then full beads.
- Master Foot Pedal Control: If your machine has a foot pedal, practice modulating it to control amperage precisely. This is crucial for managing heat input.
- Observe the Puddle: Pay close attention to the molten puddle. It will tell you if you’re applying too much or too little heat, or if your travel speed is incorrect. A good puddle is small, fluid, and controllable.
- Keep Your Tungsten Sharp: A dull or balled-up tungsten will create a wide, diffuse arc, leading to excessive heat input. Re-sharpen your tungsten frequently.
- Use a Magnifying Lamp: For very intricate work, a magnifying lamp can greatly improve visibility and allow for more precise torch and filler rod manipulation.
- Consider Fixturing: For repetitive or highly precise tasks, consider using custom fixtures to hold your workpiece perfectly in place. This ensures consistent fit-up and alignment.
- Work in Short Bursts: Especially when learning, it’s often better to make short welds and allow the material to cool slightly between passes, rather than trying to complete a long seam in one go.
Troubleshooting Common Micro TIG Welding Issues
Even experienced welders encounter challenges. Here are some common problems and their solutions in micro TIG welding.
- Burn-Through: This is the most common issue with thin materials.
- Cause: Too much amperage, arc too close, travel speed too slow.
- Solution: Reduce amperage, increase arc length slightly, increase travel speed, use pulse function if available. Practice finding the “sweet spot.”
- Lack of Fusion: The edges aren’t melting together properly.
- Cause: Not enough amperage, arc too far away, travel speed too fast.
- Solution: Increase amperage slightly, move the arc closer, slow down travel speed. Ensure material is clean.
- Porosity (Small Holes in the Weld):
- Cause: Contamination (dirt, oil, moisture on workpiece or filler), insufficient shielding gas, or contaminated tungsten.
- Solution: Meticulously clean the workpiece. Ensure proper gas flow. Use clean filler rod and tungsten.
- Warping: The thin metal distorts significantly.
- Cause: Uneven heat application, excessive heat input.
- Solution: Use lower amperage, make shorter welds, consider intermittent welding, use clamping or fixturing to resist distortion, consider back-purging if applicable.
- Inconsistent Bead Profile: The weld bead is uneven or lumpy.
- Cause: Inconsistent torch movement, erratic filler rod feeding, or unstable arc.
- Solution: Practice smooth, consistent torch motion. Dip filler rod smoothly and consistently into the puddle. Ensure a stable arc length.
Conclusion
Micro TIG welding is a demanding but incredibly rewarding skill. It opens up possibilities for working with materials and creating projects that are simply impossible with conventional welding methods. By understanding the unique challenges, investing in the right specialized equipment, and diligently practicing the precise techniques outlined in this guide, you can master this delicate art.
Remember that patience is key. Each weld you make is an opportunity to learn and refine your technique. Don’t be discouraged by early failures; they are part of the learning process. With dedication and focus, you’ll soon be creating beautiful, strong, and incredibly precise welds on the thinnest of metals.