

Welding aluminum with a MIG welder is an accessible skill for many DIY enthusiasts and professionals. In this guide, you’ll learn the essential steps, equipment setup, and tips to produce strong, clean welds on aluminum. Whether you’re a beginner or looking to improve your technique, this comprehensive overview will help you succeed.
Key Takeaways
- Use the right wire: Choose 4043 or 5356 aluminum MIG wire, depending on your project requirements.
- Set proper shielding gas: Use 100% argon or a mix of argon and helium for optimal weld quality.
- Adjust machine settings: Set the correct voltage, wire feed speed, and travel speed tailored for aluminum welding.
- Prepare your materials: Clean aluminum thoroughly to remove oxide layers for better weld adhesion.
- Practice technique: Maintain a steady hand and consistent travel speed for smooth, strong welds.
- Troubleshoot common issues: Address porosity, cracks, or lack of fusion with proper settings and cleaning.
Introduction
Welding aluminum with a MIG welder can seem challenging at first, but with the right knowledge and practice, it becomes straightforward. Aluminum is a popular material in many industries—from automotive to aerospace—and learning how to weld it properly opens up many possibilities. In this guide, we’ll walk you through every step, from preparing your materials to setting up your welder, and finally executing clean, strong welds. Whether you’re a hobbyist or a professional, these tips will help you master aluminum welding with a MIG welder.
Understanding the Basics of MIG Welding Aluminum
MIG (Metal Inert Gas) welding, also known as GMAW (Gas Metal Arc Welding), uses a continuous wire feed and shielding gas to create a weld. Aluminum presents unique challenges because of its high thermal conductivity and oxide layer. To successfully weld aluminum with a MIG welder, you need specific equipment, settings, and preparation. Let’s explore what makes aluminum welding different and how to approach it effectively.
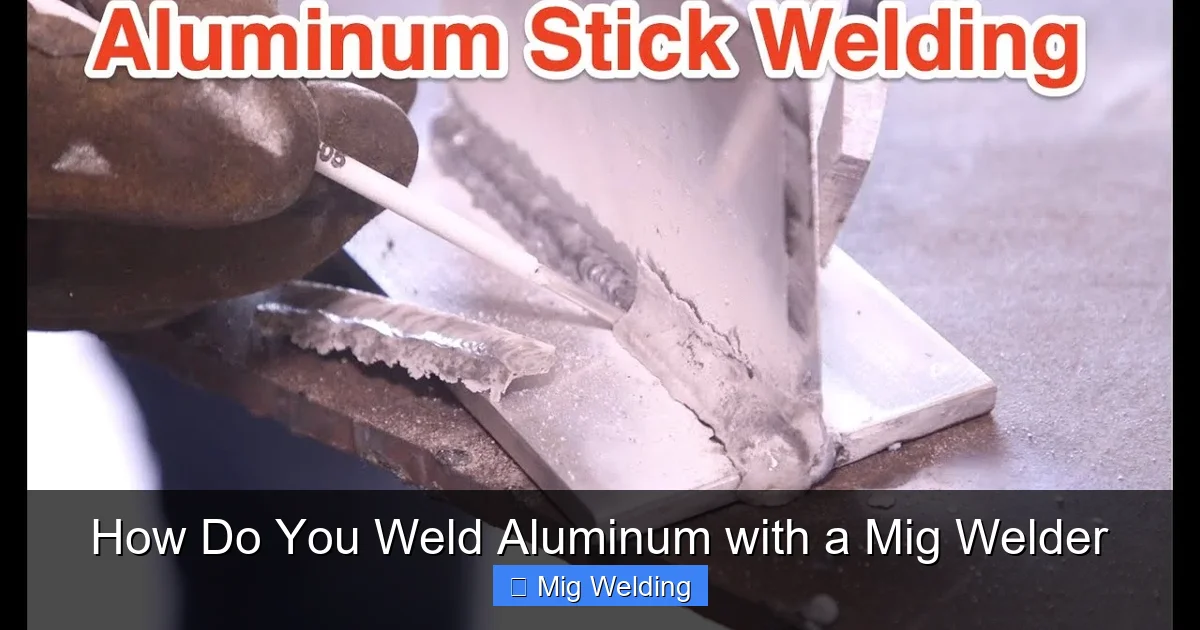
Visual guide about How Do You Weld Aluminum with a Mig Welder
Image source: i.ytimg.com
Step 1: Gather the Right Equipment and Materials
1. Selecting the Correct MIG Wire
- 4043 Aluminum Wire: Good for general use, easier to weld, and produces a smoother finish. Suitable for softer aluminum alloys.
- 5356 Aluminum Wire: Stronger and more corrosion-resistant, ideal for structural applications. Slightly harder to weld than 4043.
2. Proper Shielding Gas
- 100% Argon: Most common choice for MIG aluminum welding, providing good arc stability and weld quality.
- Argon-Helium Mix: Enhances penetration and improves weld appearance, especially on thicker materials.
3. Welding Equipment
- Power Source: MIG welders capable of handling aluminum wire (usually with adjustable voltage and wire feed).
- Wire Feeder: Ensure it supports aluminum wire and has smooth feeding capabilities.
- Contact Tip: Use a tip designed for aluminum wire, with a size matching your wire diameter (commonly 0.035″ or 0.045″).
- Cleaning Tools: Wire brushes or stainless steel brushes to remove oxide before and after welding.
Step 2: Prepare Your Materials
1. Clean the Aluminum Surface
Aluminum naturally forms an oxide layer that melts at a higher temperature than the base metal. Clean the surface thoroughly to remove dirt, grease, and oxide. Use a stainless steel wire brush dedicated for aluminum or chemical cleaners designed for aluminum cleaning.
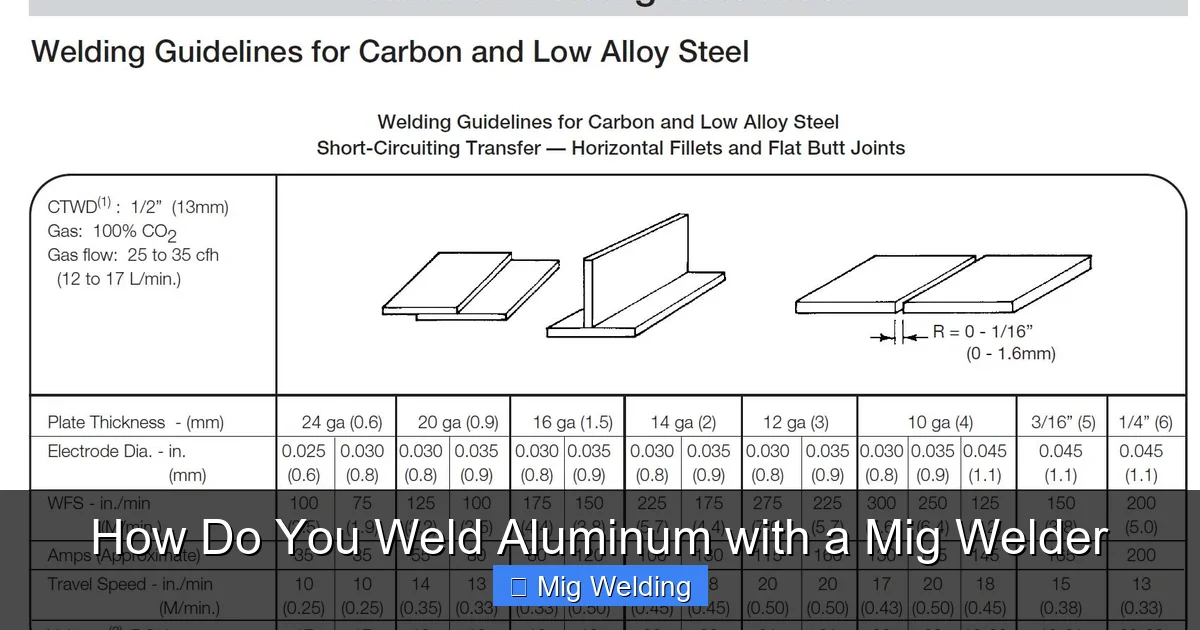
Visual guide about How Do You Weld Aluminum with a Mig Welder
Image source: app.aws.org
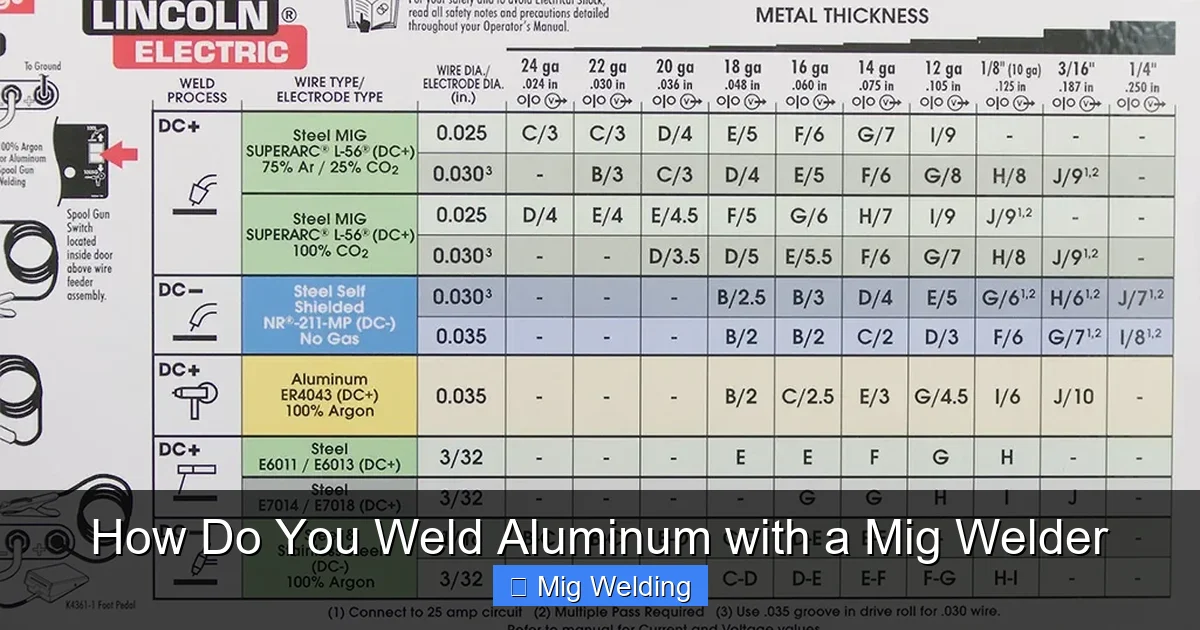
Visual guide about How Do You Weld Aluminum with a Mig Welder
Image source: i2.wp.com
2. Remove Oxide Layers
Use a wire brush or a chemical etchant to remove the oxide layer just before welding. Avoid using steel brushes or tools that could introduce rust or contamination.
3. Secure Your Materials
Clamp or fixture your aluminum pieces securely. Minimize movement during welding to ensure consistent results.
Step 3: Set Up Your MIG Welder
1. Select the Right Settings
- Voltage: Typically between 16-22V, depending on the thickness of the aluminum.
- Wire Feed Speed: Adjust according to wire diameter and material thickness—usually around 200-400 inches per minute.
- Shielding Gas Flow Rate: 20-30 CFH (cubic feet per hour) for optimal shielding.
2. Configure the Gun and Nozzle
- Use a contact tip that matches your wire size.
- Use a nozzle that provides good coverage and easy access to weld joints.
3. Safety Precautions
- Wear appropriate PPE: welding helmet, gloves, long sleeves, and proper ventilation.
- Ensure your workspace is well-ventilated to avoid fumes.
Step 4: Welding Technique and Execution
1. Positioning and Starting the Weld
Hold the MIG gun at a consistent angle—typically 10-15 degrees from perpendicular—and keep a steady hand. Start with a short arc to establish a good puddle.
2. Maintaining Proper Travel Speed
Keep a steady, moderate travel speed. Moving too fast can cause porosity or weak welds, while moving too slow may cause burn-through.
3. Use Backing and Weaving Techniques
- For thicker materials, use a backing plate or weave the wire slightly to ensure complete fusion.
- Maintain a consistent arc length—about the same as the wire diameter—to ensure stable welding.
4. Monitor and Adjust
Watch the weld pool and adjust your speed or settings if you notice issues like excessive spatter, porosity, or lack of fusion.
Step 5: Post-Weld Cleanup and Inspection
- Allow the weld to cool naturally.
- Use a stainless steel brush to remove any oxide or slag from the weld bead.
- Inspect the weld for cracks, porosity, or weak spots. Good welds should be smooth, shiny, and free of visible defects.
Troubleshooting Common Issues
Porosity in the Weld
This often results from contaminated surfaces or insufficient shielding gas. Ensure your aluminum is clean and check your gas flow rate. Also, avoid drafts that could blow away shielding gas.
Cracks or Cold Laps
Adjust your heat and travel speed. Too cold a weld can cause cracks; too hot can cause burn-through. Proper cleaning and material preparation help prevent this.
Inconsistent Weld Bead
Maintain a steady hand and consistent travel speed. Check your machine settings and ensure your wire feed is smooth.
Conclusion
Welding aluminum with a MIG welder is a skill that improves with practice. By choosing the right materials, preparing your workpiece thoroughly, and adjusting your settings properly, you can produce strong, clean welds. Remember to stay safe, be patient, and keep honing your technique. With time, you’ll be confidently welding aluminum like a pro!
Additional Tips for Success
- Practice on scrap pieces before working on your main project.
- Use a spool gun for better control on larger projects or softer aluminum alloys.
- Maintain your equipment regularly to ensure smooth operation and consistent results.
- Stay updated with welding techniques through tutorials or courses.