

Using a MIG welder is an essential skill for many DIY and professional projects. In this guide, you’ll learn the basics of MIG welding, from setup to technique, ensuring safe and successful welds. Whether you’re a beginner or looking to improve, this comprehensive overview will help you weld with confidence.
Key Takeaways
- Preparation is key: Always gather the right safety gear and prepare your workspace before welding.
- Proper setup: Adjust your MIG welder’s settings, including voltage, wire feed speed, and gas flow, based on the material and thickness.
- Safety first: Wear protective gear such as a welding helmet, gloves, and protective clothing to prevent injuries.
- Technique matters: Maintain a steady hand, proper arc length, and consistent travel speed for clean welds.
- Practice makes perfect: Start with scrap metal to refine your technique before working on your main project.
- Troubleshooting: Recognize common issues like porosity, poor penetration, or spatter, and learn how to fix them.
How Do You Use a MIG Welder?
Welding with a MIG (Metal Inert Gas) welder is a popular choice for beginners and professionals alike. It’s versatile, fast, and relatively easy to learn. In this guide, we will walk you through the entire process—setting up, safety tips, techniques, and troubleshooting—so you can weld confidently and produce strong, clean joints.
Understanding MIG Welding
MIG welding, also known as Gas Metal Arc Welding (GMAW), uses a continuous wire feed as an electrode and an inert gas (like argon or CO2) to shield the weld from contaminants. It’s ideal for welding steel, stainless steel, and aluminum. The process creates a stable arc, making it easier to control and resulting in a neat weld bead.
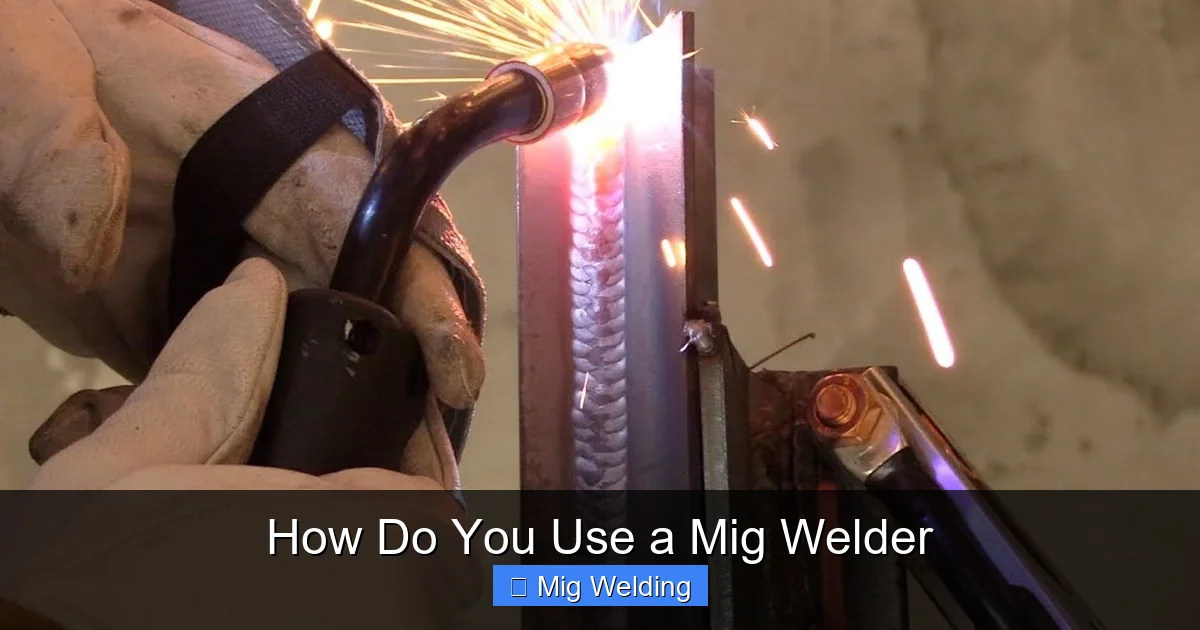
Visual guide about How Do You Use a Mig Welder
Image source: i.ytimg.com
Step 1: Prepare Your Workspace and Safety Equipment
Gather Safety Gear
- Welding helmet: Protect your eyes and face from sparks, UV rays, and intense light.
- Gloves: Wear heavy-duty, heat-resistant gloves to protect your hands.
- Protective clothing: Use flame-resistant long sleeves, pants, and boots.
- Ventilation: Ensure good airflow or use fume extraction to avoid inhaling harmful fumes.
Set Up Your Workspace
- Clear area: Remove flammable materials and clutter.
- Secure materials: Clamp your metal pieces firmly to prevent movement.
- Check equipment: Inspect your MIG welder, gas cylinders, and cables for damage.
Step 2: Prepare Your Materials
Select the Right Wire and Gas
- Wire type: Use the appropriate wire (solid wire for steel, flux-cored for thicker or outdoor welding).
- Wire diameter: Choose the right size (e.g., 0.025″, 0.030″, or 0.035″) based on metal thickness.
- Shielding gas: Use CO2, Argon, or a mix depending on your material and desired weld quality.
Clean Your Metal
Remove rust, paint, oil, or dirt from your metal surfaces. Clean metal results in better weld quality and less spatter.

Visual guide about How Do You Use a Mig Welder
Image source: i.ytimg.com
Step 3: Set Up Your MIG Welder
Connect Gas and Power
- Attach the gas cylinder to the regulator and connect it to your welder.
- Plug in the welder and switch it on.
Adjust Settings
- Voltage: Set based on the thickness of your metal. Consult your welder’s manual or a welding chart.
- Wire feed speed: Adjust to match the wire diameter and material thickness. Too fast causes spatter; too slow causes poor penetration.
- Gas flow rate: Usually around 20-25 CFH (cubic feet per hour), but check your equipment for specific recommendations.
Step 4: Practice Your Technique
Starting the Arc
- Hold the welding gun at a 10-15 degree angle.
- Pull the trigger to start the wire feed and create the arc.
- Maintain a steady hand and keep the arc length about the same as the wire diameter.
Welding Motion and Speed
- Travel speed: Move steadily along the joint—too slow causes excessive build-up, too fast results in weak welds.
- Consistent angle: Keep the gun at a consistent angle for even penetration and bead appearance.
Step 5: Welding Tips for Better Results
- Use a proper torch angle: 10-15 degrees from vertical, pointing into the weld puddle.
- Maintain a steady hand: Practice smooth, controlled movements.
- Check your welds: Look for uniform beads, proper penetration, and minimal spatter.
- Adjust as needed: Fine-tune voltage or wire feed if welds look weak, burnt, or spattered.
Step 6: Finish and Clean Up
- Release the trigger and move the gun away from the weld without stopping the wire feed immediately.
- Allow the weld to cool before handling.
- Clean your welds with a wire brush to remove slag or spatter.
- Store your equipment properly for next use.
Troubleshooting Common MIG Welding Issues
Porosity or Holes in the Weld
Caused by contaminated metal, improper shielding gas, or drafts. Ensure your metal is clean and shield gas flow is steady.
Poor Penetration
Usually due to low voltage or incorrect torch angle. Increase voltage or adjust your angle for better penetration.
Spatter
Often results from too high wire feed speed or excessive voltage. Reduce wire speed or voltage and check your settings.
Undercut or Lack of Fusion
Increase heat or adjust travel speed. Keep the torch at the correct angle and maintain steady movement.
Conclusion
Learning how to use a MIG welder takes practice, patience, and attention to safety. Start with small projects on scrap metal to hone your skills. Over time, you’ll develop a steady hand and an understanding of how to produce strong, clean welds. Remember, safety is always first—wear your gear and work in a well-ventilated area. Happy welding!
Additional Tips
- Practice on different metals and thicknesses to expand your skills.
- Keep your welding gun clean and free of debris.
- Join a welding class or watch online tutorials for hands-on guidance.