

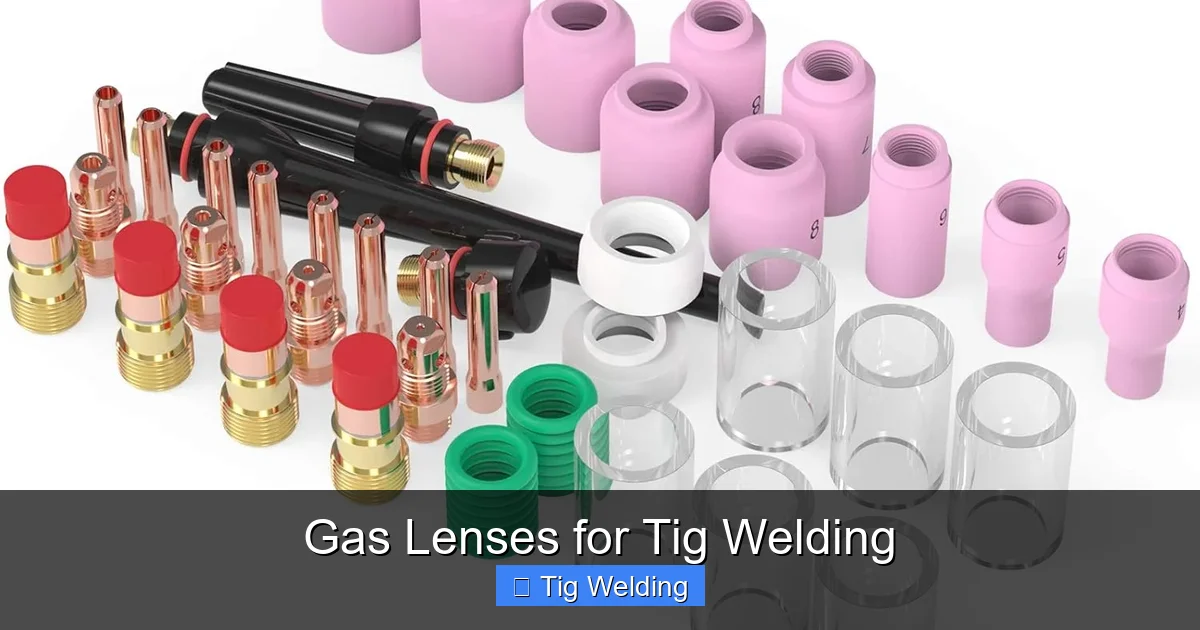
Discover the transformative power of gas lenses for TIG welding. This guide explains how they provide superior gas coverage, leading to cleaner welds and fewer defects. Learn to choose, install, and utilize gas lenses effectively to significantly improve your TIG welding results.
Key Takeaways
- Superior Gas Coverage: Gas lenses create a wider, more laminar flow of shielding gas, protecting the molten puddle from atmospheric contamination more effectively than standard collets.
- Reduced Tungsten Contamination: The improved gas flow minimizes turbulence, preventing atmospheric gases from oxidizing or contaminating the tungsten electrode, a common cause of weld defects.
- Cleaner Welds and Fewer Defects: By ensuring better shielding, gas lenses significantly reduce issues like porosity, lack of fusion, and tungsten inclusions, leading to stronger, more aesthetically pleasing welds.
- Increased Tungsten Stick-out: Gas lenses allow for a longer tungsten electrode stick-out from the gas nozzle, which can be crucial for welding in tight spaces and for achieving better torch maneuverability.
- Versatile Applications: They are highly beneficial for a wide range of materials, including stainless steel, aluminum, and exotic alloys, where impeccable shielding is paramount.
- Easy Installation and Use: Swapping to a gas lens setup is a straightforward process that requires minimal tools and understanding, offering a significant upgrade with little effort.
- Cost-Effectiveness: While the initial cost might be slightly higher than standard consumables, the reduction in rework, wasted materials, and improved weld quality makes gas lenses a cost-effective investment for serious TIG welders.
Gas Lenses for TIG Welding: Your Path to Superior Welds
Are you tired of dealing with porosity, tungsten inclusions, or just plain ugly welds on your TIG projects? You’re not alone. Many TIG welders struggle with achieving consistent, high-quality results. One of the most impactful upgrades you can make to your TIG welding setup is the adoption of gas lenses. In this comprehensive guide, we’ll dive deep into what gas lenses are, why they are so beneficial, and how you can use them to elevate your TIG welding game. By the end of this article, you’ll understand how to choose, install, and effectively utilize gas lenses for cleaner, stronger, and more beautiful welds.
TIG welding, or Gas Tungsten Arc Welding, is renowned for its precision and ability to produce aesthetically pleasing, high-integrity welds. However, it’s also a process that demands meticulous attention to detail, especially regarding shielding gas coverage. The shielding gas is the unsung hero of TIG welding; it prevents atmospheric contaminants like oxygen and nitrogen from reaching the molten weld pool and the tungsten electrode. When this shielding is compromised, defects are almost inevitable. This is where gas lenses shine.
What Exactly is a Gas Lens?
Before we get into the “how-to,” let’s clarify what a gas lens is. In a standard TIG torch setup, you have a collet body, a collet, a gas nozzle, and a tungsten electrode. The collet body holds the collet, which in turn grips the tungsten. The gas nozzle directs the shielding gas. A gas lens replaces the standard collet body and utilizes a special screen or series of holes to diffuse the shielding gas more evenly and broadly. This diffusion creates a laminar, or smooth, flow of gas that blankets the weld area more effectively than the turbulent, cone-shaped flow from a standard nozzle.
Think of it like a showerhead. A standard nozzle is like a simple pipe with water spraying out in a focused stream. A gas lens is like a high-quality showerhead with multiple small holes, creating a wider, softer spray. This wider, gentler flow is the key to its superior performance.
Why Use Gas Lenses? The Benefits Explained
The advantages of using gas lenses for TIG welding are numerous and significant. Understanding these benefits will solidify why this simple upgrade is so essential for anyone serious about TIG welding.
1. Superior Shielding Gas Coverage
This is the primary benefit. Standard TIG torch setups can produce turbulent gas flow, especially at higher flow rates. This turbulence can create dead spots where the shielding gas doesn’t reach, leaving the molten puddle vulnerable. Gas lenses, with their diffusion screens, create a much wider and more consistent blanket of shielding gas. This laminar flow displaces the air more effectively, offering superior protection against oxidation and contamination.
2. Reduced Tungsten Contamination
One of the most frustrating TIG welding defects is tungsten inclusions, where small pieces of the tungsten electrode break off and end up in the weld. This often happens when the tungsten gets too close to the arc or the weld pool, or when atmospheric contamination weakens the tungsten. The broader, more stable gas coverage from a gas lens keeps the tungsten further back and better protected, significantly reducing the chances of contamination and electrode degradation.
3. Cleaner Welds and Fewer Defects
With improved shielding, you’ll see a dramatic reduction in common TIG weld defects. Porosity (small holes caused by trapped gas) is greatly minimized. Lack of fusion, where the weld metal doesn’t properly join the base metal, is also less likely because the protected puddle is more fluid and easier to manage. The overall quality of your welds will improve, both structurally and aesthetically.
4. Increased Tungsten Stick-out Capability
Because the gas coverage is so much more effective, you can extend your tungsten electrode further out of the gas nozzle. This is a huge advantage for welding in tight corners or reaching awkward spots. A longer stick-out allows for better torch angle and maneuverability, making challenging welds more accessible and easier to perform.
5. Improved Performance on Various Materials
Gas lenses are particularly beneficial when welding materials that are highly susceptible to contamination, such as stainless steel, nickel alloys, and aluminum. The pristine shielding they offer is crucial for maintaining the corrosion resistance and mechanical properties of these materials.
6. Enhanced Weld Appearance
Cleaner welds naturally look better. Reduced spatter, smoother bead profiles, and the absence of dark, oxidized areas contribute to a professional and aesthetically pleasing finish.
How to Install and Use Gas Lenses for TIG Welding
Switching to a gas lens setup is a straightforward process that doesn’t require specialized tools. Here’s a step-by-step guide to help you make the transition.
Step 1: Identify Your Torch Type and Required Components
There are different types of TIG torch bodies (e.g., standard, large diameter). Gas lenses are designed to fit specific torch models and series. Most popular TIG torches have aftermarket gas lens kits available.
Common Gas Lens Kits Include:
- Gas Lens Insulator: This small component fits between the gas lens body and the torch head. It’s crucial for preventing short circuits. Make sure you get the correct insulator for your torch.
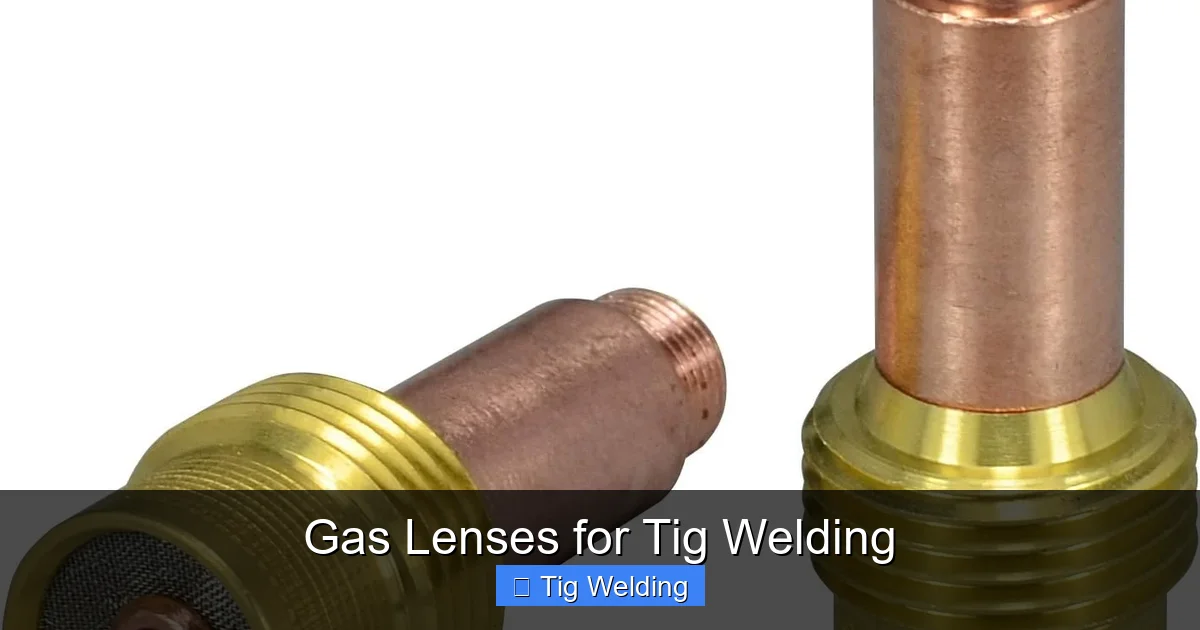
- Gas Lens Body: This is the main component that replaces your standard collet body. It houses the diffuser screen.
- Diffuser: This is the screen or mesh assembly inside the gas lens body that evenly distributes the shielding gas.
- Collet: You’ll need a collet that matches the diameter of your tungsten electrode. The collet fits *inside* the gas lens body.
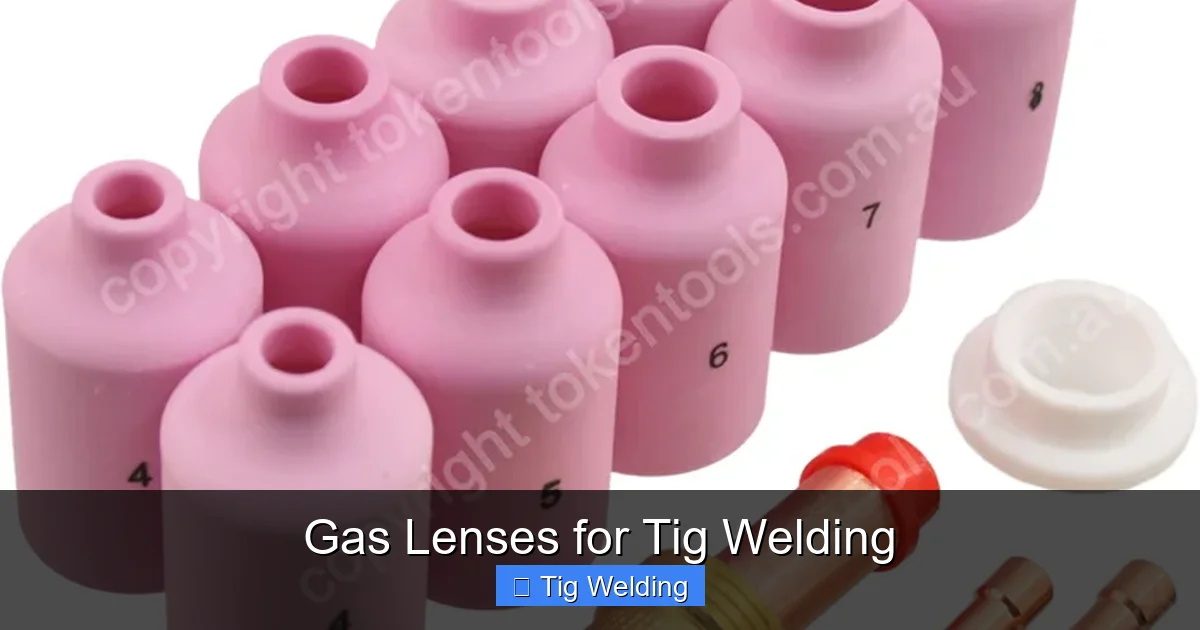
- Gas Nozzle: While you can often use your existing gas nozzles, some gas lens kits come with specific nozzles designed to work optimally with the lens.
**Tip:** Before buying, check the manufacturer of your TIG torch and look for gas lens kits specifically designed for it. Many welding supply stores offer universal kits, but ensure compatibility. Popular brands include CK Worldwide, Weldcraft, and Miller.
Step 2: Disassemble Your Current TIG Torch Setup
Carefully disassemble your existing TIG torch consumables.
Sub-steps:
- Turn off the gas: Ensure your shielding gas cylinder is turned off at the valve and purge any remaining gas from the line by pressing the torch switch briefly.
- Remove the nozzle: Unscrew or pull off the current gas nozzle.
- Remove the collet body: Unscrew the standard collet body from the torch head.
- Remove the collet and tungsten: Once the collet body is off, you can easily slide out the collet and the tungsten electrode. Keep these parts in a safe place if you plan to reuse them with a standard setup.
Step 3: Assemble the Gas Lens Components
Now, it’s time to put the new gas lens setup together.
Sub-steps:
- Install the insulator: Place the gas lens insulator onto the torch head where the original collet body was. Ensure it sits flush.
- Screw in the gas lens body: Carefully thread the gas lens body onto the torch head over the insulator. Hand-tighten it firmly, but avoid over-tightening, which can damage the threads or the insulator.
- Insert the diffuser: If the diffuser is a separate piece, insert it into the gas lens body. It usually snaps or seats into place.
- Insert the collet: Select the correct collet for your tungsten diameter. Slide the collet into the gas lens body.
- Insert the tungsten electrode: Slide your tungsten electrode through the collet. Ensure it’s the desired length for your application (we’ll discuss stick-out later).
- Tighten the collet: Gently tighten the collet nut (if your torch has one) to secure the tungsten electrode within the collet. The gas lens body itself often acts as the tightening mechanism for the collet.
- Attach the gas nozzle: Screw or place the gas nozzle onto the front of the gas lens body.
**Important Note:** Always refer to the specific instructions that come with your gas lens kit, as assembly can vary slightly between manufacturers.
Step 4: Set Your Shielding Gas Flow Rate
This is a crucial step that often requires some fine-tuning. Gas lenses require a higher gas flow rate than standard setups to achieve their full potential.
Recommendations:
- Start higher: A good starting point for most TIG applications with a gas lens is often 15-25 cubic feet per hour (CFH) for Argon. For larger nozzles or windy conditions, you might need to go even higher, up to 30-40 CFH.
- Listen and observe: Turn on your gas and listen for a steady, consistent flow. Watch the gas flow indicator on your regulator.
- Test the flow: Hold the torch away from any metal and briefly activate the gas flow. You should feel a strong, steady stream of gas emanating from the nozzle.
- Adjust as needed: If you experience arc instability or see signs of contamination, increase the gas flow. If the flow seems excessive and causes turbulence or “lifting” of the arc, you may need to slightly reduce it.
**Tip:** Always use a flowmeter regulator on your gas cylinder. Ball-in-tube flowmeters are more accurate than simple pressure gauges and are essential for consistent shielding gas delivery.
Step 5: Fine-Tuning Tungsten Stick-Out
The ability to run a longer tungsten stick-out is one of the key advantages of gas lenses.
Guidelines for Tungsten Stick-Out:
- Standard Applications: For general TIG welding, a tungsten stick-out of 1/4 to 1/2 inch (6-12 mm) is common.
- Tight Spaces: In tight corners or hard-to-reach areas, you might extend the tungsten up to 1 inch (25 mm) or more, thanks to the superior gas coverage.
- Aluminum Welding: For AC welding of aluminum, a slightly longer stick-out can sometimes help with arc stability.
- Observe the Arc: The ideal stick-out is the longest you can achieve without the arc becoming unstable or you experiencing arc-back.
**Practical Example:** Imagine welding a pipe joint on the inside. With a standard setup, reaching in might be impossible without burning through the nozzle. With a gas lens, you can extend the tungsten significantly, allowing you to get the torch at the correct angle and achieve a clean weld.
Step 6: Practice and Observe
The best way to master using gas lenses is through practice.
Tips for Practice:
- Weld on scrap material: Use identical scrap pieces to practice welding with your new gas lens setup and compare the results to your old setup.
- Focus on the arc: Notice how the arc behaves. Is it stable? Is it centered?
- Examine the weld puddle: Observe how fluid the puddle is and how easily it can be manipulated.
- Inspect the finished weld: Look for porosity, discoloration, and other defects. Compare the cleanliness and appearance of welds made with and without the gas lens.
- Experiment with settings: Adjust your amperage, travel speed, and gas flow to see how they interact with the gas lens performance.
Troubleshooting Common Issues with Gas Lenses
While gas lenses are designed to prevent problems, you might encounter a few issues during your transition.
Issue: Arc Instability or Arc Wander
Possible Causes:
Visual guide about Gas Lenses for Tig Welding
Image source: m.media-amazon.com

Visual guide about Gas Lenses for Tig Welding
Image source: americanindustrialsupl.com
- Insufficient shielding gas flow.
- Damaged diffuser screen.
- Incorrectly installed components (e.g., loose collet, improper insulator).
- Drafts or air currents around the welding area.
Solutions:
- Increase shielding gas flow rate.
- Inspect the diffuser screen for damage (rips, tears) and replace if necessary.
- Reassemble the gas lens components, ensuring everything is seated correctly and tightened properly.
- Shield your work area from drafts.
Issue: Porosity in the Weld
Possible Causes:
- Inadequate gas coverage (often due to low flow or drafts).
- Contaminated filler metal or base metal.
- Arc too far from the work.
- Tungsten too low in the gas nozzle.
Solutions:
- Increase gas flow rate and ensure no drafts are present.
- Clean your base metal and filler metal thoroughly before welding.
- Maintain the correct arc length and tungsten stick-out.
- Ensure tungsten is extended adequately for the gas lens to be effective.
Issue: Tungsten Contamination (Arc Back or Tungsten in Weld)
Possible Causes:
- Tungsten electrode too long (excessive stick-out).
- Arc too close to the workpiece or filler rod.
- Insufficient shielding gas flow.
- Using the wrong type of gas for the material.
Solutions:
- Reduce tungsten stick-out if it’s excessively long.
- Maintain proper arc length and keep the tungsten from touching the puddle or filler.
- Increase gas flow rate.
- Ensure you are using the correct shielding gas (e.g., Argon for most applications, Helium for increased heat, or mixes for specific alloys).
Conclusion
Visual guide about Gas Lenses for Tig Welding
Image source: weldingstore.tokentools.com.au
Gas lenses are not just another consumable; they are a fundamental upgrade that can dramatically improve the quality and consistency of your TIG welds. By providing superior shielding gas coverage, they reduce defects, allow for greater torch maneuverability, and ultimately lead to cleaner, stronger, and more aesthetically pleasing results. The transition to using gas lenses is simple, requiring minimal effort and cost for a significant return on investment. If you’re looking to take your TIG welding skills to the next level, incorporating gas lenses into your setup is one of the most effective steps you can take. So, grab a gas lens kit, follow these steps, and prepare to see a noticeable difference in your welds. Happy welding!
