

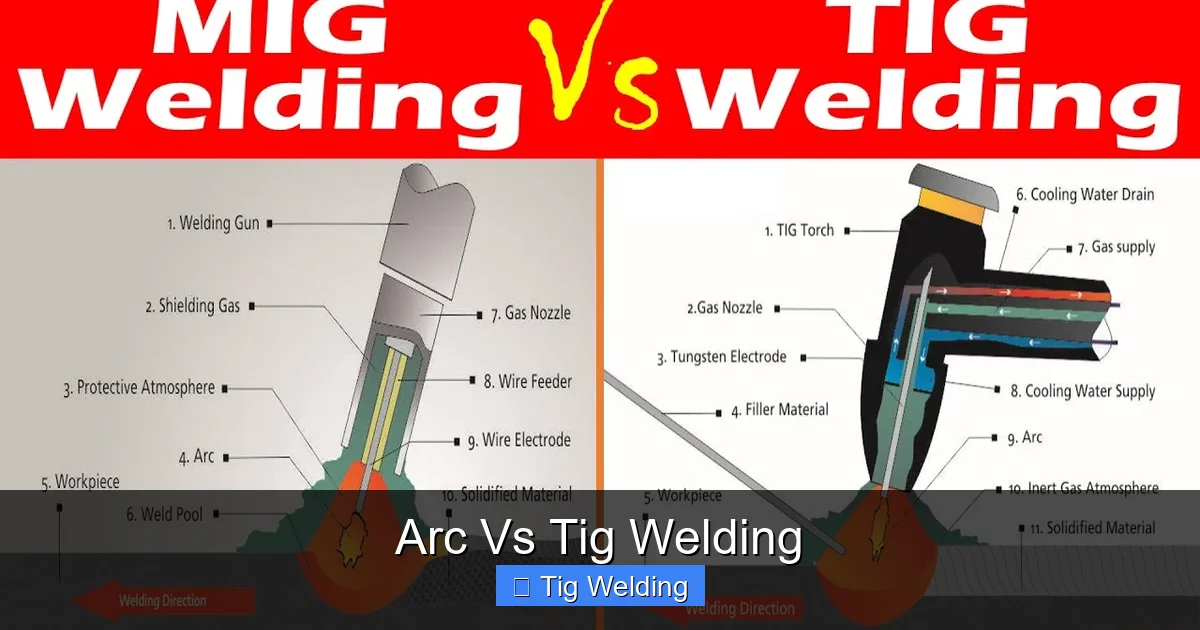
This guide dives deep into Arc vs TIG welding, breaking down their fundamental differences, advantages, and ideal applications. You’ll discover which welding process is best suited for your projects, from the versatile stick welding (a form of Arc welding) to the precise and clean TIG welding. Understand the equipment, techniques, and material compatibility to make informed decisions for your metalworking endeavors.
Arc Vs Tig Welding: A Comprehensive Guide to Choosing Your Metal Joining Method
Welcome! If you’re delving into the world of metal fabrication or looking to expand your welding skills, you’ve likely encountered the terms “Arc Welding” and “TIG Welding.” These are two of the most common and versatile welding processes available, but they are far from interchangeable. Understanding the nuances between them is crucial for selecting the right tool for your job, ensuring strong, clean, and durable welds. This guide will walk you through everything you need to know about Arc welding and TIG welding. We’ll cover their fundamental differences, explore their pros and cons, detail the equipment involved, and provide practical advice on when to use each.
By the end of this guide, you’ll have a clear understanding of what sets Arc and TIG welding apart and be well-equipped to make an informed decision for your specific welding needs. Let’s get started!
Key Takeaways
- Arc welding (like Stick welding) is generally more forgiving and portable, ideal for outdoor or rougher conditions and thicker materials.
- TIG welding offers exceptional control and produces the cleanest, most aesthetically pleasing welds, making it perfect for thin materials and critical joints.
- The learning curve for TIG welding is steeper than for Arc welding, requiring more practice and dexterity.
- Arc welding typically uses consumables like flux-coated electrodes, while TIG welding uses a non-consumable tungsten electrode and filler rod.
- Material compatibility differs; Arc welding is versatile across many metals, while TIG excels on stainless steel, aluminum, and exotic alloys but can be slower.
- Cost of equipment can vary, with basic Arc welding setups often being more affordable than advanced TIG welding machines.
Understanding the Basics: What Are Arc and TIG Welding?
Before we dive into comparisons, let’s establish a foundational understanding of each process.
Arc Welding Explained
The umbrella term “Arc Welding” covers a range of processes that use an electric arc to create heat and melt the base metals, along with a filler material (often part of the electrode itself), to join them together. The most common type of arc welding for hobbyists and many professional applications is Shielded Metal Arc Welding, or SMAW, more commonly known as Stick Welding. Other arc welding processes include Gas Metal Arc Welding (GMAW or MIG) and Flux-Cored Arc Welding (FCAW).
For the purpose of this comparison, when we refer to “Arc Welding,” we will primarily focus on the principles that distinguish it from TIG, often drawing parallels with Stick welding due to its prevalence.
TIG Welding Explained
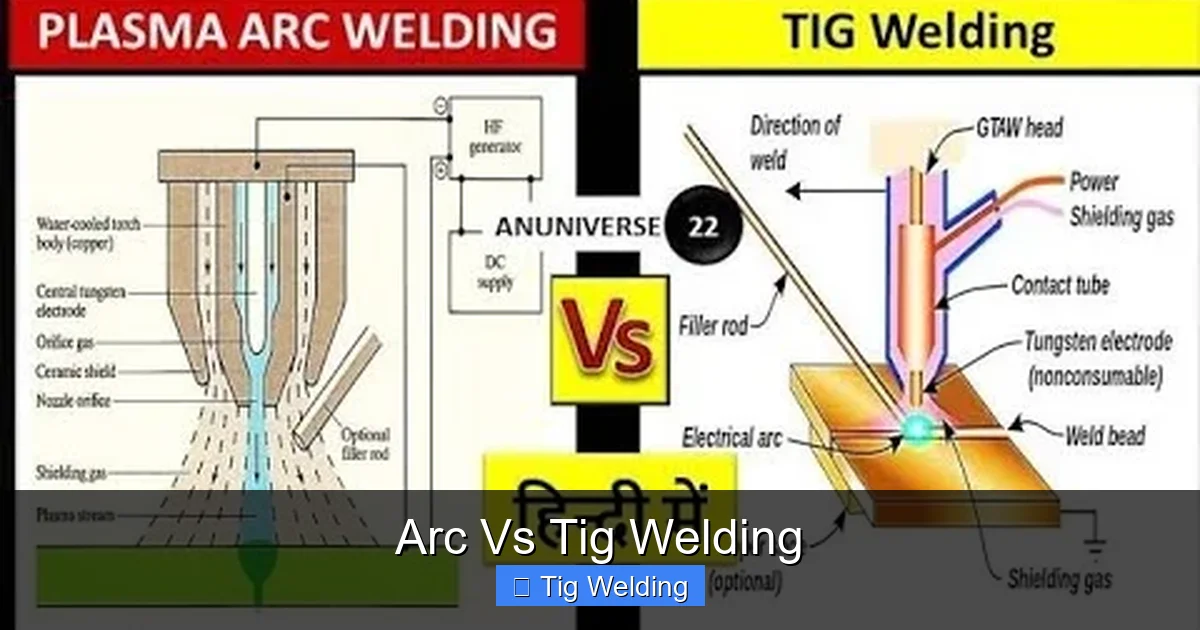
TIG stands for Tungsten Inert Gas welding. It’s also known as Gas Tungsten Arc Welding (GTAW). TIG welding is renowned for its precision, control, and the exceptionally clean welds it produces. In TIG welding, a non-consumable tungsten electrode creates the arc, melting the base metals. A separate filler rod is often used to add material to the joint, and a shielding gas (typically Argon) protects the molten weld pool from atmospheric contamination.
Key Differences: Arc vs. TIG Welding
The most significant distinctions between Arc and TIG welding lie in their method of arc creation, shielding, filler material, and the resulting weld characteristics.
Visual guide about Arc Vs Tig Welding
Image source: thetoolreviews.com
Arc Generation and Electrode Usage
Arc Welding: In processes like Stick welding, the electrode is a consumable rod coated in flux. This flux serves multiple purposes: it stabilizes the arc, provides shielding gas as it burns, and helps to create slag that protects the cooling weld. The electrode itself is consumed and becomes part of the weld metal.
TIG Welding: TIG welding uses a non-consumable tungsten electrode. This means the electrode itself does not melt and become part of the weld. The arc is generated between the tungsten electrode and the workpiece. A separate filler rod, made of the same or a compatible metal, is manually fed into the molten pool by the welder.
Shielding Mechanism
Arc Welding (Stick): The flux coating on the electrode is the primary source of shielding. As the flux burns, it releases shielding gases that displace oxygen and other contaminants from the weld area. This is why Stick welding can be done outdoors, even in windy conditions, as the flux provides robust protection.
TIG Welding: TIG welding relies on an external inert gas, usually Argon, which is supplied from a gas cylinder through the welding torch. This gas flows around the tungsten electrode and blankets the molten weld pool, preventing contamination. This makes TIG welding sensitive to drafts, requiring a clean and often enclosed environment.
Filler Material
Arc Welding (Stick): The filler material is integral to the electrode. The composition of the electrode core wire and the flux coating dictates the properties of the deposited weld metal. This simplifies the process as you don’t need to manage a separate filler rod.
TIG Welding: A separate filler rod is typically used and manually fed into the weld puddle. This allows the welder complete control over the amount and placement of filler material, enabling precise bead formation and control over bead width and reinforcement. You can also choose different filler metals to achieve specific alloy properties.
Weld Quality and Appearance
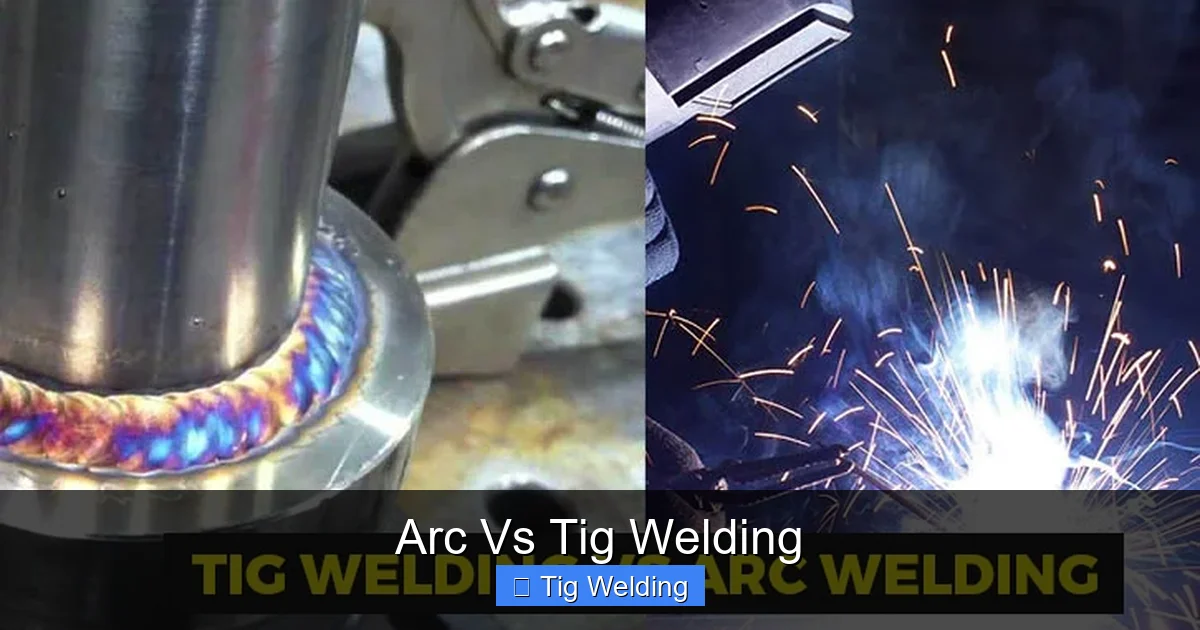
Arc Welding: While capable of producing strong welds, Arc welding (especially Stick) can leave behind slag that needs to be chipped and brushed off. The appearance of the weld can be more coarse compared to TIG welds. Spatter can also be more prevalent.
TIG Welding: TIG welding is celebrated for its exceptionally clean and precise welds. The welds are often aesthetically pleasing, with a consistent, stacked-dime appearance. There is typically no spatter, and slag formation is minimal to non-existent, requiring less post-weld cleanup.
Material Thickness and Versatility
Arc Welding (Stick): Stick welding is very versatile and can be used on a wide range of metals, including steel, cast iron, and some stainless steels. It’s particularly well-suited for thicker materials because the deeper penetration and hotter arc can effectively fuse substantial metal sections. It’s also a great choice for dirty or rusty surfaces where TIG welding would struggle.
TIG Welding: TIG welding is the gold standard for thin materials. It offers the control needed to weld very thin gauge metals like aluminum and stainless steel without burning through. It is also excellent for exotic metals and applications requiring high-integrity welds, such as aerospace or automotive components. While it can weld thicker materials, it is often a slower process than other methods.
Pros and Cons: When to Choose Arc or TIG
Let’s break down the advantages and disadvantages of each process to help you decide.
Visual guide about Arc Vs Tig Welding
Image source: i.ytimg.com
Advantages of Arc Welding (Focusing on Stick)
- Portability and Simplicity: Stick welders are often more compact and simpler to set up, making them ideal for mobile welding or fieldwork.
- All-Weather Capability: The flux provides excellent shielding, allowing for welding in windy or outdoor conditions where TIG would be impractical.
- Cost-Effective: Entry-level Stick welding equipment and consumables are generally less expensive than TIG setups.
- Versatility with Materials and Conditions: It’s forgiving on dirty, rusty, or painted surfaces and can handle a wide variety of metals, especially thicker steel.
Disadvantages of Arc Welding (Focusing on Stick)
- Steeper Learning Curve for Fine Control: Achieving a consistently clean and aesthetically pleasing bead requires significant practice.
- Post-Weld Cleanup: Slag removal is necessary after welding, adding an extra step.
- More Spatter and Smoke: Stick welding can produce more spatter and fumes than TIG.
- Limited on Very Thin Materials: It can be challenging to weld very thin metals without burning through, especially for beginners.
Advantages of TIG Welding
- Exceptional Control and Precision: Allows for precise control over heat input and filler metal deposition.
- High-Quality, Clean Welds: Produces aesthetically pleasing, spatter-free, and strong welds with minimal cleanup.
- Versatility with Materials: Excellent for welding a wide range of metals, including stainless steel, aluminum, copper, titanium, and exotic alloys.
- Ideal for Thin Materials: Perfect for welding very thin gauge metals without risk of burn-through.
- No Slag: The inert gas shielding means no slag to remove, saving time.
Disadvantages of TIG Welding
- Steeper Learning Curve: Requires significant hand-eye coordination and dexterity to manage the torch, filler rod, and pedal simultaneously.
- Slower Welding Speed: Generally slower than other welding processes, especially on thicker materials.
- Equipment Cost: TIG welding machines and consumables can be more expensive than basic Arc welding setups.
- Sensitivity to Environment: Requires a clean workspace and protection from drafts due to the gas shielding.
- Less Forgiving on Dirty Surfaces: TIG welding requires clean base metals for optimal results.
Equipment and Setup: What You’ll Need
The tools you need will vary depending on which process you choose.
Visual guide about Arc Vs Tig Welding
Image source: fitwelding.com
Arc Welding (Stick) Equipment
- Welding Machine: A DC or AC/DC power source capable of providing the required amperage.
- Electrode Holder (Stinger): Holds the electrode and connects to the welding cable.
- Welding Cables: To connect the machine to the electrode holder and ground clamp.
- Ground Clamp: Connects the workpiece to the welding machine for a complete circuit.
- Electrodes: Consumable flux-coated rods, chosen based on the metal being welded and the desired weld properties (e.g., 6013 for general purpose, 7018 for higher strength).
- Chipping Hammer: To remove slag.
- Wire Brush: For cleaning the weld.
- Welding Helmet: With an appropriate shade lens to protect your eyes from the bright arc.
- Personal Protective Equipment (PPE): Welding gloves, jacket, and sturdy footwear.
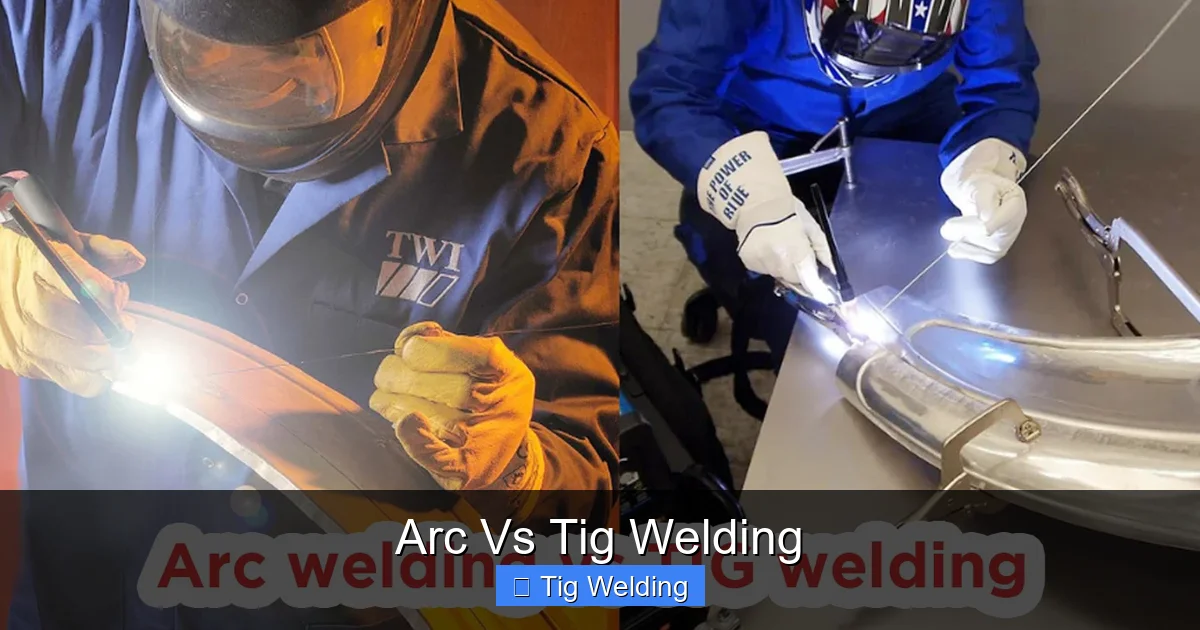
TIG Welding Equipment
- TIG Welding Machine: A DC or AC/DC power source with features like high-frequency start, amperage control (often via a foot pedal), and post-flow gas.
- TIG Torch: Holds the tungsten electrode and channels inert gas.
- Tungsten Electrodes: Non-consumable rods (e.g., pure tungsten, ceriated, lanthanated) chosen based on the material and AC/DC current.
- Shielding Gas: Typically Argon, supplied from a cylinder with a regulator.
- Gas Hose: To connect the gas cylinder to the torch.
- Ground Clamp: For completing the circuit.
- Filler Rods: Made of metal compatible with the base material, manually fed.
- Welding Helmet: With an appropriate shade lens.
- TIG Welding Gloves: Often thinner and more dexterous for better feel.
- Personal Protective Equipment (PPE): Welding jacket, sturdy footwear.
- Welding Table: A clean, flat surface is highly recommended.
Step-by-Step Guide: Basic Techniques
Here’s a simplified look at how to perform basic welds with each method.
Basic Arc Welding (Stick) Technique
1. Preparation
Clean the Metal: Remove rust, paint, grease, and any other contaminants from the weld area. This is crucial for a strong weld, even with Stick welding.
Set Up Your Machine: Select the correct amperage for your electrode and material thickness. Consult your electrode manufacturer’s recommendations.
Connect the Ground Clamp: Ensure a solid connection to the workpiece.
Prepare Your Stance: Ensure you have good balance and can reach the weld area comfortably and safely.
2. Striking the Arc
Scratching Method: Similar to lighting a match, lightly scratch the tip of the electrode across the workpiece until the arc strikes. Avoid pressing too hard, as this can embed the electrode.
Tapping Method: Gently tap the electrode tip onto the workpiece and quickly lift it a short distance to establish the arc.
3. Welding
Maintain Arc Length: Keep the arc length consistent, typically about the diameter of the electrode. Too short an arc can cause the electrode to stick; too long an arc leads to poor penetration and spatter.
Travel Speed: Move the electrode along the joint at a steady pace. A good indicator is a consistent bead width. Too fast a speed results in a narrow bead with poor fusion; too slow a speed can lead to excessive heat input and a wide, flat bead.
Electrode Angle: Hold the electrode at a slight angle (around 10-15 degrees) in the direction of travel.
4. Finishing the Weld
Continue to the End: Weld to the end of your joint.
Break the Arc: Quickly lift the electrode away from the workpiece to break the arc.
Clean the Weld: Use a chipping hammer to remove slag, then a wire brush to clean the weld. Inspect for any defects.
Basic TIG Welding Technique
1. Preparation
Clean the Metal Thoroughly: TIG welding demands pristine surfaces. Use a stainless steel wire brush and degreaser on both the base metal and filler rod.
Set Up Your Machine: Set the amperage, gas flow rate, and any AC balance or frequency settings if applicable (for aluminum). Attach the ground clamp.
Prepare Your Torch: Ensure the correct size tungsten electrode is installed and sharpened to a point (for DC welding). Connect the shielding gas.
2. Starting the Arc
High-Frequency Start: Most TIG welders have a high-frequency start that initiates the arc without touching the workpiece, preventing tungsten contamination.
Lift-Arc Start: Some machines offer lift-arc, where you lightly touch the tungsten to the workpiece and lift it a short distance to start the arc.
3. Welding
Control the Torch: Hold the torch at a slight angle (around 5-10 degrees) in the direction of travel. Maintain a consistent distance from the workpiece (arc length).
Feed the Filler Rod: With your other hand, dip the filler rod into the leading edge of the molten puddle. Feed it in small increments, just enough to add material to build the bead. Avoid touching the tungsten with the filler rod.
Amperage Control: Use the foot pedal to precisely control the heat input. As you feed filler, you might slightly reduce amperage, and as you pause or move, you might increase it. This takes practice!
4. Finishing the Weld
Complete the Joint: Weld to the end of your joint.
Break the Arc: Gradually release the foot pedal to decrease amperage and then lift the torch to break the arc.
Post-Flow: Allow the shielding gas to flow for a few seconds after the arc breaks (post-flow) to protect the hot tungsten and weld puddle.
Inspect the Weld: Visually inspect the weld for appearance and continuity.
Troubleshooting Common Issues
No matter the process, you might encounter problems. Here are a few common ones.
Arc Welding (Stick) Troubleshooting
- Electrode Sticking: Usually caused by too low an amperage, not striking the arc properly, or poor arc length. Try increasing amperage or striking more confidently.
- Porosity (Holes in Weld): Often due to insufficient shielding (wind, dirty metal, wrong electrode) or moisture in the electrode. Clean metal and use fresh, dry electrodes.
- Lack of Fusion: Caused by too fast travel speed, incorrect electrode angle, or too low an amperage. Ensure proper travel speed and sufficient heat input.
TIG Welding Troubleshooting
- Tungsten Inclusions: Occurs when the tungsten electrode touches the weld puddle or filler rod. Always maintain a consistent arc length and feed the filler rod correctly.
- Tungsten Contamination: If the tungsten touches the base metal or filler rod, it becomes contaminated and will create a “fuzzy” arc, requiring re-sharpening or replacement.
- Porosity: Similar to Arc welding, this can be due to inadequate shielding gas (leaks, drafts, insufficient flow), dirty metal, or contaminated filler rod. Ensure proper gas coverage and meticulous cleaning.
- Arc Instability: Can be caused by a dull or contaminated tungsten electrode, incorrect gas type, or poor machine settings.
Conclusion: Which Welding Process is Right for You?
The choice between Arc welding and TIG welding ultimately depends on your project’s specific requirements, the materials you’re working with, your skill level, and your budget.
Choose Arc Welding (especially Stick) if:
- You need a portable and rugged solution for fieldwork.
- You’re working with thicker steel and need good penetration.
- You’re on a tighter budget for equipment.
- You need to weld in windy or outdoor conditions.
- A slightly rougher weld finish is acceptable.
Choose TIG Welding if:
- You require the highest quality, most aesthetically pleasing welds.
- You’re working with thin materials, especially stainless steel or aluminum.
- Precision and control are paramount.
- You’re welding exotic metals or high-purity applications.
- You have the patience and dedication to master a more complex skill.
Both Arc and TIG welding are invaluable skills for any metalworker. Understanding their distinct characteristics, strengths, and weaknesses will empower you to select the right process and achieve outstanding results. Happy welding!
