

Excessive spatter in MIG welding not only wastes material and creates cleanup headaches—it can also signal deeper issues with your setup or technique. This guide walks you through the root causes and practical solutions to reduce spatter and improve weld quality.
Key Takeaways
- Correct voltage and wire speed: Mismatched settings are the #1 cause of spatter—fine-tune them for your material thickness.
- Use the right shielding gas: A 75% argon / 25% CO2 mix is ideal for most steel welding and minimizes spatter.
- Check wire quality and feed system: Rusty, dirty, or poorly feeding wire increases spatter significantly.
- Maintain proper stick-out and angle: Keep ½ to ¾ inch of wire stick-out and use a 10–15° push or drag angle.
- Clean your workpiece: Oil, rust, paint, and mill scale create instability and spatter during welding.
- Upgrade to a spool gun or push-pull system: Helps with soft wires like aluminum that are prone to bird-nesting and spatter.
- Regular maintenance matters: Clean contact tips, liners, and drive rolls to ensure smooth wire delivery.
What Is Excessive Spatter in MIG Welding?
Spatter is the small droplets of molten metal that spray out from the weld pool during MIG welding. A little bit is normal—but excessive spatter means you’re losing material, wasting time on cleanup, and possibly compromising weld integrity. It looks like tiny metal beads stuck around your weld bead, often requiring grinding or wire brushing before painting or further processing.
In this guide, you’ll learn exactly why spatter happens, how to prevent it, and how to fix it fast—whether you’re a beginner or a seasoned welder. We’ll cover machine settings, equipment maintenance, technique adjustments, and material prep. By the end, you’ll be able to produce clean, spatter-free welds consistently.
Why Does Excessive Spatter Happen?
Spatter occurs when the arc becomes unstable, causing violent eruptions from the weld pool. This instability can stem from several factors, including incorrect machine settings, poor wire feeding, contaminated materials, or improper technique. Understanding the root cause is the first step to solving the problem.
Common Causes of Spatter
- Incorrect voltage or wire speed: Too high or too low settings disrupt the arc stability.
- Wrong shielding gas: Using pure CO2 or incorrect mixes increases spatter.
- Dirty or rusty wire: Contaminants on the wire cause erratic arcing.
- Improper gun angle or travel speed: Angling too aggressively or moving too fast/slow affects arc behavior.
- Long wire stick-out: More than ¾ inch of exposed wire increases resistance and spatter.
- Worn or clogged contact tips: Restricts smooth wire passage and causes arcing inside the tip.
Step-by-Step Guide to Reduce Excessive Spatter
Step 1: Check Your Machine Settings
The most common cause of spatter is incorrect voltage and wire feed speed (WFS). These two settings must be balanced for your specific material thickness and wire type.
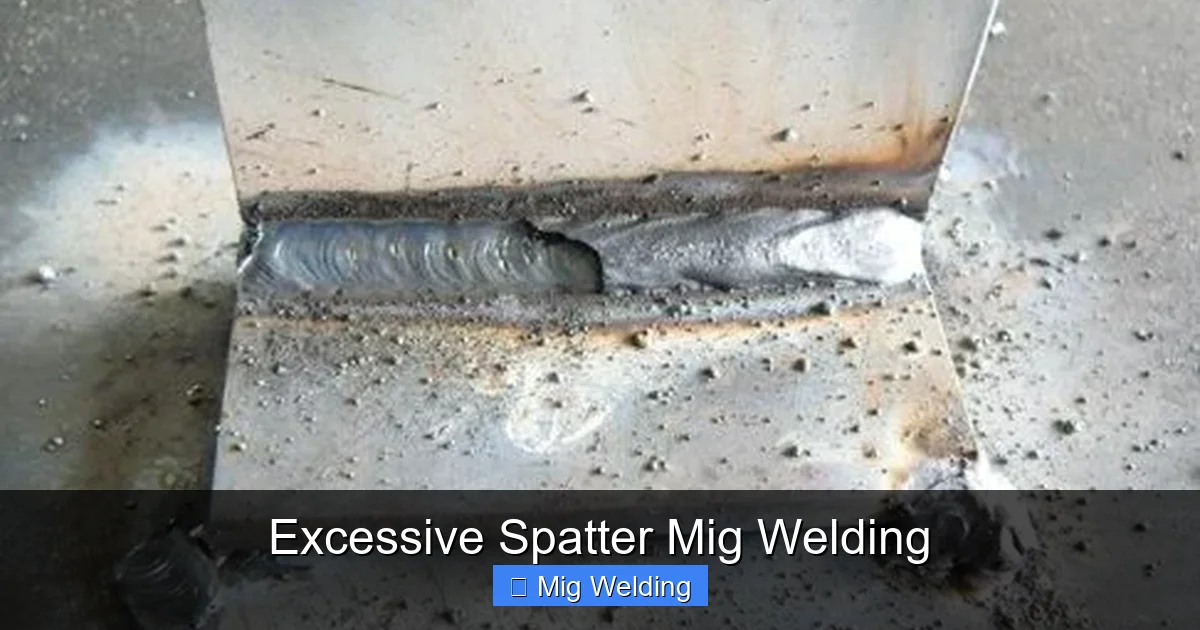
Visual guide about Excessive Spatter Mig Welding
Image source: welders.tokentools.com.au
Start by consulting your welder’s manual or a voltage/WFS chart. For example, when welding 1/8-inch mild steel with 0.035-inch solid wire, you might start at 18–20 volts and 300–350 inches per minute (IPM) wire speed. Use a tap test: weld a short bead and observe. If you see lots of spatter, adjust in small increments—±0.5 volts or ±10 IPM—and retest.
Tip: Use a synergic MIG welder if available—it automatically adjusts voltage when you change wire speed, making tuning much easier.
Step 2: Use the Right Shielding Gas
Shielding gas plays a huge role in arc stability and spatter control. For mild steel, the gold standard is a 75% argon / 25% CO2 mix. This blend provides a smooth, stable arc with minimal spatter and good penetration.
Avoid using 100% CO2 unless necessary—it’s cheaper but produces more spatter and a rougher arc. For stainless steel, use tri-mix gases (e.g., 90% helium, 7.5% argon, 2.5% CO2). For aluminum, use 100% argon.
Also, ensure your gas flow rate is correct—typically 20–25 cubic feet per hour (CFH). Too little gas leads to porosity and spatter; too much can cause turbulence and pull in air.
Step 3: Inspect and Maintain Your Wire and Feed System
Dirty, rusty, or damaged welding wire is a major spatter culprit. Always store wire in a dry, sealed container. If your wire looks discolored or feels rough, replace it.
Next, check your feed system:
- Drive rolls: Make sure they’re the correct size and not worn. Use U-groove rolls for aluminum, V-groove for steel.
- Tension: Too tight crushes the wire; too loose causes slipping. Adjust until the wire feeds smoothly without bird-nesting.
- Liners: Clean or replace clogged liners. A dirty liner creates friction and erratic feeding.
- Contact tips: Replace worn or clogged tips immediately. A damaged tip causes arcing inside the nozzle, leading to spatter.
Pro tip: Use a wire cleaner or anti-spatter spray on the liner and tip to reduce friction and buildup.
Step 4: Prepare Your Workpiece Properly
Never weld over oil, grease, rust, paint, or mill scale. These contaminants vaporize in the arc, causing explosions that throw molten metal everywhere—aka spatter.
Clean the weld area with a wire brush, grinder, or solvent. For heavy rust or paint, use a flap disc or chemical cleaner. Remember: a clean weld is a spatter-free weld.
Also, ensure good electrical contact. Use clean ground clamps and attach them close to the weld zone. A poor ground causes arc wandering and instability.
Step 5: Adjust Your Welding Technique
Even with perfect settings, bad technique can cause spatter.
Keep your wire stick-out (the length of wire extending from the contact tip) between ½ and ¾ inch. Longer stick-out increases electrical resistance, leading to overheating and spatter.
Use a consistent travel angle—either a 10–15° push (for flatter beads) or drag (for deeper penetration) angle. Avoid side-to-side weaving unless necessary, as it can destabilize the arc.
Maintain a steady travel speed. Too slow = excessive heat and spatter; too fast = incomplete fusion and erratic arc.
Finally, keep the gun perpendicular to the workpiece. Tilting too much disrupts gas coverage and arc focus.
Step 6: Upgrade Your Equipment (If Needed)
If you’re welding aluminum or soft wires and still getting spatter, consider upgrading your feed system.
A spool gun or push-pull system eliminates bird-nesting and ensures smooth wire delivery over long distances. These systems are especially helpful for 0.035-inch aluminum wire, which bends easily and feeds poorly through standard MIG torches.
Also, invest in a quality MIG gun with a flexible liner and durable contact tips. Cheap guns often have inconsistent performance.
Troubleshooting Common Spatter Problems
Even after following all steps, you might still encounter spatter. Here’s how to diagnose and fix persistent issues:
Problem: Spatter Only at Start or End of Weld
This usually indicates incorrect crater fill or arc start settings. Many welders have adjustable start/end parameters. Increase the crater fill time or reduce the initial voltage spike to smooth out the transition.
Problem: Spatter on One Side of the Bead
Likely caused by uneven gas coverage or drafts. Check for open windows, fans, or air conditioners blowing across the weld. Use a welding curtain or windscreen if needed.
Problem: Random, Explosive Spatter Throughout Weld
This suggests contaminated wire or base metal. Re-clean the workpiece and inspect the wire spool. Also, check for moisture in the gas line—use a gas dryer if necessary.
Problem: Spatter with Aluminum Welding
Aluminum is especially prone to spatter due to its soft wire and oxide layer. Use a spool gun, clean the material with a stainless steel brush (dedicated to aluminum only), and ensure 100% argon gas.
Final Tips for Spatter-Free Welding
- Practice on scrap metal before welding your final piece.
- Keep a welding log to track settings that work for different materials.
- Use anti-spatter spray on fixtures and nozzles to make cleanup easier.
- Regularly maintain your machine—clean vents, check connections, and replace worn parts.
- Invest in quality consumables—cheap contact tips and nozzles fail faster and cause spatter.
Conclusion
Excessive spatter in MIG welding is frustrating, but it’s rarely a mystery. By balancing your machine settings, using the right gas, maintaining your equipment, and practicing good technique, you can dramatically reduce—or even eliminate—spatter.
Remember: clean materials, correct settings, and consistent technique are the pillars of spatter-free welding. Take the time to troubleshoot and fine-tune your process, and you’ll save time, money, and frustration in the long run. Happy welding!