
Too much spatter in MIG welding can ruin your work, waste filler metal, and create extra cleanup. This guide walks you through the top causes and easy fixes to get clean, professional-looking welds every time.
Key Takeaways
- Correct voltage and wire speed: Mismatched settings are the #1 cause of spatter—always match them to your material and wire type.
- Use proper shielding gas: A 75% argon / 25% CO2 mix works best for most steel welding and reduces spatter significantly.
- Keep your gun and nozzle clean: Clogged nozzles and worn contact tips disrupt gas flow and increase spatter.
- Maintain the right stick-out length: Keep the wire stick-out under 1 inch to ensure stable arc and consistent shielding.
- Clean your base metal: Oil, rust, and mill scale create erratic arcs and spatter—always prep your metal before welding.
- Check your drive rolls and liner: Poor wire feeding causes feeding issues that lead to spatter—inspect and replace worn parts.
- Use anti-spatter spray: A light coat on the nozzle and workpiece reduces sticking and makes cleanup faster.
Introduction: Why Spatter Happens in MIG Welding
If you’re seeing little metal balls flying everywhere during your MIG welds, you’re dealing with too much spatter. Spatter is that annoying spray of molten metal droplets that stick to your workpiece, welding gun, and surrounding area. While a small amount is normal, excessive spatter wastes time, money, and effort—especially during cleanup.
In this guide, you’ll learn exactly why spatter happens and how to fix it step by step. Whether you’re a beginner or a seasoned welder, these practical tips will help you reduce spatter, improve weld quality, and work more efficiently. We’ll cover everything from machine settings to maintenance and material prep—so you can get clean, professional results every time.
Step 1: Check Your Voltage and Wire Feed Speed
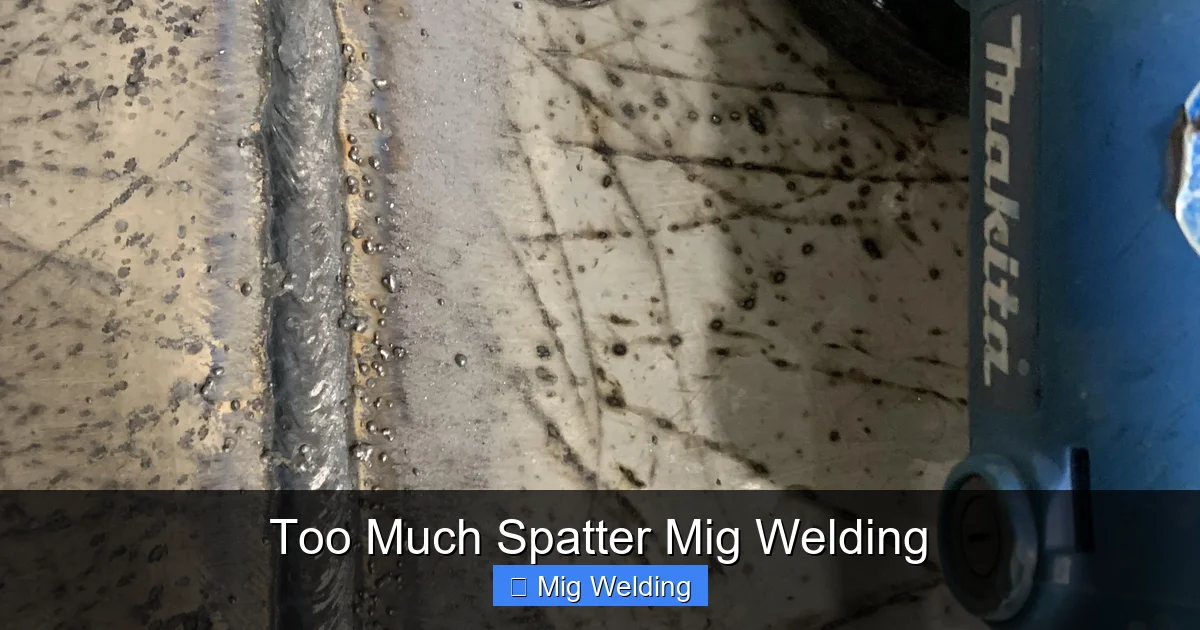
Visual guide about Too Much Spatter Mig Welding
Image source: i.redd.it
One of the most common causes of spatter is incorrect voltage or wire feed speed (WFS). If these two settings don’t match, the arc becomes unstable, causing the wire to “explode” into droplets instead of melting smoothly.
Match Settings to Your Material and Wire
Always refer to your welder’s manual or a welding parameter chart. For example:
– 0.030″ solid wire on 1/8″ steel: ~18–20 volts and 200–250 IPM (inches per minute)
– 0.035″ wire on 3/16″ steel: ~20–22 volts and 250–300 IPM
If the voltage is too high, the arc is too aggressive and throws out spatter. If it’s too low, the wire stubs into the puddle, creating bursts of spatter.
Use a Voltage Sensing Welding Helmet or Meter
Some advanced helmets and meters let you monitor voltage in real time. This helps you fine-tune settings without guesswork. Even without one, start with the recommended settings and adjust in small increments.
Tip: Try the “Tune-In” Method
Set your voltage and wire speed slightly below recommended. Weld a test piece. If you hear a crackling sound and see spatter, increase voltage slightly. If the arc is too smooth and the weld is flat, you might be too high. Aim for a steady, sizzling sound—like frying bacon.
Step 2: Use the Right Shielding Gas
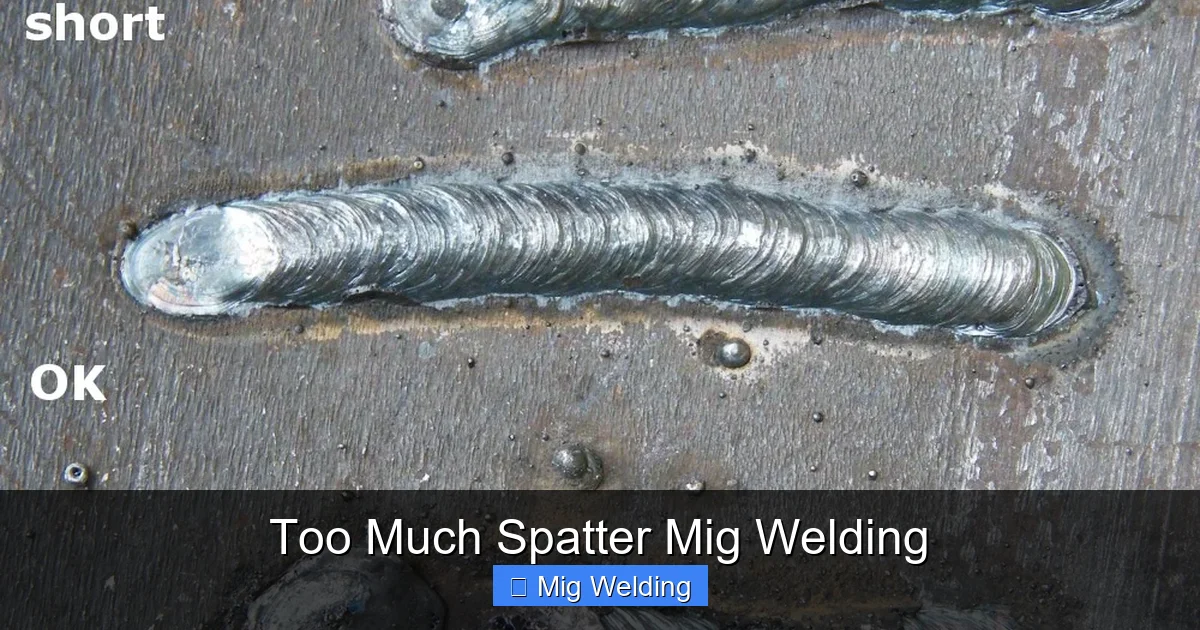
Visual guide about Too Much Spatter Mig Welding
Image source: mig-welding.co.uk
Shielding gas protects the weld pool from oxygen and nitrogen in the air. Without proper coverage, the arc becomes erratic and spatter increases.
Best Gas Mix for Steel
For most mild steel MIG welding, use a 75% argon / 25% CO2 mix. This blend offers:
– Smooth arc transfer
– Low spatter
– Good penetration and bead appearance
Avoid 100% CO2 unless you’re welding thick materials—it creates more spatter and a rougher arc.
Check Gas Flow Rate
Set your regulator to 20–25 CFH (cubic feet per hour). Too little gas = poor coverage and spatter. Too much = turbulence that pulls in air.
Inspect for Leaks
Use soapy water on fittings and hoses. Bubbles mean leaks. Even small leaks can ruin gas coverage and increase spatter.
Step 3: Clean and Maintain Your Welding Gun
A dirty or worn welding gun can’t deliver consistent wire or gas—leading to spatter.
Clean the Nozzle and Contact Tip
Spatter builds up inside the nozzle and around the contact tip. This blocks gas flow and causes erratic arcing.
– Remove the nozzle and contact tip weekly.
– Use a nozzle cleaning tool or a small wire brush.
– Soak in anti-spatter solution if needed.
Replace Worn Contact Tips
A worn or oval-shaped contact tip creates poor electrical contact. This causes arcing inside the tip and increases spatter.
– Replace tips every 1–2 weeks with regular use.
– Use the correct size tip for your wire (e.g., 0.030″ tip for 0.030″ wire).
Check the Gas Diffuser
The diffuser spreads gas evenly around the wire. If it’s clogged or damaged, gas flow becomes uneven.
– Remove and inspect during routine maintenance.
– Replace if cracked or blocked.
Step 4: Control Wire Stick-Out Length
Stick-out is how far the wire extends from the contact tip. Too long = unstable arc and spatter.
Keep Stick-Out Under 1 Inch
Aim for 3/8″ to 1/2″ stick-out. Longer stick-out increases electrical resistance, causing the wire to heat up before it reaches the arc. This leads to “burn-back” and spatter.
Use a Consistent Technique
Hold the gun at a 10–15 degree angle and maintain steady travel speed. Don’t drag the gun too close or too far from the workpiece.
Tip: Use a Spatter-Resistant Nozzle
Some nozzles have ceramic coatings that repel spatter. They’re more expensive but last longer and reduce buildup.
Step 5: Prepare Your Base Metal
Dirty or contaminated metal is a major spatter trigger. Even small amounts of oil, grease, rust, or mill scale can cause the arc to jump and spatter.
Clean Before You Weld
– Use a wire brush (dedicated to steel) to remove rust and scale.
– Wipe surfaces with acetone or a degreaser to remove oil and dirt.
– For painted or coated metals, grind down to bare metal.
Avoid Welding Over Mill Scale
Mill scale (that dark, flaky layer on hot-rolled steel) conducts electricity poorly. It causes arc instability and spatter. Grind it off in the weld area.
Store Metal Properly
Keep your workpieces in a dry, clean area. Moisture leads to rust, which increases spatter.
Step 6: Inspect Drive Rolls and Liner
If your wire isn’t feeding smoothly, it can cause feeding issues that lead to spatter.
Check Drive Roll Type and Tension
Use V-groove rolls for solid wire and U-groove for aluminum or flux-cored. Wrong rolls can deform the wire.
– Adjust tension so the wire feeds smoothly but isn’t crushed.
– Too tight = birdnesting and spatter. Too loose = slipping.
Clean or Replace the Liner
The liner guides the wire from the spool to the gun. If it’s clogged with debris or worn, wire feeding becomes erratic.
– Blow out the liner with compressed air monthly.
– Replace every 6–12 months or if you notice feeding problems.
Lubricate When Needed
Some wires (like aluminum) benefit from a light wire lubricant. Check manufacturer recommendations.
Step 7: Use Anti-Spatter Spray
Anti-spatter spray is a quick, affordable way to reduce buildup on your nozzle and workpiece.
Apply Sparingly
Spray a light coat on the nozzle, contact tip, and surrounding area. Don’t spray directly into the weld zone—it can cause porosity.
Choose a Water-Based Formula
Water-based sprays are less toxic and easier to clean than oil-based ones. They also don’t interfere with paint or coatings later.
Reapply as Needed
After every few welds, give the nozzle a quick spray. It only takes a second and saves minutes of cleanup.
Troubleshooting Common Spatter Problems
Even with perfect settings, spatter can still happen. Here’s how to fix common issues:
Spatter on One Side of the Weld
This usually means poor gas coverage. Check for:
– Clogged nozzle
– Drafts blowing gas away
– Incorrect gun angle (aim slightly into the weld)
Spatter with a Crackling Sound
Likely too low voltage or too high wire speed. Increase voltage slightly or reduce wire feed.
Spatter with a Popping Sound
Could be moisture in the wire or gas, or contaminated base metal. Dry your wire spool and clean the metal.
Spatter Only at Start or End of Weld
Adjust your starting technique. Use a “backstep” or “tack and restart” method. Also, check for voltage surge at arc start—some welders have a “soft start” feature to reduce this.
Conclusion: Clean Welds Start with Smart Habits
Dealing with too much spatter in MIG welding doesn’t have to be frustrating. By focusing on the right settings, proper maintenance, and clean materials, you can drastically reduce spatter and improve your weld quality.
Remember: small changes make a big difference. Start with voltage and wire speed, then check your gas, gun, and material prep. Keep your equipment clean, and don’t skip the anti-spatter spray.
With these tips, you’ll spend less time cleaning and more time welding. Whether you’re working on a car, building a fence, or crafting metal art, you’ll get professional results with less mess.
Now grab your helmet, dial in those settings, and weld with confidence!