
Discover the right polarity settings for MIG welding aluminum to avoid common mistakes and achieve strong, clean welds. This guide breaks down the science, setup, and troubleshooting tips you need.
Key Takeaways
- Use DCEN (Direct Current Electrode Negative) polarity for aluminum MIG welding to ensure proper arc stability and penetration.
- Never use DCEP (Direct Current Electrode Positive)—it causes poor arc control, spatter, and weak welds on aluminum.
- Match your wire feed speed and voltage to the aluminum thickness and joint design for optimal results.
- Clean the aluminum surface thoroughly before welding to remove oxides and contaminants that interfere with the arc.
- Use a spool gun or push-pull system to prevent soft aluminum wire from birdnesting in the feed mechanism.
- Preheat thick aluminum sections (over 1/4 inch) to reduce thermal shock and improve weld quality.
- Always double-check your machine settings before starting—wrong polarity is the #1 cause of failed aluminum welds.
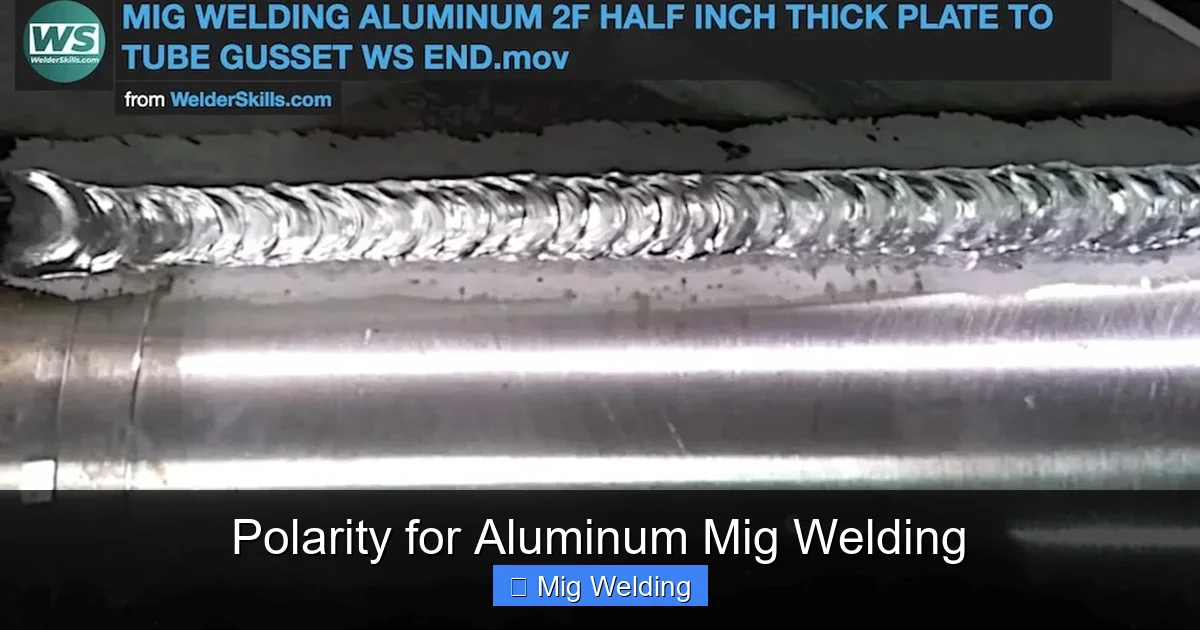
Understanding Polarity in MIG Welding
If you’re new to welding aluminum, you’ve probably heard that it’s tricky. One of the biggest reasons? Getting the polarity right. Unlike steel, aluminum has unique properties that demand specific welding settings—especially when it comes to electrical polarity.
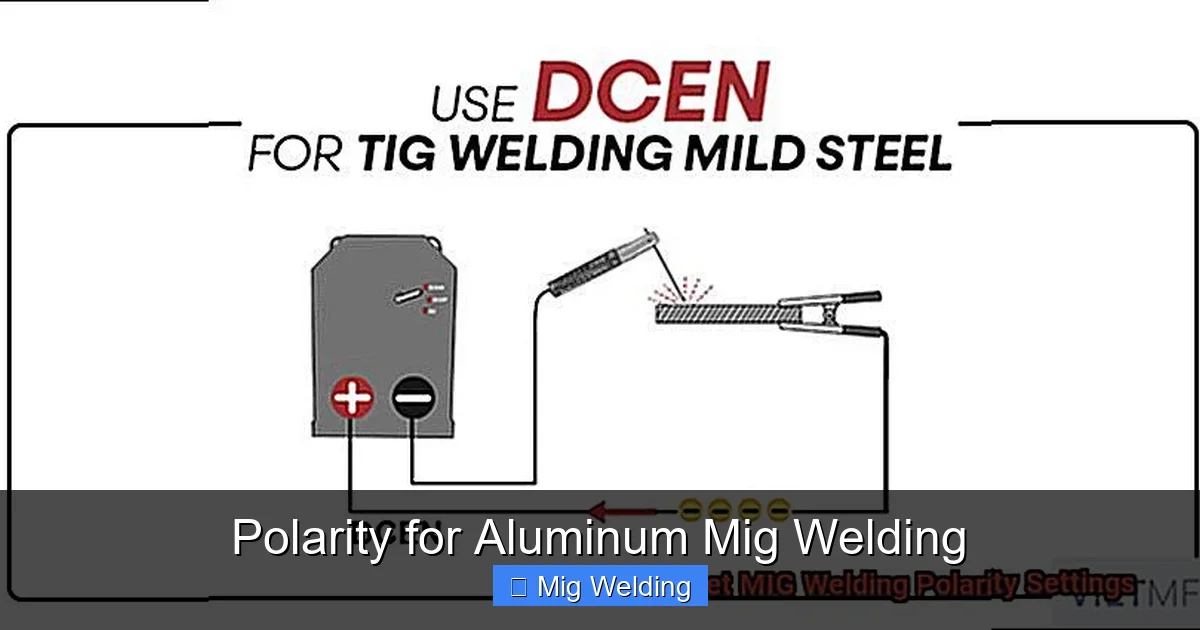
In MIG (Metal Inert Gas) welding, polarity refers to the direction of the electrical current flowing through the welding circuit. There are two main types: DCEN (Direct Current Electrode Negative) and DCEP (Direct Current Electrode Positive). For aluminum, the correct choice is critical.
Most welders are used to welding steel with DCEP, where the electrode (wire) is positive. But aluminum is different. It requires DCEN polarity—where the electrode is negative and the workpiece is positive. This setup ensures deeper penetration, better arc stability, and cleaner welds.
Using the wrong polarity on aluminum leads to poor fusion, excessive spatter, and a weak, brittle weld. So, before you even strike an arc, make sure your machine is set to DCEN.
Why DCEN Polarity Works Best for Aluminum
Visual guide about Polarity for Aluminum Mig Welding
Image source: weldingtipsandtricks.com
To understand why DCEN is essential for aluminum MIG welding, let’s look at how the arc behaves.
When the electrode is negative (DCEN), electrons flow from the wire to the workpiece. This creates a concentrated, focused arc that penetrates deeply into the aluminum. The heat is primarily generated at the workpiece, which helps melt the base metal efficiently.
Aluminum has a high thermal conductivity and a tough oxide layer. The DCEN setup helps break through that oxide layer and transfer heat evenly. In contrast, DCEP spreads the heat over a wider area, making it harder to achieve full penetration.
Additionally, DCEN reduces spatter and gives you better control over the weld pool. This is especially important with aluminum, which can easily burn through if too much heat is applied.
Step-by-Step: Setting Up Polarity for Aluminum MIG Welding
Visual guide about Polarity for Aluminum Mig Welding
Image source: theweldguru.com
Follow these steps to ensure your welder is correctly configured for aluminum.
Step 1: Check Your Welder’s Capabilities
Not all MIG welders can weld aluminum effectively. You need a machine that supports DCEN polarity and has adjustable voltage and wire feed speed. Most modern MIG welders have a polarity switch or interchangeable leads.
If you’re using a spool gun or push-pull system, make sure it’s compatible with your welder and set up for DCEN.
Step 2: Switch to DCEN Polarity
This is the most crucial step. Locate the polarity switch on your welder—it’s usually near the power cord or inside the wire feeder compartment.
– Turn off the welder and unplug it for safety.
– Open the compartment and find the two welding leads: one connected to the gun (electrode) and one to the ground clamp (workpiece).
– For DCEN, the gun lead should be connected to the negative (-) terminal, and the ground clamp to the positive (+) terminal.
– Secure the connections and close the compartment.
Double-check the labels. Some machines have clear markings like “DC-” for DCEN and “DC+” for DCEP.
Step 3: Select the Right Wire and Gas
Use a 4043 or 5356 aluminum MIG wire, depending on your application. 4043 is easier to weld and resists cracking, while 5356 offers higher strength.
Pair it with 100% argon shielding gas. A flow rate of 20–30 CFH (cubic feet per hour) is ideal. Never use CO2 or argon-CO2 mixes—they’re for steel, not aluminum.
Step 4: Set Voltage and Wire Feed Speed
Start with manufacturer recommendations based on material thickness. For example:
– 1/8 inch (3 mm) aluminum: 18–20 volts, 200–250 IPM (inches per minute)
– 1/4 inch (6 mm) aluminum: 20–22 volts, 250–300 IPM
Adjust slightly based on arc sound and bead appearance. A smooth, consistent sizzle means you’re close.
Step 5: Clean the Base Metal
Aluminum oxidizes quickly. Use a stainless steel wire brush (dedicated to aluminum only) to scrub the surface. Wipe with acetone or a degreaser to remove oils.
Any contamination can cause porosity or lack of fusion—even with correct polarity.
Step 6: Test on Scrap Material
Before welding your actual project, run a test bead on a scrap piece of aluminum. Look for:
– Smooth, shiny bead
– Good penetration
– Minimal spatter
If the arc is unstable or the weld looks dull and porous, recheck your polarity and settings.
Common Mistakes and How to Avoid Them
Even experienced welders make errors when switching from steel to aluminum. Here are the top pitfalls:
Using DCEP Instead of DCEN
This is the #1 mistake. If your welder is set to DCEP, the arc will wander, spatter excessively, and fail to penetrate. Always verify polarity before welding.
Incorrect Wire Feed System
Aluminum wire is soft and bends easily. Feeding it through a standard MIG gun often causes birdnesting (tangling in the drive rolls).
Solution: Use a spool gun or push-pull system. These feed the wire smoothly from a small spool near the gun.
Poor Surface Preparation
Dirty or oxidized aluminum leads to weak welds. Always clean the joint area thoroughly.
Wrong Shielding Gas
Using a gas mix with CO2 will contaminate the weld. Stick to 100% argon.
Inadequate Preheating
Thick aluminum (over 1/4 inch) cools the weld pool too quickly. Preheat to 300–400°F (150–200°C) using a torch or heating blanket to maintain proper heat input.
Troubleshooting Aluminum MIG Welding Issues
Even with correct polarity, problems can arise. Here’s how to fix them:
Porosity in the Weld
Cause: Contaminated base metal, moisture, or incorrect gas flow.
Fix: Clean the metal, dry the gas hose, and ensure proper gas coverage. Use a gas lens or longer nozzle if needed.
Lack of Fusion
Cause: Low voltage, slow travel speed, or wrong polarity.
Fix: Increase voltage slightly, speed up travel, and confirm DCEN settings.
Excessive Spatter
Cause: High voltage, incorrect wire stick-out, or DCEP polarity.
Fix: Reduce voltage, keep wire stick-out under 3/4 inch, and double-check polarity.
Wire Feeding Problems
Cause: Birdnesting or erratic feeding.
Fix: Use a spool gun, check drive roll tension, and ensure the liner is clean and undamaged.
Burn-Through
Cause: Too much heat on thin material.
Fix: Reduce voltage and wire feed speed. Use a heat sink or backer bar to absorb excess heat.
Best Practices for Strong Aluminum Welds
Follow these tips to consistently produce high-quality aluminum welds:
– Always use DCEN polarity—never assume your machine remembers the last setting.
– Keep your work area clean and free of drafts that can disrupt shielding gas.
– Use a consistent travel angle (10–15 degrees drag angle).
– Maintain a steady travel speed—too slow causes burn-through, too fast causes lack of fusion.
– Store aluminum wire in a dry place to prevent moisture absorption.
– Replace worn contact tips frequently—they cause arc instability.
Conclusion
Getting the polarity right is the foundation of successful aluminum MIG welding. By setting your welder to DCEN, using the correct wire and gas, and following proper techniques, you’ll achieve strong, clean, professional-looking welds every time.
Aluminum may seem intimidating at first, but with the right setup and attention to detail, it’s very manageable. Remember: polarity isn’t just a suggestion—it’s a requirement. Take the time to double-check your connections, clean your material, and test your settings.
With practice, you’ll gain confidence and skill. Soon, you’ll be welding aluminum like a pro—starting with the right polarity.