
This guide teaches you how to MIG weld stainless steel with pure argon, a method used for specific applications. You’ll learn setup, technique, and common pitfalls to avoid for strong, clean welds.
Key Takeaways
- Use pure argon only for thin stainless steel: Pure argon works best on materials under 1/8 inch thick due to limited penetration.
- Choose the right filler wire: ER308L or ER309L wires match most stainless steels and prevent cracking.
- Cleanliness is critical: Always clean base metal and filler wire to avoid contamination and porosity.
- Control heat input: Use lower voltage and wire speed to prevent warping and oxidation.
- Post-weld cleaning matters: Remove oxide discoloration with a stainless steel brush or pickling paste.
- Avoid overheating: Excessive heat can cause carbide precipitation, weakening the weld.
- Consider gas alternatives: For thicker sections, argon-CO2 mixes offer better penetration and arc stability.
Introduction: Why Weld Stainless Steel with Pure Argon?
Welding stainless steel can be tricky, especially when choosing the right shielding gas. While most MIG welders use argon mixed with CO2 or oxygen for carbon steel, stainless steel requires a gentler touch. MIG welding stainless steel with pure argon is a specialized technique used primarily on thin materials where minimal spatter and clean finishes are essential.
In this guide, you’ll learn exactly how to set up your MIG welder, choose the right materials, and execute clean, strong welds using pure argon. We’ll cover everything from safety tips to troubleshooting common issues. Whether you’re working on automotive parts, kitchen equipment, or decorative metalwork, this method can deliver professional results—if done correctly.
Understanding Why Pure Argon Is Used
Pure argon is an inert gas that doesn’t react with the molten weld pool. This makes it ideal for welding reactive metals like stainless steel, which can oxidize easily. Unlike CO2 or oxygen, argon won’t introduce carbon into the weld, helping maintain the corrosion-resistant properties of stainless steel.
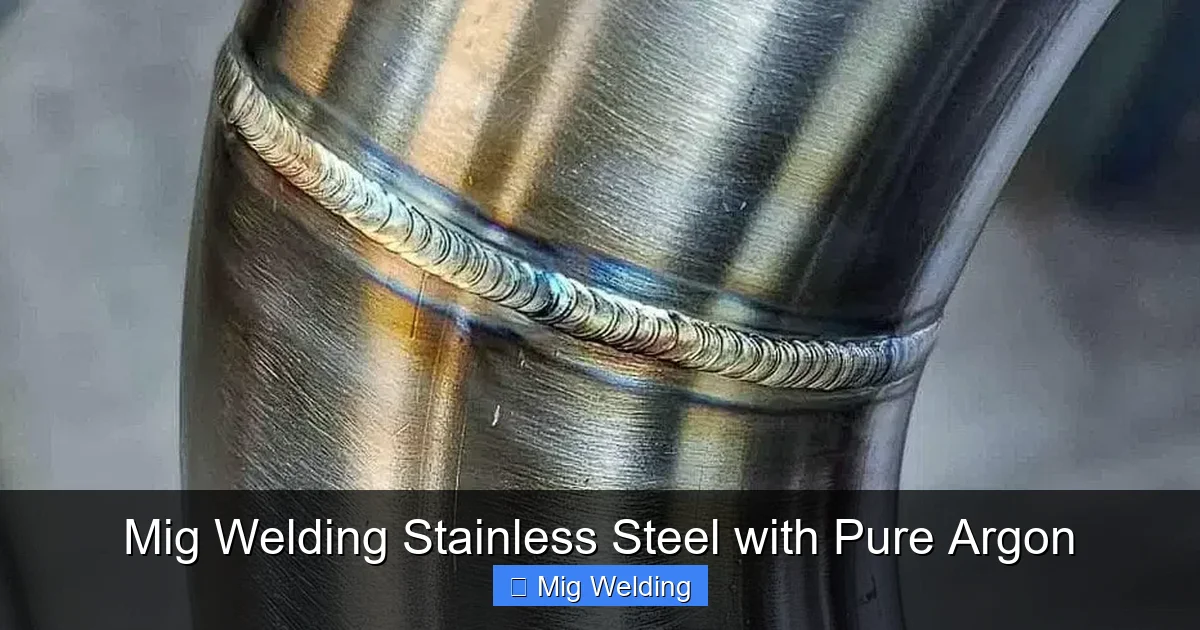
Visual guide about Mig Welding Stainless Steel with Pure Argon
Image source: cdn.sheetstainlesssteel.com
However, pure argon has limitations. It produces a softer arc with less penetration than mixed gases. That’s why it’s best suited for thin materials—typically under 1/8 inch (3 mm). For thicker sections, argon mixed with 2–5% CO2 is usually preferred because it improves arc stability and penetration.
Equipment and Materials You’ll Need
Before you start welding, make sure you have the right tools and materials. Here’s a checklist:

Visual guide about Mig Welding Stainless Steel with Pure Argon
Image source: fixitmanblog.com
- MIG welder: Capable of running on DC electrode positive (DCEP).
- Pure argon gas cylinder: Minimum 99.99% purity. Use a regulator and flow meter.
- Stainless steel filler wire: ER308L for 304 stainless, ER309L for dissimilar metals.
- Wire feeder and liner: Stainless steel wire is harder than mild steel—use a U-groove drive roll and Teflon liner to prevent birdnesting.
- Clean clamps and work surface: Non-ferrous tools only to avoid iron contamination.
- Safety gear: Auto-darkening helmet, gloves, flame-resistant clothing, and proper ventilation.
Choosing the Right Filler Wire
The filler wire must match the base metal. For most common stainless steels like 304 or 316, use ER308L. If you’re welding stainless to mild steel, ER309L is a better choice. Always store wire in a dry place and handle it with clean gloves to prevent oil or moisture contamination.
Pre-Weld Preparation
Proper preparation is half the battle. Stainless steel is unforgiving when it comes to contamination.
Clean the Base Metal
Use a dedicated stainless steel wire brush to remove scale, oil, paint, or rust. Never use a brush that’s been on carbon steel—iron particles can embed into the stainless surface and cause rust. Wipe the area with acetone or a stainless-safe cleaner.
Set Up Your Welder
- Set polarity to DCEN (direct current electrode negative)—wait, no! Actually, MIG welding uses DCEP (direct current electrode positive). This ensures proper heat transfer to the workpiece.
- Adjust voltage and wire feed speed based on material thickness. Start low—around 18–20 volts and 200–250 inches per minute (IPM) for 18-gauge steel.
- Use a push technique (drag angle) to improve gas coverage and visibility.
Gas Flow Settings
Set your argon flow rate between 20–25 cubic feet per hour (CFH). Too little gas leads to porosity; too much can cause turbulence and draw in air. Use a windscreen if working outdoors.
Welding Technique: Step by Step
Now that everything is set up, it’s time to weld. Follow these steps for consistent results.
Step 1: Tack the Joint
Place small tacks every 2–3 inches to hold the pieces in place. Keep tacks short to avoid overheating.
Step 2: Start the Arc
Position the gun at a 10–15 degree angle, pointing in the direction of travel. Trigger the welder and begin moving smoothly. Listen for a steady, crackling sound—this indicates a stable arc.
Step 3: Maintain a Short Arc Length
Keep the contact tip 1/2 inch from the workpiece. A long arc increases spatter and reduces gas protection. Move at a steady pace—too slow causes burn-through; too fast leads to lack of fusion.
Step 4: Use a Stringer Bead
Avoid weaving unless necessary. A straight stringer bead gives better control and cleaner results with pure argon. Overlapping beads should be evenly spaced and fused properly.
Step 5: Let It Cool Between Passes
Stainless steel conducts heat poorly. Allow each pass to cool slightly before adding the next to prevent distortion and carbide precipitation.
Post-Weld Care and Finishing
Your weld may look good, but finishing is key to longevity.
Remove Oxide Discoloration
Pure argon reduces oxidation, but some discoloration (rainbow hues) may still appear. Use a stainless steel wire brush or abrasive pad to clean the surface. For heavy oxidation, apply pickling paste, let it react, then rinse thoroughly.
Inspect the Weld
Check for cracks, porosity, or undercutting. Use a magnifying glass if needed. If defects are found, grind them out and re-weld.
Passivation (Optional but Recommended)
For critical applications, passivate the weld area with nitric or citric acid to restore the chromium oxide layer and improve corrosion resistance.
Troubleshooting Common Issues
Even with careful setup, problems can arise. Here’s how to fix them.
Porosity (Bubbles in the Weld)
Cause: Contaminated base metal, moisture on wire, or insufficient gas coverage.
Solution: Clean everything thoroughly. Check for gas leaks. Increase flow slightly and ensure no drafts.
Burn-Through
Cause: Too much heat on thin material.
Solution: Reduce voltage and wire speed. Use a copper backing bar to dissipate heat.
Poor Penetration
Cause: Pure argon lacks penetration power.
Solution: Increase voltage slightly or switch to argon-2% CO2 mix for thicker materials.
Excessive Spatter
Cause: Incorrect voltage, long arc, or dirty wire.
Solution: Fine-tune settings. Clean wire and contact tip. Use anti-spatter spray if needed.
Discoloration or Scaling
Cause: Overheating or air exposure.
Solution: Reduce heat input. Improve gas coverage. Clean post-weld.
When NOT to Use Pure Argon
While pure argon works for thin stainless steel, it’s not always the best choice. Avoid it when:
- Welding materials thicker than 1/8 inch.
- High strength or deep penetration is required.
- Working in windy conditions (argon is heavier than air but can still be disrupted).
- Cost is a concern—pure argon is more expensive than mixed gases.
For most industrial applications, a 98% argon / 2% CO2 mix offers better performance. It stabilizes the arc, improves wetting, and increases penetration without sacrificing corrosion resistance.
Safety Tips You Can’t Ignore
Welding stainless steel with pure argon is generally safe, but don’t skip these precautions:
- Always weld in a well-ventilated area. Argon can displace oxygen in confined spaces.
- Never inhale fumes. Use a fume extractor or respirator rated for welding.
- Wear full protective gear—UV radiation can damage eyes and skin.
- Store gas cylinders upright and secured.
- Keep a fire extinguisher nearby.
Conclusion: Mastering MIG Welding Stainless Steel with Pure Argon
MIG welding stainless steel with pure argon is a precise technique best suited for thin materials and clean, aesthetic welds. While it requires careful setup and attention to detail, the results can be outstanding—especially for automotive, food-grade, or decorative applications.
Remember: cleanliness, correct settings, and proper post-weld care are essential. Start with low heat, use the right filler wire, and always prioritize safety. With practice, you’ll achieve strong, corrosion-resistant welds that look as good as they perform.
If you’re working on thicker sections or need deeper penetration, consider switching to an argon-CO2 blend. But for thin stainless steel where appearance matters, pure argon remains a reliable and effective choice.