
This guide provides a detailed MIG welding stainless steel settings chart and step-by-step instructions to help you achieve strong, clean welds. You’ll learn about proper wire types, shielding gases, machine settings, and troubleshooting tips for flawless results.
Key Takeaways
- Use the right wire: ER308L or ER309L is ideal for most stainless steel welding projects due to its corrosion resistance and compatibility.
- Choose correct shielding gas: A tri-mix of 90% helium, 7.5% argon, and 2.5% CO₂ (or C25) provides deep penetration and smooth arc stability.
- Set voltage and wire speed properly: Follow a settings chart based on material thickness—typically 18–24 volts and 200–400 IPM for 16–11 gauge steel.
- Clean materials before welding: Remove oil, grease, and oxides with a stainless steel wire brush and acetone to prevent contamination.
- Use push technique and steady travel speed: This minimizes heat input and reduces warping or carbide precipitation.
- Post-weld cleaning is essential: Pickle or passivate the weld area to restore corrosion resistance and improve appearance.
- Match base metals when possible: Use ER308L for 304 stainless and ER309L for dissimilar metals like stainless to mild steel.
Introduction: Why MIG Welding Stainless Steel Needs Special Settings
MIG welding stainless steel isn’t just about flipping a switch and pulling the trigger. Unlike mild steel, stainless steel has unique properties—like lower thermal conductivity and higher thermal expansion—that demand precise machine settings and techniques. If you use the wrong voltage, wire speed, or shielding gas, you risk warping, porosity, or even corrosion down the line.
In this guide, you’ll get a complete MIG welding stainless steel settings chart tailored to common material thicknesses. We’ll walk you through choosing the right wire and gas, setting up your machine, and avoiding common mistakes. Whether you’re welding a custom exhaust, food-grade equipment, or decorative railings, this guide will help you get professional-quality results every time.
Understanding Stainless Steel and Its Welding Challenges
Stainless steel is prized for its corrosion resistance, strength, and clean appearance. But that same chromium content that prevents rust also makes it tricky to weld. When exposed to high heat, chromium can combine with carbon to form chromium carbides, which deplete the metal’s corrosion resistance—a problem known as sensitization.
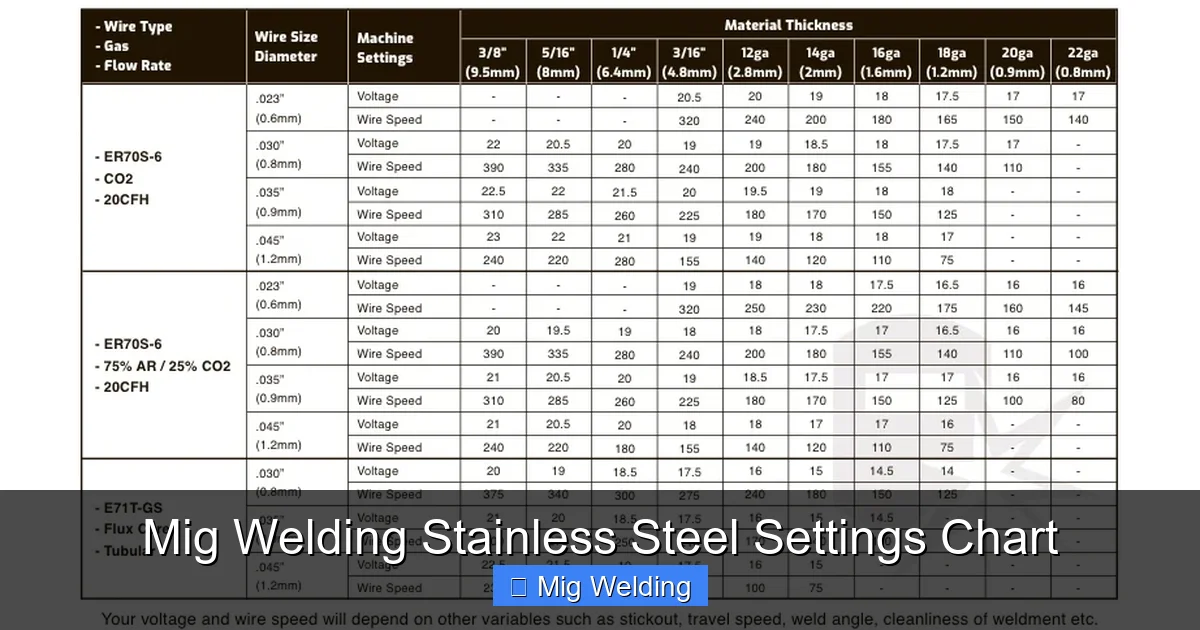
Visual guide about Mig Welding Stainless Steel Settings Chart
Image source: weldguru.com
Additionally, stainless steel expands more when heated and conducts heat less efficiently than mild steel. This means it’s prone to warping and distortion if you don’t control heat input carefully. That’s why proper settings, technique, and post-weld care are non-negotiable.
Choosing the Right MIG Wire for Stainless Steel
The wire you choose directly affects weld quality, strength, and corrosion resistance. For most applications, you’ll want a low-carbon stainless steel wire to minimize carbide formation.
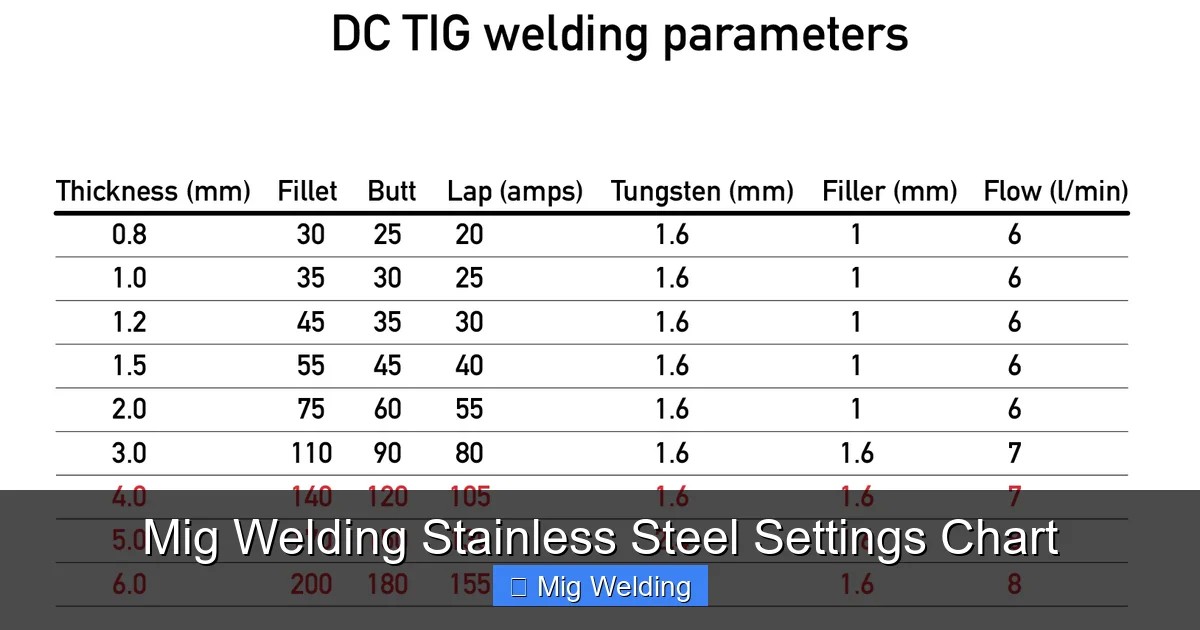
Visual guide about Mig Welding Stainless Steel Settings Chart
Image source: mig-welding.co.uk
Common Wire Types
- ER308L: Best for welding 304 and 304L stainless steel. It’s the most widely used wire for general-purpose stainless welding.
- ER309L: Ideal for joining stainless steel to mild steel or for dissimilar metal applications. Offers good crack resistance.
- ER316L: Used for marine or chemical environments where extra corrosion resistance is needed. Matches 316 stainless steel.
Avoid using mild steel wire (like ER70S-6) on stainless—it will compromise corrosion resistance and may crack under stress.
Selecting the Correct Shielding Gas
Shielding gas protects the weld pool from atmospheric contamination. For stainless steel, you need a gas mix that supports arc stability, penetration, and minimal spatter—without introducing oxygen that could oxidize the chromium.
Recommended Gas Mixes
- Tri-Mix (90% He / 7.5% Ar / 2.5% CO₂): Offers deep penetration, wide bead profile, and excellent arc control. Best for thicker materials.
- C25 (75% Ar / 25% CO₂): A popular alternative that’s easier to find. Provides good results but may increase spatter slightly.
- Argon + 2–5% Oxygen: Rarely used today due to oxidation risk, but some older systems still use it for thin materials.
Never use 100% CO₂—it will oxidize the stainless steel and ruin the weld. Always use a gas with minimal oxygen content.
MIG Welding Stainless Steel Settings Chart
Below is a practical settings chart based on common stainless steel thicknesses. These values are starting points—fine-tune based on your machine, joint design, and material condition.
| Material Thickness (inches) | Wire Diameter | Voltage (V) | Wire Speed (IPM) | Gas Flow Rate (CFH) |
|---|---|---|---|---|
| 24 gauge (0.025″) | 0.023″ or 0.030″ | 16–18 | 150–200 | 20–25 |
| 20 gauge (0.035″) | 0.030″ | 18–20 | 200–250 | 20–25 |
| 16 gauge (0.060″) | 0.030″ or 0.035″ | 20–22 | 250–320 | 25–30 |
| 14 gauge (0.075″) | 0.035″ | 22–24 | 320–400 | 25–30 |
| 11 gauge (0.120″) | 0.035″ or 0.045″ | 24–26 | 400–500 | 30–35 |
Note: These settings assume a standard MIG welder with DCEN (direct current electrode negative) polarity and a tri-mix or C25 gas. Adjust ±1–2 volts or ±20 IPM based on arc sound and bead appearance.
Step-by-Step Setup for MIG Welding Stainless Steel
Now that you have your settings, let’s walk through the process from start to finish.
Step 1: Prepare Your Materials
Clean both base metals thoroughly. Use a dedicated stainless steel wire brush (never used on mild steel) to remove oxides. Wipe surfaces with acetone or a stainless-safe cleaner to eliminate oil, grease, or fingerprints. Even small contaminants can cause porosity or cracking.
Step 2: Set Up Your Welder
- Install the correct wire spool (e.g., ER308L).
- Set polarity to DCEN (electrode negative)—this is standard for MIG welding.
- Load the tri-mix or C25 gas cylinder and set flow rate to 20–30 CFH.
- Refer to the settings chart above and input voltage and wire speed.
Step 3: Test on Scrap Metal
Always run a test weld on a piece of scrap stainless steel. Look for:
- A smooth, stable arc with minimal spatter.
- A bead that’s uniform in width and slightly convex (not flat or undercut).
- No porosity or discoloration (blue or rainbow hues indicate overheating).
If the arc is harsh or the wire burns back, increase voltage slightly. If the weld is too cold or lacks penetration, increase wire speed.
Step 4: Weld with Proper Technique
- Use the push technique (nozzle pointing in the direction of travel) to improve visibility and reduce spatter.
- Maintain a 10–15 degree travel angle and steady speed.
- Keep the gun close to the workpiece (about ½ inch) for consistent shielding.
- Avoid excessive weaving—straight beads reduce heat input and distortion.
Step 5: Post-Weld Cleaning and Passivation
After welding, the heat-affected zone may have surface oxides that reduce corrosion resistance. To fix this:
- Use a stainless wire brush to remove scale.
- Apply a pickling paste (available at welding supply stores) to dissolve oxides.
- Rinse thoroughly with water and dry.
- For critical applications, consider electro-passivation to restore the chromium oxide layer.
Troubleshooting Common Issues
Even with perfect settings, problems can arise. Here’s how to fix them:
Porosity or Bubbles in the Weld
Cause: Contaminated base metal, poor gas coverage, or moisture in the gas line.
Fix: Clean materials thoroughly, check for gas leaks, and ensure proper flow rate. Use a gas lens if available.
Discoloration (Blue, Purple, or Rainbow Hues)
Cause: Excessive heat or insufficient shielding gas.
Fix: Reduce voltage, increase travel speed, and ensure full gas coverage. Use a trailing shield for critical welds.
Undercutting or Cracking
Cause: Too high voltage, fast travel speed, or poor joint fit-up.
Fix: Lower voltage, slow down slightly, and ensure tight fit-up. Use ER309L for crack-prone joints.
Wire Feeding Issues
Cause: Incorrect drive roll size, kinked liner, or dirty contact tip.
Fix: Use U-groove drive rolls for stainless wire, replace the liner if damaged, and clean or replace the contact tip regularly.
Final Tips for Success
- Work in a draft-free area: Wind can blow away shielding gas and cause porosity.
- Use a backing bar for thin materials: Copper or stainless steel backing helps control heat and prevents burn-through.
- Preheat thick sections (optional): For materials over ¼ inch, preheating to 300–400°F can reduce cracking.
- Store wire properly: Keep stainless wire in a dry, sealed container to prevent moisture absorption.
Conclusion: Master Stainless Steel MIG Welding with Confidence
Welding stainless steel with MIG doesn’t have to be intimidating. With the right wire, gas, and settings—guided by a reliable MIG welding stainless steel settings chart—you can produce strong, clean, and corrosion-resistant welds every time. Remember to clean your materials, use the push technique, and always test your settings. And don’t skip post-weld cleaning—it’s what separates a good weld from a great one.
Whether you’re building a custom kitchen hood, repairing a boat railing, or fabricating industrial equipment, these tips and settings will help you weld stainless steel like a pro. Practice on scrap, fine-tune your technique, and soon you’ll be turning out flawless welds with ease.