

This guide covers everything you need to know about MIG welding gun tips, including how to choose the right size, maintain them properly, and troubleshoot common issues. Whether you’re a beginner or experienced welder, these tips will help you improve weld quality and extend equipment life.
Key Takeaways
- Choose the right tip size: Match your welding gun tip to your wire diameter for optimal performance and consistent arc stability.
- Keep tips clean and free of spatter: Regular cleaning prevents clogging and ensures smooth wire feeding and better weld quality.
- Inspect for wear and damage: Worn or pitted tips cause erratic arcs and poor penetration—replace them promptly.
- Use proper contact tip recess: The tip should sit flush or slightly recessed in the nozzle to protect it and improve gas coverage.
- Store tips properly: Keep spare tips in a dry, sealed container to prevent corrosion and contamination.
- Troubleshoot common issues: Learn to identify and fix problems like birdnesting, poor arc start, or excessive spatter caused by faulty tips.
- Upgrade when needed: High-quality copper or chrome zirconium tips last longer and perform better under heavy use.
Introduction to MIG Welding Gun Tips
If you’re serious about MIG welding, you know that even the smallest parts can make a big difference in your results. One of the most overlooked yet critical components is the MIG welding gun tip—also known as the contact tip. This tiny copper or alloy piece guides the welding wire, conducts electricity, and helps create a stable arc. A worn, clogged, or mismatched tip can ruin your welds, cause frustration, and even damage your machine.
In this guide, you’ll learn everything about MIG welding gun tips: how to choose the right one, maintain it properly, troubleshoot common problems, and get the best performance from your welder. Whether you’re working on automotive repairs, home projects, or industrial fabrication, mastering your gun tip will save time, reduce waste, and improve weld quality.
Understanding the Role of the MIG Welding Gun Tip
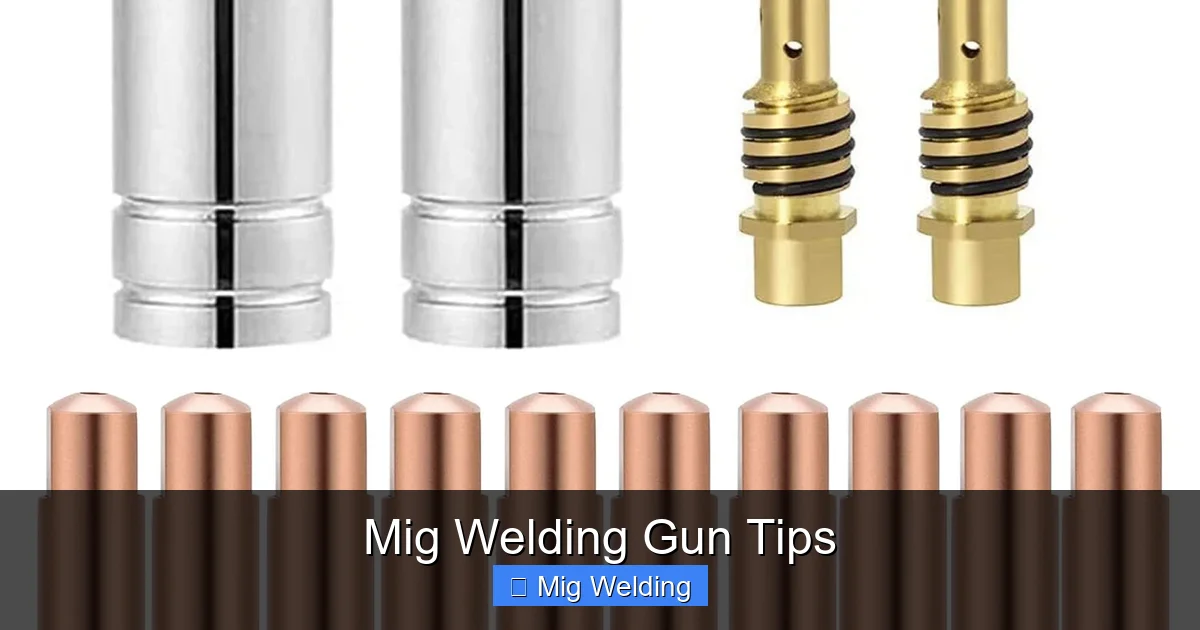
Visual guide about Mig Welding Gun Tips
Image source: m.media-amazon.com
The contact tip is where the welding wire meets the electrical current. As the wire feeds through the tip, electricity flows through it, creating the arc that melts the wire and fuses your materials. Because it’s in constant contact with the wire and exposed to high heat and spatter, the tip wears out over time.
A good tip ensures:
- Smooth wire feeding
- Consistent electrical contact
- Stable arc initiation
- Reduced spatter and defects
Using the wrong tip—or a damaged one—can lead to poor penetration, erratic arcs, and frequent downtime. That’s why understanding how to care for and replace your MIG welding gun tip is essential.
How to Choose the Right MIG Welding Gun Tip
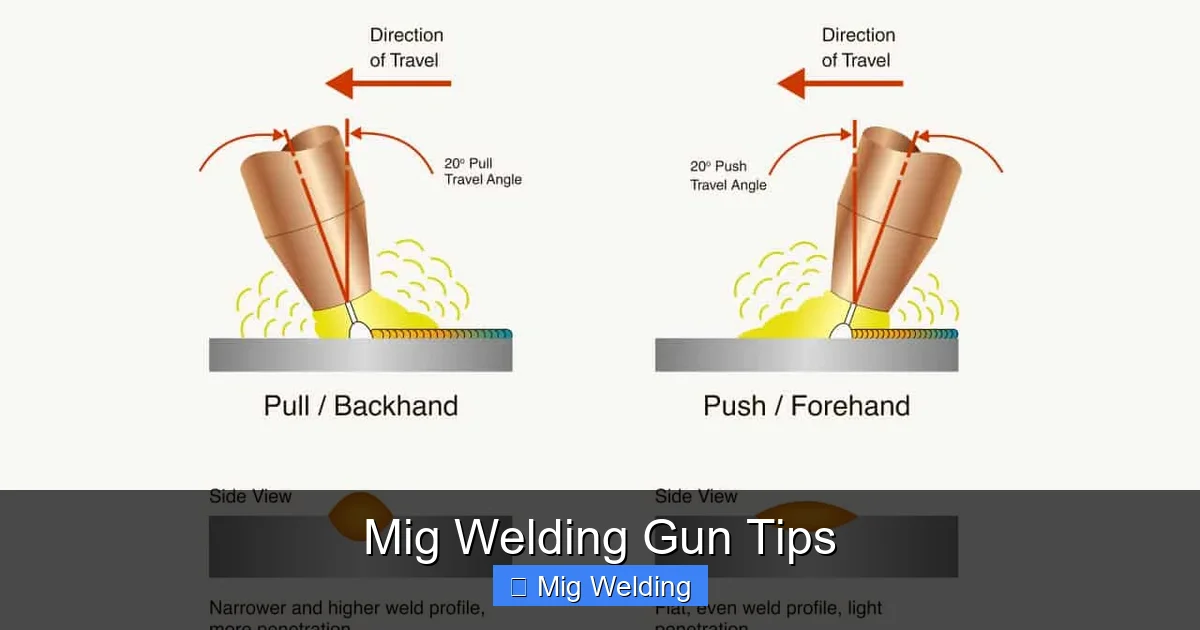
Visual guide about Mig Welding Gun Tips
Image source: weldguru.com
Not all tips are created equal. Choosing the correct one starts with matching it to your wire diameter.
Match Tip Size to Wire Diameter
Most MIG welding wires come in standard sizes like 0.023″, 0.030″, 0.035″, and 0.045″. Your contact tip must match this size precisely. For example:
- Use a 0.030″ tip for 0.030″ wire
- Use a 0.035″ tip for 0.035″ wire
Using a tip that’s too small will restrict the wire and cause feeding problems. A tip that’s too large creates poor electrical contact, leading to an unstable arc.
Consider Tip Material
Most tips are made from copper, but higher-end options include chrome zirconium. Here’s how they compare:
- Copper tips: Affordable and conductive, great for light to medium use.
- Chrome zirconium tips: More durable, resist wear and heat better—ideal for high-amperage or continuous welding.
If you weld frequently or use larger wires, investing in chrome zirconium tips can save money in the long run.
Check Compatibility with Your Gun
Not all tips fit all guns. Check your welding gun model and manufacturer specs. Common brands like Lincoln, Miller, and Hobart have specific tip designs. Using incompatible tips can lead to poor fit, gas leaks, or electrical issues.
Installing and Replacing Your MIG Welding Gun Tip
Replacing a tip is simple, but doing it correctly ensures optimal performance.
Step 1: Turn Off the Welder
Always disconnect power before working on your gun. This prevents accidental starts and electric shock.
Step 2: Remove the Nozzle
Unscrew the gas diffuser or nozzle from the front of the gun. This gives you access to the contact tip.
Step 3: Unscrew the Old Tip
Use needle-nose pliers or a tip removal tool to gently unscrew the old tip. Be careful not to damage the threads.
Step 4: Install the New Tip
Screw in the new tip by hand, then tighten it snugly with pliers. Don’t over-tighten—this can strip the threads.
Step 5: Reattach the Nozzle
Screw the nozzle back on securely. Make sure it’s aligned properly to avoid gas leaks.
Step 6: Test the Gun
Turn on the welder and do a test feed. Listen for smooth wire movement and check for proper arc start.
Maintaining Your MIG Welding Gun Tip
Regular maintenance keeps your tip in top shape and prevents costly downtime.
Clean Spatter Regularly
Spatter buildup is the #1 cause of tip clogging. After each welding session:
- Use a tip cleaner tool or small wire brush to remove debris.
- Spray with anti-spatter solution to prevent future buildup.
For heavy spatter, soak the nozzle and tip in a cleaning solution or use a tip cleaning station.
Inspect for Wear and Damage
Check your tip before every job. Look for:
- Pitting or grooves on the inside
- Enlarged hole diameter
- Cracks or deformation
A worn tip causes poor contact and erratic arcs. Replace it immediately.
Check Contact Tip Recess
The tip should sit flush or slightly recessed (about 1/16″) inside the nozzle. If it sticks out too far, it’s exposed to more spatter and heat. If it’s too deep, gas flow may be restricted.
Adjust the tip position by loosening the diffuser and repositioning it before tightening.
Troubleshooting Common MIG Welding Gun Tip Problems
Even with good care, issues can arise. Here’s how to fix the most common ones.
Problem: Wire Feeding Problems (Birdnesting)
If the wire kinks or jams in the liner, it’s often due to a clogged or misaligned tip.
- Solution: Clean the tip and check wire alignment. Replace if damaged.
Problem: Poor Arc Start or Erratic Arc
This usually means poor electrical contact.
- Solution: Replace the tip and ensure it’s the correct size for your wire.
Problem: Excessive Spatter
Spatter can come from a worn tip, incorrect voltage, or poor gas coverage.
- Solution: Replace the tip, check gas flow (should be 20–25 CFH), and clean the nozzle.
Problem: Tip Overheating
If the tip gets too hot, it may be undersized, overworked, or poorly seated.
- Solution: Use a larger tip for high-amperage welding and ensure proper installation.
Pro Tips for Longer-Lasting MIG Gun Tips
Want to get the most out of your tips? Try these expert tricks.
Use Anti-Spatter Spray
Apply a light coat to the nozzle and tip after cleaning. This reduces spatter adhesion and makes cleanup easier.
Keep Spare Tips Handy
Always have a few extra tips on hand. Store them in a sealed plastic bag or container to prevent rust and dust.
Match Tip Quality to Your Workload
For occasional home use, standard copper tips are fine. For professional or high-volume welding, upgrade to chrome zirconium.
Don’t Forget the Liner
A worn liner can cause feeding issues that mimic tip problems. Replace the liner if you notice resistance or birdnesting.
Conclusion
The MIG welding gun tip may be small, but its impact on your welding success is huge. By choosing the right size, maintaining it properly, and replacing it when needed, you’ll enjoy smoother feeds, cleaner arcs, and stronger welds. Remember: a well-cared-for tip saves time, reduces frustration, and improves every project you tackle.
Take a few minutes after each session to inspect and clean your tip. Invest in quality replacements when necessary. With these habits, your MIG welder will perform at its best—job after job.