

A MIG welding gun holder keeps your gun secure, cool, and within easy reach, reducing downtime and improving safety. This guide walks you through choosing, installing, or building the right holder for your setup.
Key Takeaways
- Improves safety: Prevents hot guns from contacting flammable materials or causing burns.
- Boosts efficiency: Keeps your gun organized and ready, minimizing interruptions during welding.
- Protects equipment: Reduces wear and tear on the gun liner and contact tip by preventing drops or kinks.
- Easy to install: Most holders mount on tables, carts, or walls with basic tools.
- DIY-friendly: You can build a sturdy, custom holder using simple materials like steel angle and pipe.
- Versatile options: Choose from magnetic, clamp-on, or bolt-down models based on your workspace.
- Reduces fatigue: Proper positioning lets you rest the gun comfortably between welds.
What Is a MIG Welding Gun Holder?
A MIG welding gun holder is a simple but essential tool designed to safely store your welding gun when it’s not in use. Think of it like a holster for your welder—keeping your gun secure, upright, and away from hot surfaces, sparks, or clutter. Whether you’re working in a professional shop or a home garage, a good holder helps prevent accidents, protects your equipment, and keeps your workspace tidy.
These holders come in many styles: some clamp onto your welding table, others bolt to the wall, and some use strong magnets for quick attachment. No matter the design, the goal is the same—give your MIG gun a dedicated, safe spot so you can focus on welding, not fumbling with gear.
Why You Need a MIG Welding Gun Holder
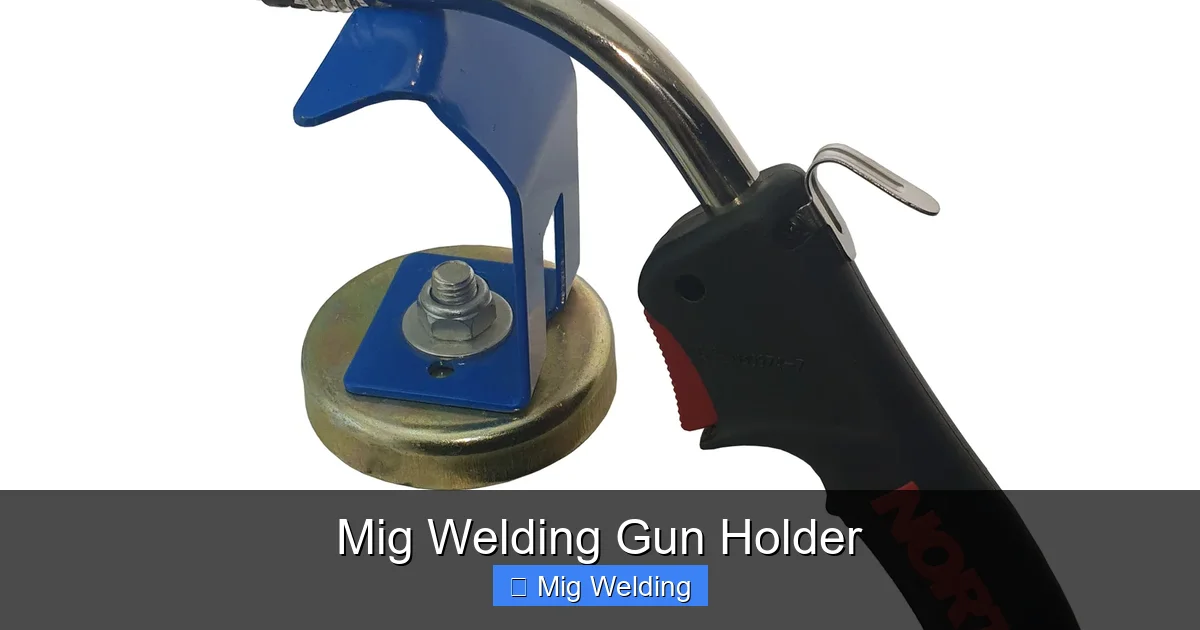
Visual guide about Mig Welding Gun Holder
Image source: hampdon.com.au
You might be thinking, “Can’t I just lay the gun on the table?” Sure, you can—but that’s where problems start. A hot MIG gun can melt surfaces, start fires, or get damaged if it falls. Plus, leaving it lying around makes it harder to find when you need it, slowing down your workflow.
Here’s why a holder is a smart investment:
- Safety first: A holder keeps the hot nozzle away from skin, clothes, and flammable materials.
- Equipment protection: Prevents the gun from being dropped or bent, which can damage the liner or trigger.
- Better workflow: No more searching for your gun—it’s always in the same spot.
- Cleaner workspace: Reduces clutter and tripping hazards.
- Longer tool life: Less stress on cables and connections means fewer repairs.
Types of MIG Welding Gun Holders
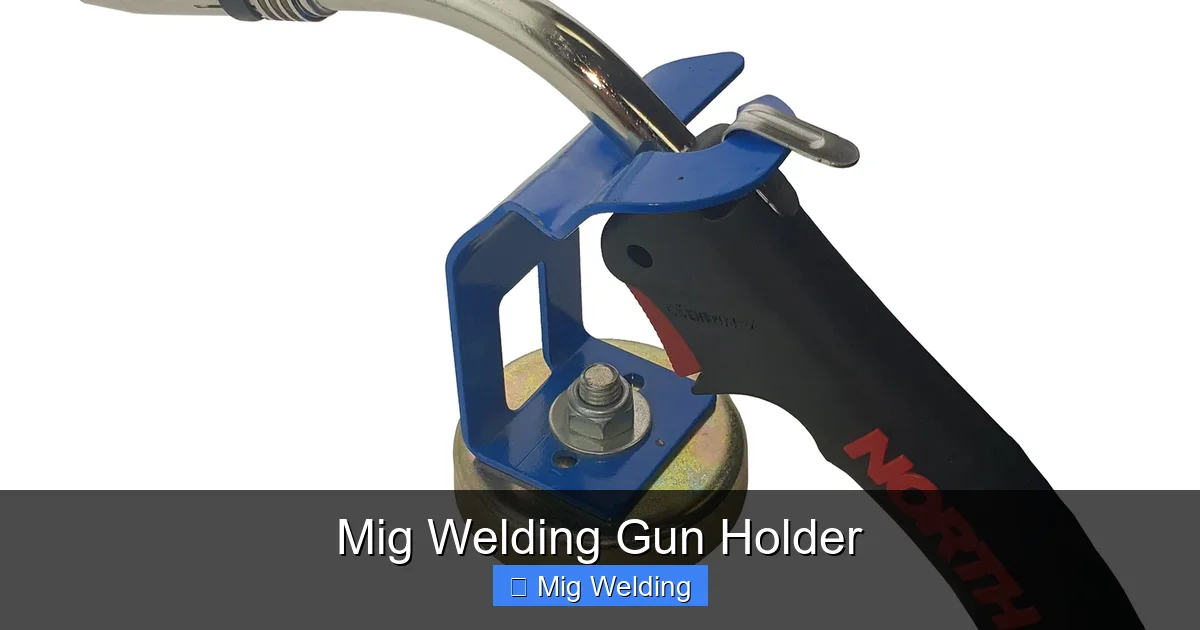
Visual guide about Mig Welding Gun Holder
Image source: hampdon.com.au
Not all holders are created equal. The best one for you depends on your workspace, welding frequency, and personal preference. Here are the most common types:
Clamp-On Holders
These attach to the edge of your welding table or cart using a strong clamp. They’re easy to install and remove, making them great for shared or mobile workspaces. Look for models with rubber padding to protect your table surface.
Bolt-Down Holders
For permanent setups, bolt-down holders offer maximum stability. They’re ideal for busy shops where the gun is used frequently. Installation takes a bit more effort, but they won’t budge once secured.
Magnetic Holders
Perfect for steel surfaces, magnetic holders snap on and off in seconds. They’re lightweight and portable, but make sure the magnet is strong enough to hold your gun securely—especially if it’s a heavy-duty model.
Wall-Mounted Holders
If floor or table space is tight, wall mounts free up room while keeping the gun accessible. These are common in small garages or organized workshops.
DIY Holders
Want full control over design and placement? Building your own holder lets you customize size, angle, and material. We’ll cover a simple DIY build later in this guide.
How to Choose the Right Holder
Picking the best MIG welding gun holder doesn’t have to be complicated. Ask yourself these questions:
- Where will I use it? Table, cart, wall, or mobile rig?
- How often do I weld? Frequent use? Go for durable, easy-access models.
- What’s my gun’s weight? Heavier guns need stronger support.
- Do I move my setup often? Clamp or magnetic types are more portable.
- What’s my budget? Basic holders start under $20; premium models go up to $60.
For most hobbyists, a clamp-on or magnetic holder works great. Professionals might prefer a heavy-duty bolt-down or custom-built version.
Step-by-Step: Installing a Commercial MIG Welding Gun Holder
Ready to install? Follow these steps for a secure, reliable setup.
Gather Your Tools
You’ll need:
- The welding gun holder
- Wrench or screwdriver (depending on model)
- Measuring tape
- Marker or pencil
- Level (optional, for wall mounts)
Choose the Location
Pick a spot within arm’s reach of your welding area—ideally near your table or cart. Avoid placing it where sparks or spatter might hit it. For wall mounts, aim for shoulder height so the gun hangs naturally.
Attach the Holder
- For clamp-on models: Open the clamp, position it on the table edge, and tighten securely. Make sure it doesn’t interfere with your welding surface.
- For bolt-down models: Mark drill holes, drill pilot holes, then secure with bolts and washers. Use a level to ensure it’s straight.
- For magnetic holders: Simply place it on a clean, flat steel surface. Test the hold by gently tugging the gun.
- For wall mounts: Use wall anchors if needed, especially on drywall. Screw in firmly and double-check stability.
Test It Out
Insert your MIG gun and give it a gentle shake. It should stay firmly in place without wobbling. Adjust the angle if needed—most holders allow slight rotation for comfort.
DIY MIG Welding Gun Holder: Build Your Own
Want a custom solution? Building your own holder is easier than you think—and often cheaper than buying one.
Materials You’ll Need
- 2-inch steel angle (12–18 inches long)
- 1/4-inch steel plate (4×4 inches)
- 1/2-inch steel pipe (6–8 inches long)
- Welding wire and gas (for assembly)
- Bolt, washer, and nut (1/4-inch)
- Drill and metal drill bits
- Angle grinder or hacksaw
- Measuring tape and marker
Step-by-Step Build
Step 1: Cut the Base
Cut the steel plate to size (4×4 inches works well). This will be the base that mounts to your table or cart.
Step 2: Attach the Angle
Weld the steel angle vertically to the center of the base. This creates the back support for the gun.
Step 3: Add the Pipe
Weld the steel pipe horizontally near the top of the angle. This acts as a cradle for the gun handle. Make sure it’s angled slightly upward so the gun doesn’t slip out.
Step 4: Drill Mounting Holes
Drill two holes in the base for bolts. If using a clamp, skip this step and attach a C-clamp instead.
Step 5: Test and Adjust
Mount the holder and test with your gun. Adjust the pipe angle if needed for a snug fit.
Safety Tip
Always wear safety glasses and gloves when cutting or welding metal. Work in a well-ventilated area and keep a fire extinguisher nearby.
Tips for Using Your MIG Welding Gun Holder
A holder only works well if you use it correctly. Follow these best practices:
- Always return the gun after use. Make it a habit—no exceptions.
- Let the gun cool slightly before storing, but don’t wait too long or the spatter will harden.
- Keep the holder clean. Wipe off spatter and dust regularly to maintain grip.
- Check for wear. Inspect clamps, magnets, and welds periodically.
- Use a nozzle dip or anti-spatter spray to reduce buildup that can interfere with the holder.
Troubleshooting Common Issues
Even the best setups can have hiccups. Here’s how to fix common problems:
Gun Won’t Stay in Place
Possible causes: Loose clamp, weak magnet, or incorrect angle.
Solution: Tighten all connections, clean magnetic surfaces, or adjust the pipe angle.
Holder Vibrates or Wobbles
Possible causes: Loose bolts or uneven mounting surface.
Solution: Re-tighten hardware or add rubber pads under the base.
Gun Gets Stuck
Possible causes: Spatter buildup or misaligned cradle.
Solution: Clean the holder and ensure the gun slides in smoothly.
Magnetic Holder Falls Off
Possible causes: Weak magnet or painted surface.
Solution: Use a stronger magnet or attach to bare steel.
Conclusion
A MIG welding gun holder is a small tool with a big impact. It keeps your gun safe, your workspace clean, and your welding sessions efficient. Whether you buy a ready-made model or build your own, taking the time to install a holder is a smart move for any welder.
From preventing burns and fires to protecting your expensive equipment, the benefits are clear. And with so many options—clamp-on, magnetic, wall-mounted, or DIY—there’s a perfect fit for every shop.
So don’t let your gun lie around like an afterthought. Give it a proper home. Your safety, your tools, and your workflow will thank you.