

Mastering TIG welding mild steel begins with understanding the right shielding gas. This guide dives deep into using argon, the most common choice, explaining why it’s ideal and how to achieve optimal shielding gas flow. We’ll cover everything from selecting the right gas to troubleshooting common issues, ensuring you achieve clean, strong, and aesthetically pleasing welds on your mild steel projects.
Gas for Tig Welding Mild Steel
Key Takeaways
- Argon is the king of TIG welding gases for mild steel due to its inert nature, which prevents oxidation and contamination of the weld pool.
- Proper shielding gas flow is crucial; too little leads to porosity and contamination, while too much can cause turbulence and weld defects.
- The correct gas flow rate depends on factors like cup size, amperage, and welding environment (drafts).
- While pure argon is standard, mixtures with small amounts of helium or CO2 can be used for specific applications or to achieve different weld characteristics.
- Understanding gas lens usage and its impact on shielding gas coverage is vital for achieving precise and consistent welds.
- Common troubleshooting involves addressing issues like porosity, discoloration, and erratic arc behavior, often linked to gas flow or leaks.
Introduction: The Shielding Gas Secret to Stellar Mild Steel Welds
So, you’re ready to dive into the world of TIG welding mild steel and create some beautiful, strong joints? That’s fantastic! TIG welding, also known as Gas Tungsten Arc Welding (GTAW), is renowned for its precision and the quality of its welds. But to truly unlock its potential, especially with a common material like mild steel, you absolutely need to understand the role of shielding gas. Think of it as the unsung hero of your TIG setup. Without the right gas, your welds can suffer from all sorts of problems, from unsightly discoloration to weak, porous joints.
This guide is your comprehensive roadmap to selecting, using, and optimizing the shielding gas for your TIG welding endeavors with mild steel. We’ll break down why certain gases are preferred, how to set up your flow rate correctly, and what to do when things don’t go according to plan. By the end of this article, you’ll have the confidence and knowledge to choose and utilize the perfect shielding gas, leading to cleaner, stronger, and more professional-looking welds on your mild steel projects. Let’s get started!
Understanding the Role of Shielding Gas
Before we get into the specifics of *which* gas to use, let’s quickly cover *why* we need it. When you’re TIG welding, you’re creating an extremely hot arc that melts both your base metal (in this case, mild steel) and your filler metal (if you’re using one). This molten metal is incredibly susceptible to contamination from the surrounding atmosphere, primarily oxygen and nitrogen.
The primary job of shielding gas is to create a protective atmosphere around the arc and the molten weld pool. This prevents atmospheric contaminants from mixing with the molten metal and causing defects. Think of it like a clean room for your weld. Without this shield, oxygen would react with the hot metal, causing oxidation (discoloration and weak spots), and nitrogen could lead to embrittlement. So, a good shield keeps your weld clean and strong.
Visual guide about Gas for Tig Welding Mild Steel
Image source: weldgears.com
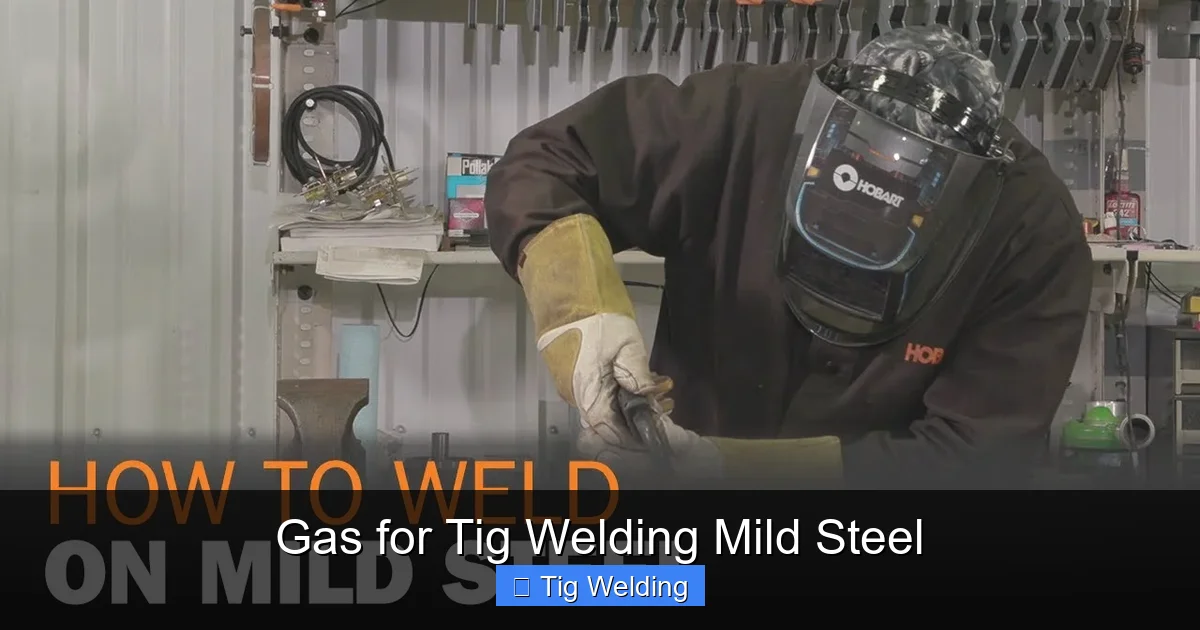
The Best Gas for TIG Welding Mild Steel: Argon Takes the Crown
When it comes to TIG welding mild steel, there’s one gas that stands head and shoulders above the rest: **Argon**.
Why Argon?
Argon is an inert gas, meaning it doesn’t readily react with other elements. This is its superpower for TIG welding. Here’s why it’s the go-to choice for mild steel:
- Inert Nature: As mentioned, argon won’t react with the molten weld pool. This is crucial for preventing oxidation and ensuring the weld metal solidifies with its intended properties.
- Excellent Arc Stability: Argon provides a very stable and focused arc. This makes it easier for the welder to control the heat input and maintain a consistent weld bead.
- Good Cleaning Action: While not as aggressive as some other gases, argon does provide a slight “cleaning” effect on the surface of the molten puddle, helping to push away minor surface contaminants.
- Availability and Cost: Argon is widely available and relatively inexpensive compared to some other inert gases, making it a practical choice for hobbyists and professionals alike.
Pure Argon vs. Argon Mixtures
For the vast majority of TIG welding on mild steel, 100% pure argon is the perfect choice. It offers all the benefits listed above without introducing any unnecessary variables.
However, you might encounter discussions about argon mixtures. While generally not recommended for standard mild steel TIG welding, these mixtures are sometimes used for specific reasons:
- Argon-Helium Mixtures: Adding helium to argon increases heat input and penetration. This can be useful for thicker sections of mild steel or when faster travel speeds are desired. However, it can make the arc harder to control and is typically more expensive.
- Argon-CO2 Mixtures: Adding a small percentage of carbon dioxide (CO2) to argon can improve bead appearance and penetration on mild steel. However, CO2 is not truly inert and can introduce some risk of porosity if not managed carefully. For beginners, it’s best to stick with pure argon for mild steel.
- Argon-Oxygen Mixtures: These are almost exclusively used for stainless steel and aluminum, not mild steel.
Tip: For your TIG welding journey with mild steel, start with pure argon. It’s the most forgiving and will give you the best results as you learn the fundamentals.
Visual guide about Gas for Tig Welding Mild Steel
Image source: i.ytimg.com
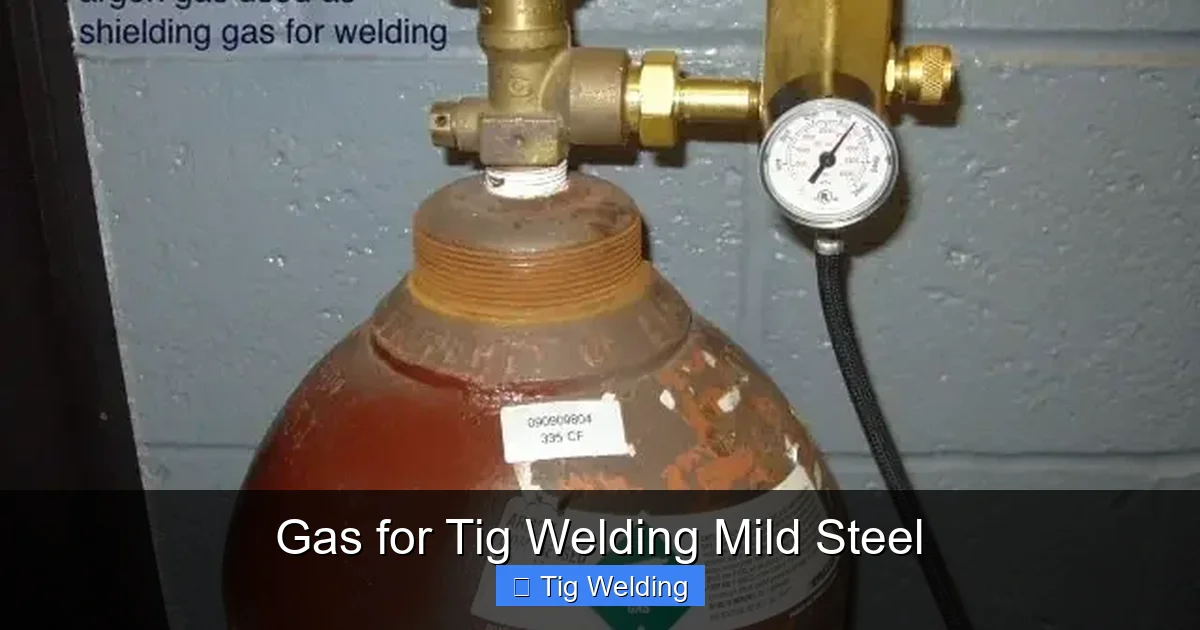
Setting Up Your Shielding Gas System
Now that you know argon is your primary gas, let’s talk about how to set it up correctly. This involves your gas cylinder, regulator, flowmeter, and hose.
Understanding Your Regulator and Flowmeter
Your gas cylinder will be connected to a **regulator-flowmeter**. This device serves two main purposes:
- Regulator: It reduces the high pressure from the gas cylinder to a usable, lower pressure for welding.
- Flowmeter: It measures and controls the rate at which the gas flows from the cylinder to your TIG torch. This is usually measured in cubic feet per hour (CFH) or liters per minute (LPM).
Important Note: Always ensure your regulator is specifically designed for the type of gas you are using (e.g., an Argon regulator for Argon). CGA fittings are standardized to prevent incorrect connections.
Visual guide about Gas for Tig Welding Mild Steel
Image source: weldingtipsandtricks.com
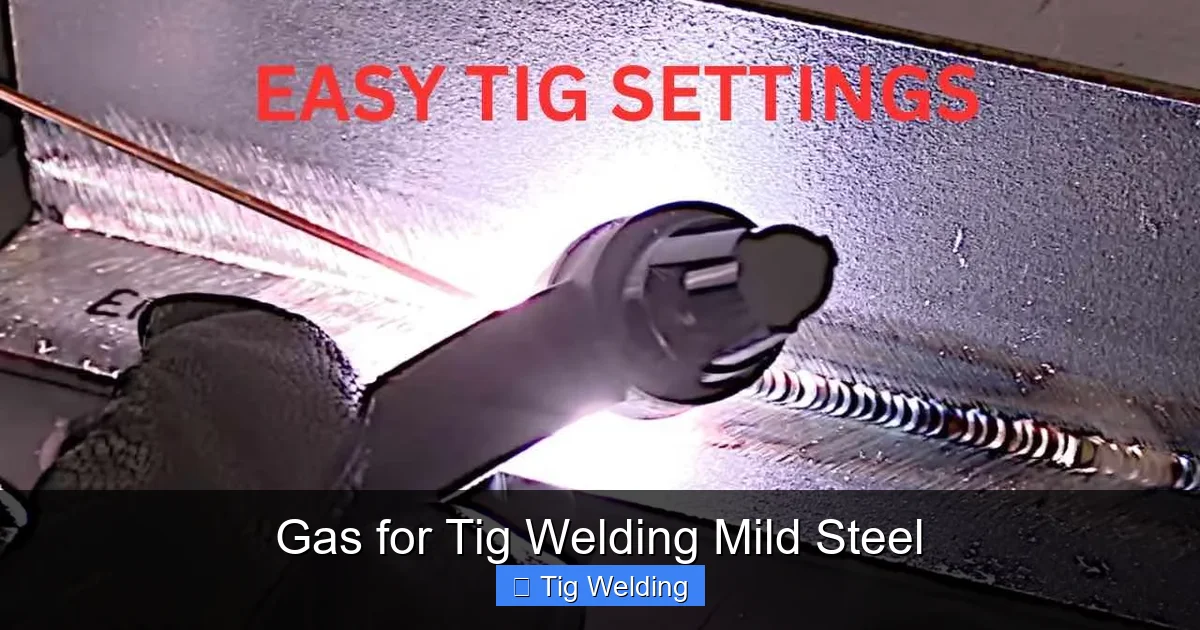
Determining the Correct Gas Flow Rate
This is where the real skill comes in, and it’s often a point of confusion for new welders. There isn’t a single “magic number” for gas flow. The optimal flow rate depends on several factors:
Factors Influencing Gas Flow Rate:
- Cup Size: This is probably the most significant factor. A larger diameter gas cup on your TIG torch requires a higher flow rate to adequately shroud the entire weld pool. A smaller cup needs less gas.
- Amperage: Generally, higher amperages require slightly higher gas flow rates to keep up with the larger, hotter weld pool.
- Welding Environment: Are you welding indoors or outdoors? Is there a draft? If there’s any air movement, you’ll need to increase your gas flow rate to overcome it and ensure the gas effectively shields the weld.
- Torch Angle: Holding the torch at an angle can affect gas coverage.
- Gas Lens (Highly Recommended): Using a gas lens instead of a standard collet body significantly improves gas coverage. A gas lens diffuses the argon in a much more controlled and consistent way, creating a wider, more stable shroud.
Typical Flow Rate Guidelines:
As a starting point, here are some general guidelines for pure argon with a standard TIG setup (not a gas lens):
- Small cup (e.g., #5): 15-20 CFH (approximately 7-9 LPM)
- Medium cup (e.g., #7): 20-25 CFH (approximately 9-12 LPM)
- Large cup (e.g., #10): 25-35 CFH (approximately 12-17 LPM)
If you are using a gas lens, you can often reduce the flow rate by 5-10 CFH and achieve better coverage.
Practical Tip: Start with a recommended flow rate for your cup size and then adjust based on visual inspection of your weld and the results. You’ll learn to “listen” to your arc and “see” what the gas is doing.
Step-by-Step Gas Setup and Verification
1. Connect Regulator: Ensure the regulator is securely attached to the argon cylinder valve.
2. Open Cylinder Valve Slowly: Turn the main cylinder valve on *slowly*. You should hear gas flowing.
3. Set Regulator Pressure: Adjust the regulator to your desired working pressure. This is usually pre-set by the flowmeter.
4. Adjust Flowmeter: Slowly turn the ball valve (or adjust the digital control) on the flowmeter to achieve your target CFH or LPM.
5. Check for Leaks: You can use a soapy water solution. Apply it to all connections (cylinder valve to regulator, regulator to hose). If you see bubbles, you have a leak and need to tighten or replace the connection.
6. Test Gas Flow: With the torch unconnected to the machine (but the machine powered on and gas activated), press the torch switch. You should feel a strong, steady flow of gas from the cup. Listen for any sputtering or uneven flow.
7. Connect Torch: Once satisfied, connect the gas hose to your TIG machine’s gas inlet.
8. Final Flow Check: With the machine powered on and ready to weld, press the torch switch again. You should have a strong, consistent gas flow.
Pre-Flow and Post-Flow Settings: Fine-Tuning Your Shield
Modern TIG welding machines offer pre-flow and post-flow settings for your shielding gas. These are crucial for optimal weld quality, especially with mild steel.
Pre-Flow
What it is: Pre-flow is the amount of time your shielding gas flows from the torch *before* the welding arc is initiated.
Why it’s important: This is your initial defense against contamination. A few seconds of pre-flow purges any residual air from the torch and cup, ensuring that the moment the arc strikes, the molten pool is immediately enveloped in inert gas. For mild steel, a pre-flow of 0.5 to 1 second is generally sufficient.
Post-Flow
What it is: Post-flow is the amount of time your shielding gas continues to flow *after* the welding arc is extinguished.
Why it’s important: This is arguably even more critical than pre-flow for mild steel. As the molten weld pool solidifies, it’s still extremely hot and vulnerable to oxidation. Post-flow keeps the shielding gas flowing over the cooling weld bead, preventing it from oxidizing and discolouring. It also helps to cool the tungsten electrode.
Recommended Settings: For mild steel, aim for a post-flow of 5 to 10 seconds. If you notice your welds have a bluish or rainbow-like discoloration after welding (not just a slight heat tint), you likely need to increase your post-flow time. If you’re using a gas lens, you might be able to get away with slightly shorter post-flow times due to more efficient coverage.
Practical Tips for Optimal Gas Usage
Here are some actionable tips to ensure you’re getting the most out of your shielding gas when TIG welding mild steel:
- Use a Gas Lens: Seriously, if you can, invest in a gas lens kit for your TIG torch. It’s a game-changer for gas coverage and weld quality, allowing for more torch standoff distance and better protection.
- Keep Your Cups Clean: A dirty or spattered gas cup can disrupt the gas flow and lead to inadequate shielding. Clean it regularly.
- Watch for Drafts: Welding near open doors, fans, or vents can blow your shielding gas away. If you can’t control the environment, increase your gas flow rate and consider using a larger cup or a gas lens.
- Listen to Your Arc: A sputtering or “lazy” arc can indicate insufficient gas coverage. A very “hard” or noisy arc might suggest too much gas causing turbulence.
- Observe Your Weld Puddle: A clean, bright weld puddle is a good sign of proper shielding. A dull, grey, or visibly oxidizing puddle is a warning.
- Check Your Tungsten: If your tungsten electrode is eroding quickly or looks balled up, it could be a sign of poor shielding gas or contamination.
- Purge Your Lines: Before welding, briefly run gas through the torch to purge any air from the hose and torch assembly.
- Maintain Proper Torch Standoff: Keep your gas cup at a consistent distance from the workpiece. Too close can restrict gas flow, and too far reduces its effectiveness.
Troubleshooting Common Gas-Related Issues
Even with the best intentions, you might run into problems. Here’s how to troubleshoot issues that are often related to shielding gas:
Issue 1: Porosity (Tiny holes or bubbles in the weld)
Possible Causes & Solutions:
- Insufficient Gas Flow: Increase your CFH/LPM.
- Drafts: Shield the area or increase gas flow.
- Leak in Gas System: Check all connections for leaks.
- Dirty Workpiece: Ensure your mild steel is clean and free of oil, rust, or paint.
- Contaminated Filler Rod: Use clean filler rods.
- Incorrect Pre-flow/Post-flow: Increase post-flow time.
- Turbulent Gas Flow: Reduce gas flow slightly if it’s too high, or consider a gas lens.
Issue 2: Discoloration (Blue, yellow, or rainbow hues on the weld and heat-affected zone)
Possible Causes & Solutions:
- Insufficient Post-Flow: Increase post-flow time significantly. This is the most common cause for discoloration on mild steel.
- Drafts: Shield the weld area.
- Dirty Workpiece: Clean the steel thoroughly.
- Low Gas Flow: Ensure adequate flow rate for your cup.
Issue 3: Erratic or Unstable Arc
Possible Causes & Solutions:
- Gas Leak: Check for leaks in your regulator, hose, or torch connections.
- Too Much Gas Flow: Excessive flow can cause turbulence. Reduce your CFH/LPM.
- Contamination: Ensure your tungsten is clean and sharp, and the workpiece is free of contaminants.
- Incorrect Tungsten Type/Grind: Ensure you’re using the correct tungsten for DC welding (e.g., pure or zirconiated for steel) and that it’s properly ground to a point.
Issue 4: Tungsten Contamination
Possible Causes & Solutions:
- Insufficient Gas Flow: The tungsten dipped into the puddle. Increase gas flow.
- Torch Too Close: Increase your standoff distance.
- Drafts: Shield the weld.
- Electrode Not Centered in Cup: Ensure your collet and gas lens are properly seated.
Conclusion: Gas is Your Ally
Shielding gas is not just an accessory to your TIG welding setup; it’s a fundamental component for achieving high-quality welds on mild steel. By understanding the role of argon, setting your flow rates correctly, and paying attention to pre-flow and post-flow, you’re setting yourself up for success.
Remember, patience and practice are key. Experiment with your settings, observe the results, and don’t be afraid to adjust. As you gain experience, you’ll develop an intuitive feel for what your shielding gas is doing, leading to consistently cleaner, stronger, and more aesthetically pleasing TIG welds on all your mild steel projects. Happy welding!