

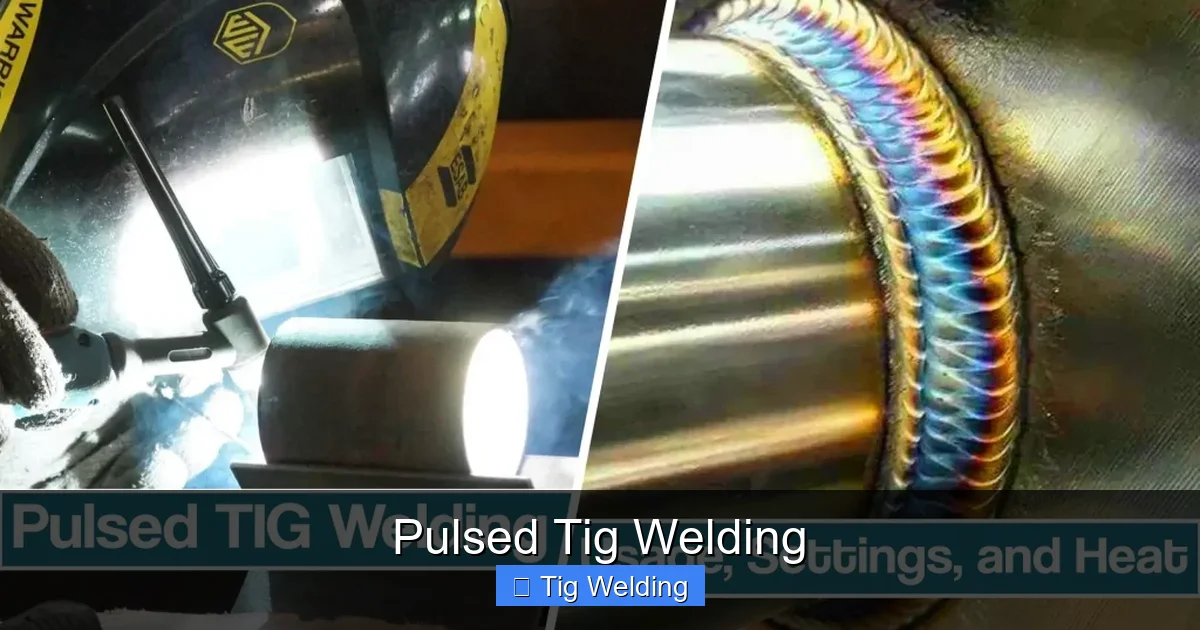
Pulsed TIG welding offers enhanced control over heat input, making it ideal for thin materials, out-of-position welding, and achieving beautiful, consistent ripples. This guide provides a step-by-step approach to mastering pulsed TIG, covering essential settings, techniques, and troubleshooting for achieving superior weld quality and appearance. Learn how to harness the power of pulsed TIG for your most demanding projects.
Pulsed TIG Welding: Your Complete How-To Guide
Welcome to the world of Pulsed TIG welding! If you’re looking to elevate your TIG welding game, you’ve come to the right place. Pulsed TIG welding isn’t just a fancy setting on your machine; it’s a powerful technique that unlocks a new level of control, precision, and aesthetic appeal in your welds. Whether you’re working with delicate, thin materials, tackling challenging out-of-position joints, or simply striving for those perfectly uniform, “stack of dimes” ripples, pulsed TIG welding can help you achieve it.
In this comprehensive guide, we’ll demystify the concept of pulsed TIG welding. You’ll learn what it is, how it works, and why it’s such a valuable tool in any welder’s arsenal. We’ll walk you through the essential settings you need to understand, provide step-by-step instructions on how to implement the technique, and offer practical tips to help you master it. By the end of this guide, you’ll be well-equipped to harness the benefits of pulsed TIG welding for your most demanding projects.
Key Takeaways
- Understanding the Pulse: Pulsed TIG welding alternates between a high peak current and a lower background current, offering superior heat management and penetration control.
- Setting Parameters is Crucial: Correctly setting peak amperage, background amperage, pulse frequency, and pulse width is vital for achieving desired weld characteristics.
- Material Matters: Different materials require varying pulse settings; thinner metals and heat-sensitive alloys benefit significantly from the controlled heat of pulsed TIG.
- Technique is Key: A steady travel speed, proper torch angle, and controlled filler rod manipulation are essential for success with pulsed TIG welding.
- Visual Cues Guide You: Observing the puddle size, the formation of ripples, and the electrode distance provides critical feedback for adjusting your technique and settings in real-time.
- Troubleshooting Common Issues: Understanding potential problems like porosity, undercut, or poor fusion allows for quick identification and correction of welding errors.
What is Pulsed TIG Welding?
TIG welding, also known as Gas Tungsten Arc Welding, is renowned for its cleanliness, precision, and ability to produce high-quality welds on a vast range of metals. Pulsed TIG welding is a variation of this process that introduces a pulsing effect to the electrical current. Instead of a constant, steady current, the amperage cycles between a high “peak” current and a lower “background” current.
This rapid alternation of high and low amperage is the heart of pulsed TIG welding. The peak amperage provides the heat necessary for melting and fusion, while the background amperage maintains the arc and allows the weld puddle to cool and solidify slightly. This cyclical process results in significantly better heat control compared to standard TIG welding.
Why Use Pulsed TIG Welding?
The controlled heat input offered by pulsed TIG welding opens up a world of advantages:
Visual guide about Pulsed Tig Welding
Image source: megmeet-welding.com
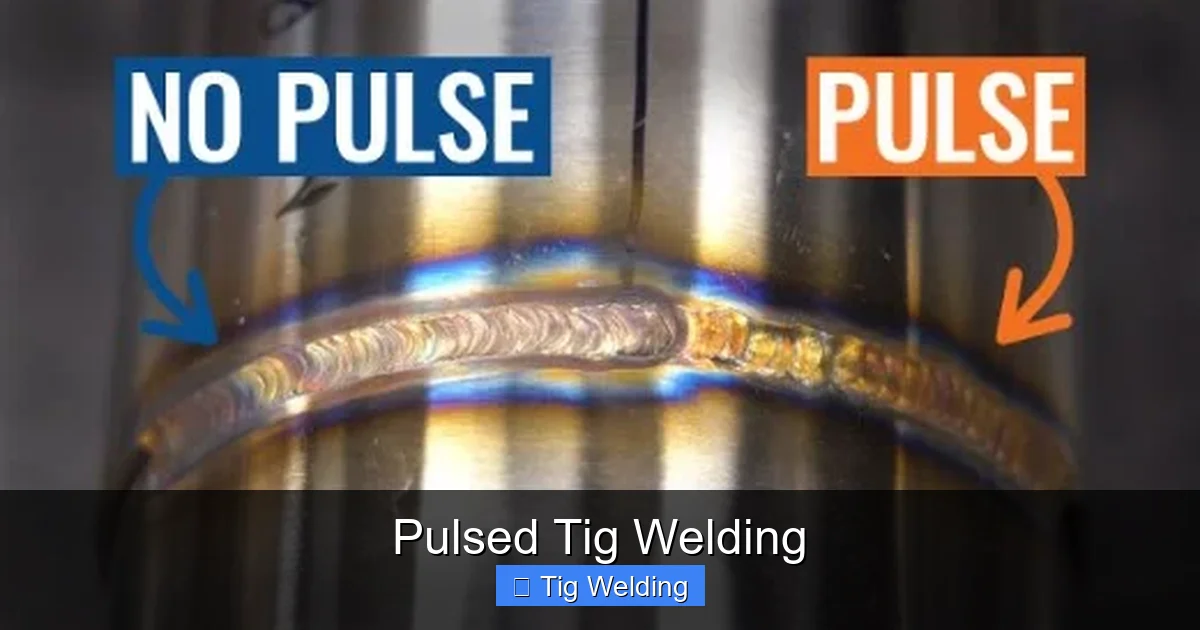
- Superior Heat Management: This is the primary benefit. By reducing the overall heat input, pulsed TIG minimizes the risk of burn-through, warping, and distortion, especially on thin materials.
- Enhanced Puddle Control: The cooling phase during the background amperage allows the weld puddle to solidify slightly. This makes it easier to control the puddle, particularly in out-of-position welding (like vertical up or overhead) or when bridging gaps.
- Improved Penetration Control: You can achieve deeper penetration during the peak amperage phase without overheating the base metal, thanks to the cooling effect of the background amperage.
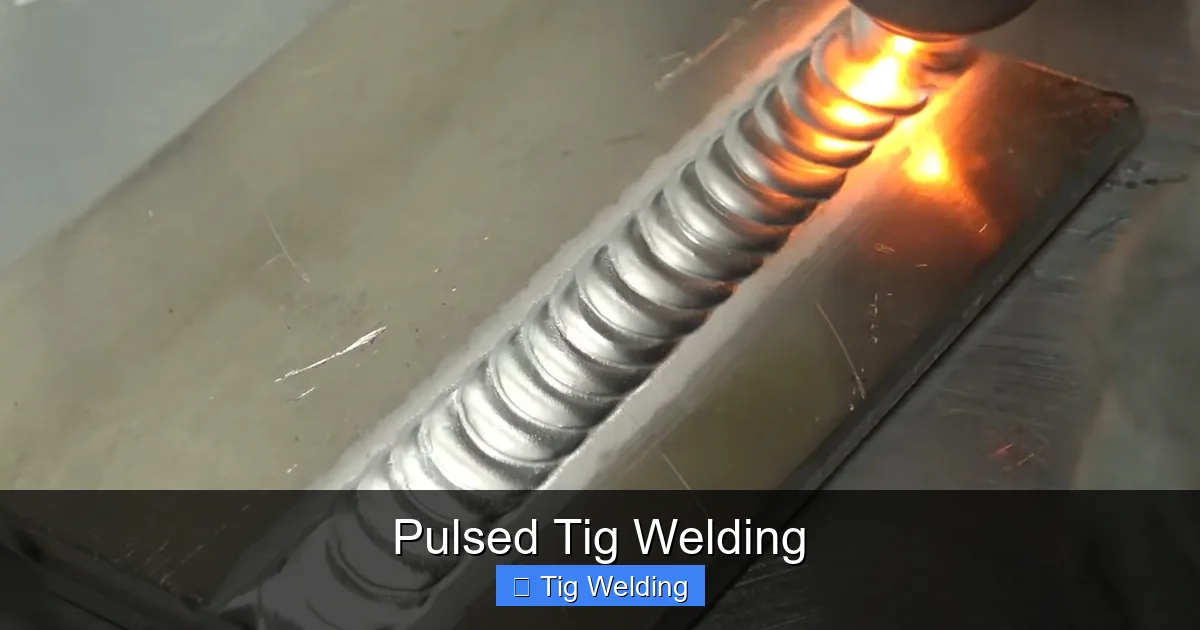
- Aesthetic Appeal: The rhythmic pulsing creates visually appealing, uniform ripples on the weld surface, often referred to as the “stack of dimes” look.
- Reduced Tungsten Contamination: Better heat control generally leads to less tungsten from the electrode melting into the weld puddle.
- Reduced Spatter: While TIG welding is already known for low spatter, pulsed TIG can further minimize it due to the controlled melting.
Understanding the Key Pulse Settings
To effectively use pulsed TIG welding, you need to understand the main parameters that control the pulsing action. These settings will vary depending on your welding machine, but they generally include:
Visual guide about Pulsed Tig Welding
Image source: weldingofwelders.com
1. Peak Amperage
This is the high current setting during the pulse cycle. It provides the necessary heat to melt the base metal and the filler material. A higher peak amperage will result in deeper penetration and a wider bead. It’s the “digging” phase of the pulse.
2. Background Amperage
This is the low current setting that your machine drops to during the pulse cycle. Its primary purpose is to maintain the arc and allow the weld puddle to cool and solidify slightly. It also contributes to overall penetration without excessive heat input. A lower background amperage reduces overall heat, while a higher one increases it.
3. Pulse Frequency (Hz)
Frequency refers to how many times per second the current cycles between peak and background amperage. It’s measured in Hertz (Hz).
- Low Frequency (0.5-5 Hz): Results in distinct, widely spaced ripples. This is great for achieving a very pronounced “stack of dimes” look and provides ample cooling time between pulses, making it ideal for thicker materials or when precise puddle control is paramount.
- Medium Frequency (5-20 Hz): Offers a good balance between ripple definition and travel speed. It’s a versatile range suitable for many applications.
- High Frequency (20-200+ Hz): Produces very fine, tightly spaced ripples that can almost appear smooth. This range is excellent for thin materials where rapid cooling is beneficial, and it allows for faster travel speeds. It can also help narrow the arc for precise work.
4. Pulse Width (Duty Cycle or Peak Time)
Pulse width, sometimes called duty cycle or peak time, determines the percentage of time the welding machine spends at the peak amperage versus the background amperage within a single pulse cycle. It’s usually expressed as a percentage (e.g., 50%).
- Higher Pulse Width (e.g., 70-80%): More time is spent at peak amperage, leading to more heat input, deeper penetration, and wider beads.
- Lower Pulse Width (e.g., 30-40%): Less time is spent at peak amperage, resulting in less heat input, shallower penetration, and a narrower bead. This is useful for thin materials or when you want to minimize heat.
Step-by-Step Guide to Pulsed TIG Welding
Now that you understand the settings, let’s get hands-on. Follow these steps to start pulsed TIG welding:
Visual guide about Pulsed Tig Welding
Image source: i.ytimg.com
Step 1: Prepare Your Materials and Machine
Just like any welding process, proper preparation is key.
Sub-step 1.1: Cleanliness is Paramount
Ensure your base metal is thoroughly cleaned. Remove any rust, paint, oil, or other contaminants using a stainless steel wire brush and appropriate solvents. Contamination leads to weld defects.
Sub-step 1.2: Set Up Your TIG Welder
Turn on your TIG welder. Ensure your shielding gas (typically Argon) is connected and the flow rate is set correctly (usually around 10-20 CFH, depending on your setup and environment).
Sub-step 1.3: Select the Right Tungsten Electrode
For DC welding (like steel or stainless steel), a 2% Thoriated or Ceriated tungsten is common. For AC welding (aluminum), pure or Zirconiated tungsten is often used. Grind the tungsten to a sharp point for DC welding; a slightly rounded tip is preferred for AC.
Sub-step 1.4: Set Up Your Torch
Install the correct collet and gas lens for your tungsten size. A gas lens provides a smoother, wider shield gas coverage, which is beneficial for pulsed TIG.
Step 2: Dial in Your Pulse Settings
This is where the magic happens. The “perfect” settings depend heavily on the material thickness, type, and joint configuration.
Sub-step 2.1: Start with Recommended Settings
Consult your TIG welder’s manual or welding charts for recommended pulsed TIG settings for your specific material and thickness. These are excellent starting points.
Sub-step 2.2: Set Amperage
Start by setting your overall amperage control for the desired weld bead size. Then, adjust the peak and background amperage. A common starting point is to set the background amperage at 30-50% of the peak amperage.
Example: For welding 1/8″ mild steel, you might aim for an average amperage of 100 amps. You could set your peak amperage to 130 amps and your background amperage to 40 amps (which is approximately 30% of 130). The machine will then cycle between 130A and 40A.
Sub-step 2.3: Set Pulse Frequency
For a classic “stack of dimes” look, start with a lower frequency, perhaps 1-3 Hz. For thinner materials or faster welding, increase the frequency to 10-20 Hz or higher.
Sub-step 2.4: Set Pulse Width
A common starting point for pulse width is 50%. This means the current spends equal time at peak and background amperage. For more heat, increase it; for less heat, decrease it.
Step 3: Practice Your Technique
Settings are only half the battle. Your technique is crucial.
Sub-step 3.1: Torch Angle and Stickout
Maintain a consistent torch angle, usually between 10-15 degrees leaning in the direction of travel. Keep your tungsten stickout consistent, typically about 1/4″ to 3/8″.
Sub-step 3.2: Filler Rod Manipulation
Dip the filler rod into the leading edge of the weld puddle during the peak amperage phase, and withdraw it slightly during the background amperage phase. This controlled feeding of the filler rod is essential for creating uniform ripples and managing the puddle.
Tip: Think of it like tapping the filler rod into the puddle. The timing is key; you want to add filler when the puddle is molten and give it a moment to cool and solidify.
Sub-step 3.3: Travel Speed
Maintain a steady travel speed. The speed at which you move the torch will influence the width and appearance of your ripples. Aim to match your travel speed to the pulse frequency and your filler rod addition.
Sub-step 3.4: Arc Length
Maintain a consistent, short arc length. This helps with focused heat and better shielding gas coverage.
Step 4: Observe and Adjust
Welding is an iterative process. Pay close attention to what the weld puddle is telling you.
Sub-step 4.1: Watch the Puddle
The weld puddle is your best indicator. During the peak amperage, it should be molten and ready for filler. During the background amperage, it should solidify slightly, helping you control its shape.
Sub-step 4.2: Listen to the Arc
The sound of the arc can also provide feedback. A consistent, sharp “buzz” is usually good. Crackling or popping might indicate an issue with gas coverage or arc length.
Sub-step 4.3: Fine-Tune Your Settings
If your puddle is too large and runny, reduce the peak amperage, decrease the pulse width, or lower the frequency. If you’re not getting enough fusion or the puddle isn’t forming well, increase the peak amperage, pulse width, or frequency.
Example Adjustment: If you’re getting excessive heat and warping on thin aluminum, try lowering your peak amperage, reducing your pulse width (less time at high heat), and increasing your pulse frequency (faster cooling cycles).
Practical Tips for Pulsed TIG Welding
- Start on Scrap Metal: Always practice on scrap pieces of the same material and thickness you’ll be welding.
- Thinner Materials Benefit Most: Pulsed TIG is particularly advantageous for materials under 1/8″ (3mm) thick.
- Out-of-Position Welding: The controlled solidification phase of pulsed TIG makes it a game-changer for vertical, overhead, and horizontal welding.
- Material-Specific Tuning: Stainless steel often requires slightly different settings than mild steel. Aluminum, being a highly conductive metal, benefits greatly from pulsed TIG to manage heat.
- Experiment with Frequency: Different frequencies produce very different ripple aesthetics. Find the frequency that gives you the look you desire and the control you need.
- Don’t Neglect the Basics: Even with pulsed TIG, good joint preparation, proper shielding gas, and clean tungsten are non-negotiable.
Troubleshooting Common Pulsed TIG Welding Issues
Even with pulsed TIG, you might encounter problems. Here’s how to address them:
Issue: Porosity (Tiny holes in the weld)
Cause: Insufficient shielding gas, contaminated filler rod or base metal, dirty tungsten.
Solution: Ensure proper gas flow and coverage. Thoroughly clean your materials. Check your tungsten for contamination.
Issue: Undercut (A groove along the edge of the weld)
Cause: Too much amperage, too fast travel speed, improper torch angle.
Solution: Reduce peak amperage, slow down your travel speed, ensure a consistent torch angle.
Issue: Lack of Fusion (The weld metal doesn’t fully bond with the base metal)
Cause: Not enough heat, too fast travel speed, improper filler rod placement.
Solution: Increase peak amperage, slow down travel speed, ensure you’re adding filler rod to the molten puddle effectively.
Issue: Burn-Through (Hole melted through the material)
Cause: Too much amperage, too slow travel speed, especially on thin materials.
Solution: Reduce peak amperage, increase travel speed, and consider reducing pulse width or increasing frequency for faster cooling.
Issue: Irregular Ripples or Weld Appearance
Cause: Inconsistent filler rod addition, unstable travel speed, incorrect pulse settings.
Solution: Focus on a steady rhythm with your filler rod. Maintain a consistent torch movement. Experiment with pulse frequency and width to achieve uniformity.
Conclusion
Pulsed TIG welding is a sophisticated yet incredibly beneficial technique that can significantly enhance your welding capabilities. By mastering the pulse settings and practicing a consistent technique, you can achieve cleaner, stronger, and more aesthetically pleasing welds, especially on challenging materials and applications. Don’t be intimidated by the extra controls; view them as tools that give you greater command over your heat input and puddle dynamics.
Remember to always prioritize safety, practice diligently, and observe the feedback your weld puddle provides. With patience and practice, you’ll soon be creating beautiful, high-quality pulsed TIG welds that will impress even the most discerning eye. Happy welding!
