


This guide offers a thorough introduction to TIG welding, also known as GTAW. You’ll learn about the necessary equipment, crucial safety precautions, and the fundamental techniques required to produce high-quality welds. From setting up your machine to mastering the art of torch movement and filler rod manipulation, this guide provides step-by-step instructions and practical tips to help you become proficient in TIG welding.
Learn TIG Welding
Welcome to your comprehensive guide to learning TIG welding! If you’re looking to create beautiful, strong, and precise welds on a wide range of metals, TIG (Tungsten Inert Gas) welding is an excellent skill to develop. Often referred to as GTAW (Gas Tungsten Arc Welding), TIG welding is known for its control and the high-quality finish it produces. It’s used in industries where precision is paramount, like aerospace, automotive, and even intricate artistic metalwork. This guide will walk you through everything you need to know, from the basic principles to practical techniques. By the end, you’ll have a solid foundation to start your TIG welding journey.
Key Takeaways
- Understand TIG Fundamentals: Grasp the core principles of TIG welding, including its ability to create precise and clean welds on a variety of metals.
- Essential Equipment: Identify and understand the purpose of critical TIG welding equipment such as the TIG welder, torch, tungsten electrodes, filler rods, and shielding gas.
- Prioritize Safety: Learn about vital safety gear and practices, including proper ventilation, eye protection, and protective clothing to prevent injuries.
- Master Torch Control: Develop the dexterity required for independent torch and filler rod manipulation, a hallmark of effective TIG welding.
- Tungsten Grinding and Selection: Understand how to properly prepare your tungsten electrode and choose the correct type for different welding applications.
- Shielding Gas Importance: Recognize the crucial role of shielding gas in protecting the weld puddle from atmospheric contamination for strong, porosity-free welds.
- Practice Makes Perfect: Emphasize the importance of consistent practice on scrap materials to build muscle memory and refine your TIG welding skills.
What is TIG Welding?
TIG welding is an arc welding process that uses a non-consumable tungsten electrode to produce the weld. An inert shielding gas, typically argon, is used to protect the weld area from contamination. A separate filler material is often used, which the welder manually feeds into the weld puddle. This allows for exceptional control over the heat input and the amount of filler metal added, resulting in clean, precise, and aesthetically pleasing welds. TIG welding is versatile and can be used on various metals, including steel, stainless steel, aluminum, titanium, and copper alloys.
Essential TIG Welding Equipment
Before you can start TIG welding, you need the right equipment. Here’s a breakdown of the essentials:

Visual guide about Learn Tig Welding
Image source: i.ytimg.com
1. TIG Welder
This is the heart of your TIG setup. TIG welders come in various types:
- AC/DC Welders: These are the most versatile, allowing you to weld both ferrous (like steel) and non-ferrous metals (like aluminum). AC is primarily used for aluminum and magnesium, while DC is used for steel, stainless steel, and titanium.
- DC Only Welders: More affordable, these are suitable for welding steel, stainless steel, and other DC-compatible metals. They are not ideal for aluminum.
For beginners, an AC/DC welder offers the most flexibility. Look for machines with adjustable amperage, pulse settings (which can help with heat control), and high-frequency start to ignite the arc without touching the tungsten to the workpiece.
2. TIG Torch
The TIG torch is what you hold. It houses the tungsten electrode and delivers the shielding gas. Torches come in different sizes (e.g., 9, 17, 26), with larger torches typically handling higher amperage. They have a gas lens that helps direct the shielding gas flow smoothly.
3. Tungsten Electrodes
These are the non-consumable rods that create the arc. They are made of tungsten, a metal with a very high melting point. Tungsten electrodes come in different types, identified by color coding, which indicates the addition of other elements that affect their performance:
- Pure Tungsten (Green): Primarily used for AC welding of aluminum and magnesium.
- 2% Thoriated Tungsten (Red): A popular all-around choice for DC welding of steel and stainless steel. Offers good arc stability and ease of starting.
- 2% Ceriated Tungsten (Orange): Good for both AC and DC welding, offers good arc stability and is a good alternative to thoriated tungsten.
- Lanthanated Tungsten (Blue/Gold): Excellent all-around performers, good for both AC and DC, easy arc starting, and long life.
The tip of the tungsten needs to be ground to a sharp point for DC welding to concentrate the arc. For AC welding of aluminum, the tip is typically ground to a ball shape.
4. Filler Rods
These are the rods you add to the molten weld puddle to build up the weld bead. They are made of the same or a similar material to the base metal you are welding. You’ll need to match the filler rod to your base material. For example, use 4043 or 5356 aluminum filler rod for welding aluminum.
5. Shielding Gas
This is crucial for TIG welding. Inert gases prevent oxygen and nitrogen from the air from entering the molten weld pool, which would cause porosity (tiny holes) and weaken the weld. The most common shielding gas for TIG welding is:
- Argon: Ideal for most TIG applications, especially aluminum and stainless steel.
- Helium: Sometimes mixed with argon to increase heat input, useful for thicker materials or out-of-position welding.
- Argon/CO2 Mixes: More common in MIG welding, not typically used for TIG.
You’ll need a gas cylinder regulator to control the flow rate.
6. Safety Gear
Safety is paramount. You’ll need:
- Welding Helmet: With an auto-darkening lens is highly recommended.
- Welding Gloves: Made of leather or other heat-resistant material.
- Welding Jacket or Apron: To protect your skin and clothing from sparks and heat.
- Safety Glasses: To wear under your helmet.
- Steel-Toed Boots: Always.
- Proper Ventilation: Welding fumes can be harmful. Work in a well-ventilated area or use fume extraction.
Safety First: The Non-Negotiable Rules
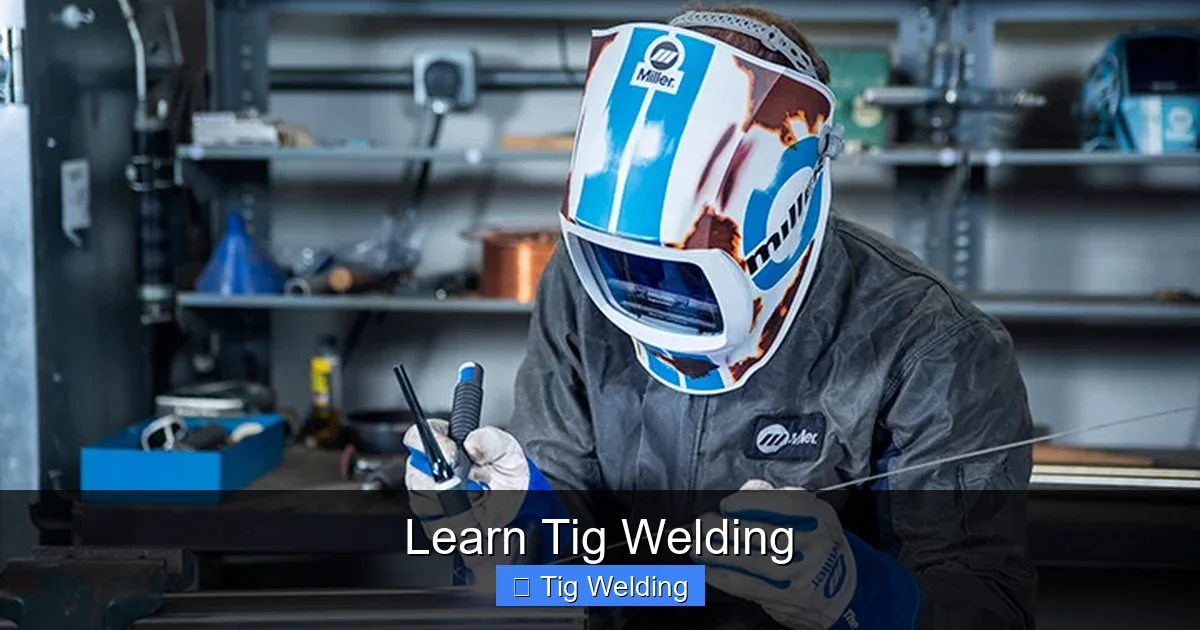
Before you strike an arc, let’s talk about safety. TIG welding involves high temperatures, intense UV light, and potentially harmful fumes. Ignoring safety can lead to severe injuries.
Visual guide about Learn Tig Welding
Image source: millerwelds.com
1. Protect Your Eyes
The arc from TIG welding is incredibly bright and emits harmful UV rays. Without protection, you can get arc flash, which feels like severe sunburn on your eyes and can cause temporary or permanent vision damage. Always wear your auto-darkening welding helmet with the correct shade level for TIG welding (typically shade 10-12).
2. Protect Your Skin
Sparks and molten metal can cause serious burns. Wear flame-resistant clothing, a welding jacket, leather gloves, and closed-toe shoes. Avoid synthetic materials like polyester, which can melt onto your skin.
3. Ventilation is Key
Welding produces fumes and gases. Some metals, like galvanized steel, release toxic fumes when heated. Ensure you’re welding in a well-ventilated area. If natural ventilation isn’t sufficient, consider using a fume extraction system.
4. Know Your Machine
Understand how your TIG welder works, its settings, and its limitations. Read the owner’s manual thoroughly.
Getting Started: Setting Up Your TIG Welder
Once you have your equipment, it’s time to set it up. This involves connecting everything correctly and setting your machine parameters.
Visual guide about Learn Tig Welding
Image source: i.ytimg.com
1. Connect Your Gas
Attach the gas regulator to your argon cylinder. Connect the other end of the regulator hose to the TIG welder’s gas inlet. Ensure all connections are secure.
2. Prepare Your Tungsten
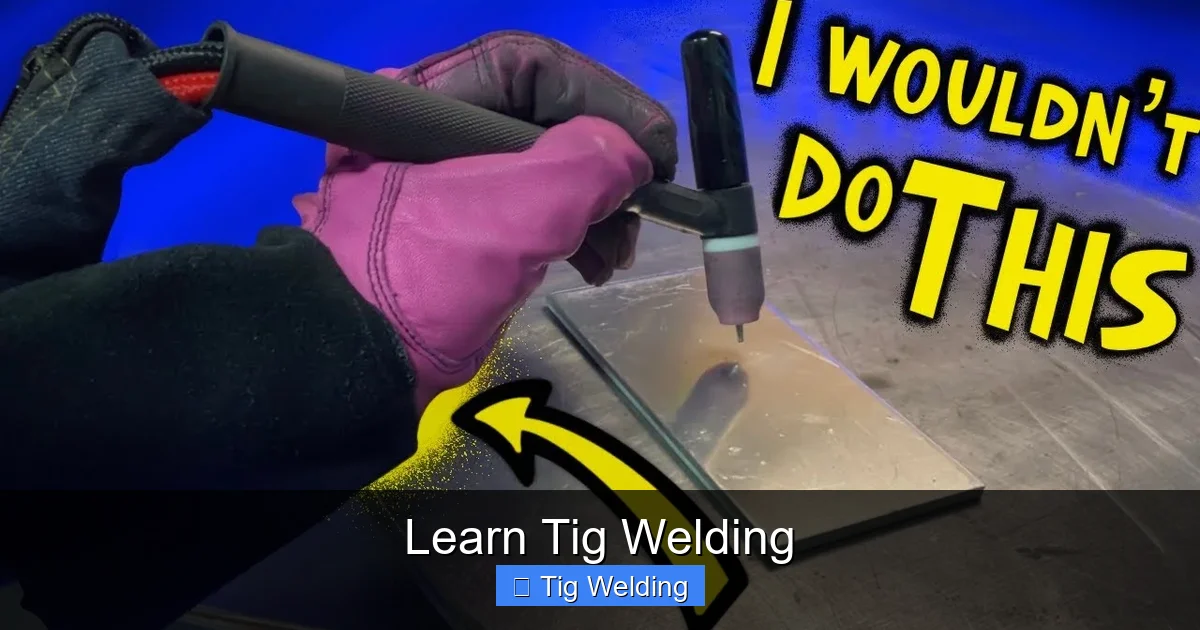
This is a crucial step for a good arc. For DC welding (steel, stainless steel), grind your tungsten electrode to a sharp, cone-like point. Use a dedicated grinder for tungsten to avoid contaminating it with other metals. For AC welding (aluminum), grind the tungsten to a ball shape at the tip. Ensure your tungsten electrode is the correct diameter for your machine’s amperage rating.
3. Install Tungsten and Gas Nozzle
Insert the ground tungsten electrode into your TIG torch collet, leaving about a quarter-inch exposed. Secure it with the collet nut. Attach the ceramic gas nozzle to the front of the torch. The nozzle directs the shielding gas flow. A smaller nozzle opening concentrates the gas better, but a larger one offers a wider coverage area.
4. Set Your Amperage
Amperage controls the heat of the arc. The correct amperage depends on the thickness and type of metal you’re welding. A general rule of thumb for mild steel is about 1 amp per thousandth of an inch of thickness. For example, 1/8-inch (0.125 inches) steel would be around 125 amps. Always start with lower amperage and adjust as needed.
5. Set Your Gas Flow Rate
For a typical TIG setup, a gas flow rate of 15-25 cubic feet per hour (CFH) is common. Too little gas won’t provide adequate protection, leading to porosity. Too much gas can create turbulence, drawing in air and causing contamination, or can even be blown away from the weld puddle.
Fundamental TIG Welding Techniques
TIG welding requires coordination between your torch hand, your filler rod hand (if used), and your foot pedal (if applicable). Mastering these techniques takes practice.
1. The Grip
Hold the TIG torch like you would a pencil, but with a relaxed grip. Your index finger should be free to manipulate the filler rod. Many welders use their thumb and index finger to control the torch angle and height.
2. Torch Angle and Distance
Maintain a consistent torch angle, typically around 70-80 degrees relative to the surface of the metal. Keep the arc length short – the distance between the tungsten tip and the workpiece should be about the diameter of the tungsten electrode. A shorter arc provides more control and a tighter weld bead.
3. Arc Ignition
Most modern TIG welders have a high-frequency start, which ignites the arc without touching the tungsten to the workpiece. This prevents tungsten contamination. If your machine doesn’t have HF start, you’ll use a “scratch start” method, gently scratching the tungsten against the metal like starting a gas lighter. Be prepared to lift the tungsten immediately to establish the arc.
4. Introducing the Filler Rod
If you’re using filler material, you’ll need to feed it into the leading edge of the molten weld puddle. The key is to keep the tip of the filler rod within the shielding gas stream to prevent contamination. Avoid dipping the filler rod into the weld puddle directly; instead, “dab” it in and pull it out, allowing it to melt and fuse with the base metal.
5. Foot Pedal Control
If your TIG welder has a foot pedal, it controls the amperage. This is where TIG welding really shines in terms of heat control. You can gradually increase amperage as you start the weld, maintain it, and then reduce it as you finish. Practicing with the foot pedal to control heat is crucial for preventing burn-through or incomplete fusion.
6. Creating a Weld Bead: The “Dab and Move” Technique
For beginners, a common technique is the “dab and move” or “rocking” method. This involves:
- Establishing the arc.
- Dabbing the filler rod into the leading edge of the molten puddle.
- Moving the torch slightly forward.
- Dabbing the filler rod again.
- Repeat this motion rhythmically.
With practice, this motion becomes fluid, creating a consistent weld bead.
Practicing Your TIG Welding Skills
Learning TIG welding is a skill that develops over time. Dedicate time to practice on scrap materials. Here are some practice exercises:
1. Butt Welds on Flat Plate
Start with two pieces of thin metal (e.g., 1/16-inch or 1/8-inch steel) butted up against each other. Practice creating a consistent weld bead along the joint. Focus on maintaining a steady arc length, torch angle, and consistent filler rod application.
2. Fillet Welds
Weld two pieces of metal at a 90-degree angle. This teaches you to control the heat and filler placement on two different planes.
3. Lap Welds
Overlap two pieces of metal and weld along the edge. This is a good way to practice controlling heat to avoid warping the thinner piece.
4. Practice Different Metals and Thicknesses
Once you’re comfortable, move on to stainless steel, then aluminum. Each metal has its own characteristics and requires slight adjustments to your settings and technique.
Troubleshooting Common TIG Welding Issues
Even experienced welders encounter issues. Here are some common problems and their solutions:
1. Porosity (Weld Puddles with Holes)
Cause: Inadequate shielding gas, contaminated filler rod or base metal, dirty tungsten.
Solution: Increase gas flow slightly, ensure gas lens is clean and functioning, clean your filler rod and base metal thoroughly before welding, check tungsten integrity.
2. Tungsten Inclusions (Pieces of Tungsten in the Weld)
Cause: Touching the tungsten to the weld puddle, arc too long, insufficient shielding gas.
Solution: Maintain a consistent, short arc length, ensure proper gas coverage, avoid dipping the tungsten.
3. Excessive Spatter
Cause: Often related to DC welding on steel, can be due to incorrect polarity, arc length, or amperage.
Solution: Ensure correct polarity (electrode negative for steel), shorten your arc, and adjust amperage. Clean your tungsten tip.
4. Burn-Through
Cause: Too much amperage, moving too slowly, welding too long in one spot.
Solution: Reduce amperage, increase travel speed, practice with the foot pedal to control heat pulses.
5. Undercut
Cause: Arc too close to the base metal, too much amperage, excessive filler rod added too quickly.
Solution: Move the arc slightly away from the edge of the weld bead, reduce amperage, or slow down filler rod addition.
Conclusion
Learning TIG welding is a rewarding endeavor that opens up a world of precision metal fabrication. It demands patience, practice, and a commitment to safety. By understanding your equipment, prioritizing safety, mastering fundamental techniques, and dedicating time to practice, you’ll be well on your way to producing beautiful, strong TIG welds. Don’t be discouraged by initial challenges; every weld is a learning opportunity. Keep practicing, keep experimenting, and you’ll soon be creating impressive metalwork with your TIG welder.
