

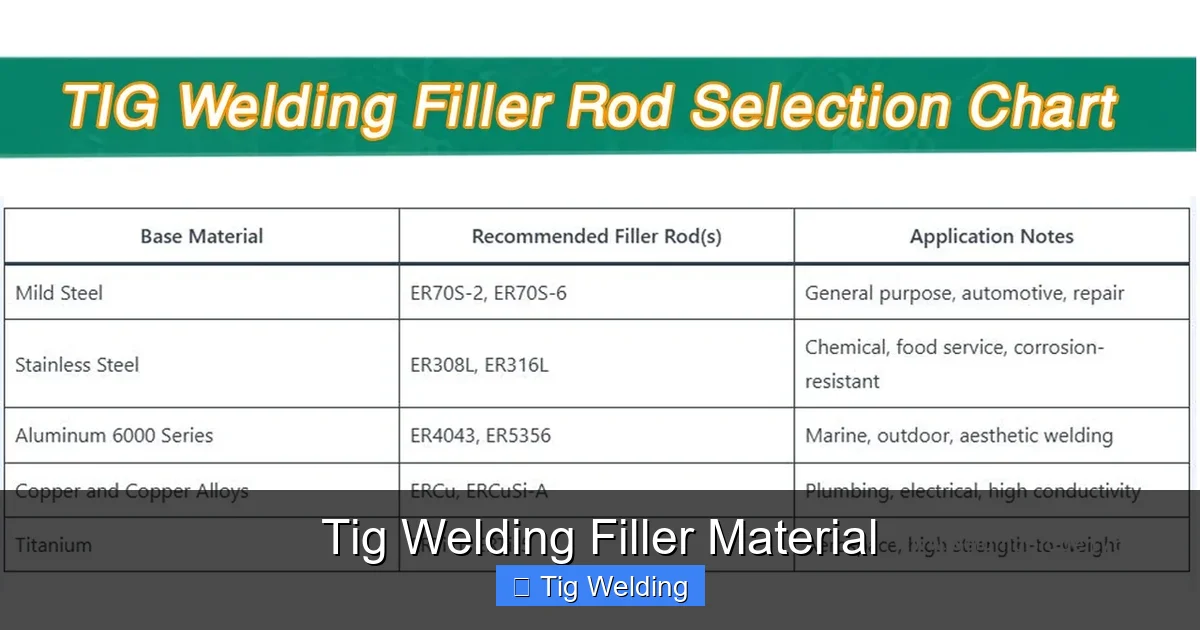
Choosing the right TIG welding filler material is crucial for strong, high-quality welds. This comprehensive guide breaks down the factors influencing your choice, from base metal compatibility to desired weld characteristics. Learn how to select, handle, and effectively use various filler metals for successful TIG welding projects.
Key Takeaways
- Base Metal Compatibility is Paramount: Always match your filler metal to the base metal being welded to ensure proper fusion and prevent weld defects.
- Filler Metal Forms and Diameters Matter: Filler rods are the most common, with diameter chosen based on joint thickness and welding amperage.
- Understanding Alloying Elements is Key: Different alloying elements in filler metals provide specific properties like increased strength, corrosion resistance, or weldability.
- Proper Filler Metal Handling Prevents Contamination: Keep filler rods clean and store them properly to avoid introducing impurities that can weaken the weld.
- Technique Dictates Filler Addition: Consistent and controlled addition of filler material is vital for building a smooth, even bead.
- Troubleshooting Common Issues: Understanding potential problems like porosity or lack of fusion helps in selecting and applying the correct filler.
Tig Welding Filler Material: Your Essential Guide to Perfect Welds
Welcome to our in-depth guide on TIG welding filler material! If you’re looking to achieve strong, clean, and aesthetically pleasing welds with your TIG torch, understanding filler material is your next crucial step. Many beginners focus heavily on the TIG torch and shielding gas, often overlooking the vital role of the filler rod. But here’s the truth: the right filler material, used correctly, is the secret ingredient to transforming your TIG welds from good to exceptional.
In this guide, we’ll demystify the world of TIG welding filler materials. You’ll learn exactly what to look for when making your selection, how to properly handle and store these essential components, and the techniques for adding them to your weld pool with precision. We’ll cover common materials like steel, stainless steel, aluminum, and exotic alloys, and explain which filler metals work best with each. Get ready to elevate your TIG welding skills and build confidence in your ability to tackle any project.
What is TIG Welding Filler Material?
At its core, TIG welding filler material is a consumable metal that you add to the weld puddle to create a stronger, more complete joint. Unlike some other welding processes where filler is automatically supplied, TIG welding requires you to manually feed the filler material into the molten pool. This manual control is what gives TIG its reputation for precision and control, but it also means you need to understand the filler material itself.
Filler materials come in various forms, but the most common for TIG welding is the filler rod. These rods are essentially solid wires of metal, designed to match the composition of the base metal you are welding, or to enhance specific properties of the final weld. Think of it like adding a specific type of glue to join two pieces of wood; you need the right glue for the job, and you need to apply it effectively.
Why Does Filler Material Selection Matter So Much?
Choosing the incorrect filler material is a recipe for disaster. It can lead to a variety of weld defects, including:
- Cracking: The weld might be brittle and prone to fracturing, especially under stress.
- Corrosion: If welding stainless steel or other corrosion-resistant alloys, the wrong filler can compromise the protective properties.
- Lack of Fusion: The filler may not properly bond with the base metal, creating a weak joint.
- Porosity: Tiny gas pockets can form within the weld, weakening it.
- Poor Mechanical Properties: The weld might not be as strong as the base metal, failing under load.
Therefore, understanding your base metal and its properties is the first, and arguably most important, step in selecting the correct TIG welding filler material.
Selecting the Right TIG Welding Filler Material
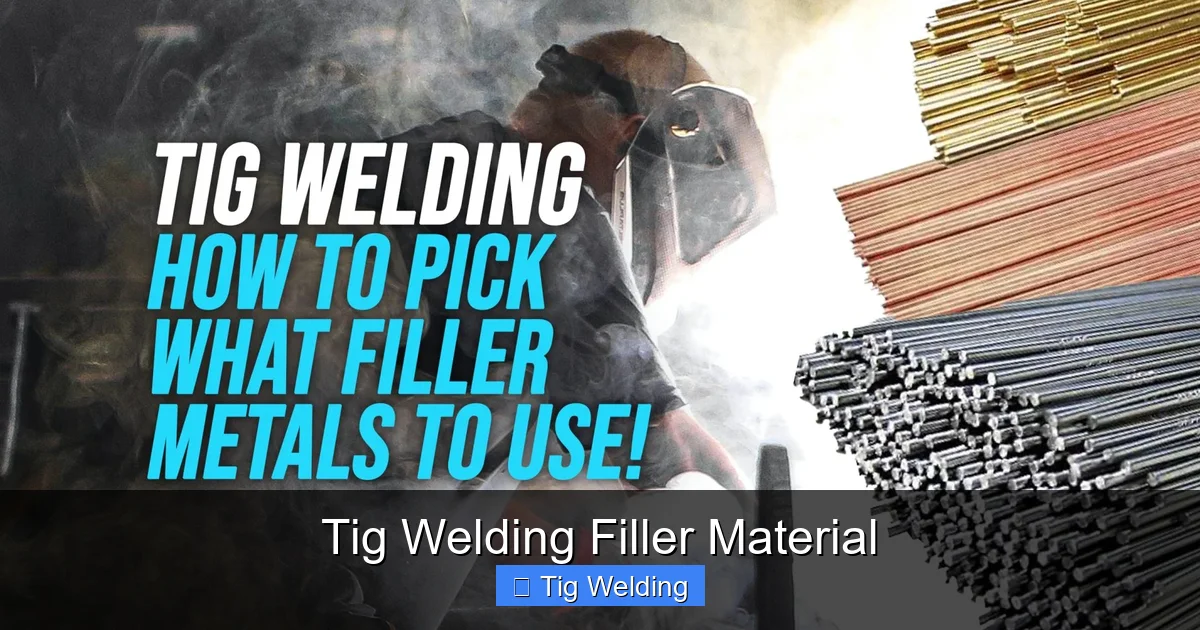
Visual guide about Tig Welding Filler Material
Image source: weldingwatch.com
This is where the real decisions begin. The best filler metal for your project depends on several key factors:
1. Matching the Base Metal
This is the golden rule of filler metal selection. You generally want to use a filler metal that has a similar chemical composition to the base metal you are welding. This ensures that the weld metal will have comparable mechanical properties and corrosion resistance to the surrounding material.
* Mild Steel: For common mild steels (like A36), ER70S-2 and ER70S-6 are industry standards. The “70” indicates a tensile strength of 70,000 psi. ER70S-2 is generally considered a cleaner rod with better deoxidizers, while ER70S-6 contains more deoxidizers and is more forgiving of slightly contaminated base materials.
* Stainless Steel:
* 304 Stainless Steel: For 304, you’ll typically use 308L. The “L” signifies low carbon content, which helps prevent sensitization (carbide precipitation) in the heat-affected zone, improving corrosion resistance, especially in thicker sections.
* 316 Stainless Steel: For 316, use 316L. The “L” is crucial here too, and the filler will contain molybdenum, matching the base metal’s enhanced corrosion resistance.
* Other Stainless Steels: Always consult a compatibility chart or experienced welder. For example, welding 309 stainless steel (often used as a transition layer between carbon steel and stainless steel) requires a 309L filler.
* Aluminum:
* 1xxx, 3xxx, and 5xxx Series Aluminum: For these softer, more formable aluminum alloys, you’ll often use 4043. It’s widely available and excellent for general-purpose aluminum welding. However, it has a lower shear strength than some other options.
* 6xxx Series Aluminum (e.g., 6061): For structural applications where higher strength is needed, 5356 is often preferred. It has better shear strength than 4043 and is more ductile, making it suitable for applications that might undergo bending.
* Cast Iron: Welding cast iron is challenging. Nickel-based fillers like 99% nickel (ENi-1) or 55% nickel/45% iron (ENiFe-1) are common. Nickel fillers are softer and easier to machine after welding.
2. Understanding Alloying Elements and Their Purpose
Filler metals aren’t just pure versions of base metals. They contain specific alloying elements that impart desirable characteristics to the weld.
* **Deoxidizers (e.g., Silicon, Manganese, Aluminum):** These elements help to scavenge oxygen from the molten weld pool, preventing the formation of oxides that can weaken the weld. This is particularly important when welding steels that may have some surface contamination. ER70S-2 and ER70S-6 both contain significant amounts of these.
* **Chromium and Nickel:** Essential for stainless steels, these elements provide corrosion resistance and strength. The specific percentages dictate the type of stainless steel the filler is designed for (e.g., 308 vs. 316).
* **Molybdenum:** Added to some stainless steels (like 316) to enhance corrosion resistance, particularly against pitting and crevice corrosion.
* **Magnesium and Silicon:** Key elements in aluminum alloys, influencing strength and weldability.
3. Considering the Application and Desired Properties
Beyond matching the base metal, think about what the final weld needs to withstand.
* **Strength Requirements:** For high-stress applications, you might need a filler that offers higher tensile or shear strength than the base metal.
* **Corrosion Resistance:** If the weld will be exposed to corrosive environments, selecting a filler that matches or exceeds the base metal’s corrosion resistance is critical. This is why the “L” (low carbon) variants for stainless steels are so important.
* **Machinability:** Some applications require the weld bead to be machined smooth. Nickel-based fillers for cast iron are a good example, as they are much softer and easier to machine than cast iron itself.
* **Color Match:** For visible welds, especially on aluminum or stainless steel, you might want a filler that will visually blend well with the base metal after welding and any post-weld cleaning or polishing.
4. Filler Metal Forms and Diameters
While filler rods are the most common for TIG, filler material also comes in wire form for automatic TIG welding, and even powder form for specialized applications. For manual TIG welding, you’ll primarily be working with filler rods.
The diameter of your filler rod is crucial and depends on:
* **Joint Thickness:** Thicker materials require thicker filler rods to lay down enough metal to fill the joint.
* **Welding Amperage:** Higher amperages melt more base metal and require a thicker filler rod to keep pace with the weld pool.
* **Joint Design:** Open joints or V-grooves might require more filler than a simple butt joint.
As a general rule of thumb:
* **Thin materials (up to 1/8″ or 3mm):** 0.030″ (0.8mm) to 0.045″ (1.2mm) filler rods.
* **Medium materials (1/8″ to 1/4″ or 3mm to 6mm):** 0.045″ (1.2mm) to 1/16″ (1.6mm) filler rods.
* **Thick materials (over 1/4″ or 6mm):** 1/16″ (1.6mm) to 3/32″ (2.4mm) or even larger for heavy industrial applications.
It’s always better to have a slightly thicker rod and be able to control the filler addition than to have a rod that’s too thin for the joint.
Handling and Storing TIG Welding Filler Material
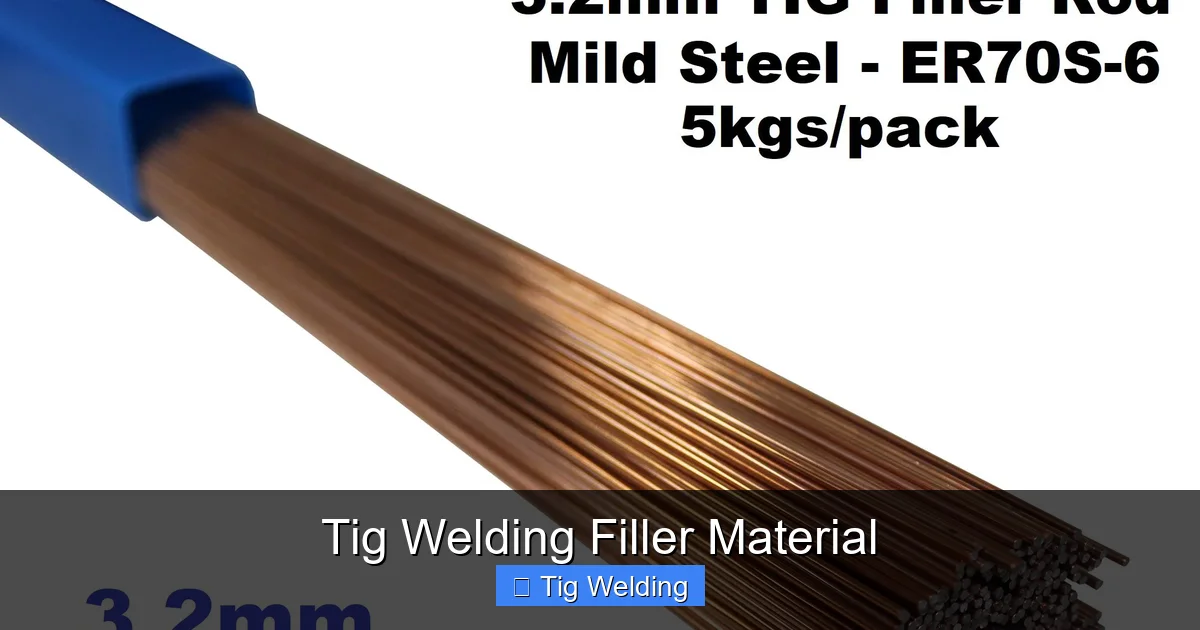
Visual guide about Tig Welding Filler Material
Image source: ph-test-11.slatic.net
Contamination is the enemy of a good TIG weld, and filler material is a prime candidate for picking up unwanted contaminants. Proper handling and storage are non-negotiable.
1. Keep it Clean!
* **Hands:** Always wash your hands thoroughly before handling filler rods. Skin oils and dirt can easily transfer to the rod.
* **Workspace:** Ensure your welding area is clean. Avoid placing filler rods on dirty workbenches or near grinding dust.
* **Storage Containers:** Use the original packaging or dedicated, clean containers for your filler rods.
2. Proper Storage
* **Dry Environment:** Moisture is a major contaminant, especially for aluminum filler. Store rods in a dry place. Many aluminum fillers come in sealed plastic bags or tubes for this reason.
* **Segregation:** Store different types of filler metals separately. Don’t mix steel rods with aluminum rods, for example.
* **Temperature:** While most common fillers aren’t overly sensitive to temperature, extreme fluctuations can sometimes affect them. A stable, moderate temperature is best.
* **Avoid Bending:** Try to keep filler rods straight. Bent rods are harder to feed consistently.
3. Pre-Weld Cleaning of Filler Rods
* **Steel:** For steel rods, a quick wipe with a clean, lint-free cloth is usually sufficient. If there’s any visible rust or grime, a light sanding with a fine-grit abrasive paper can help.
* **Stainless Steel:** Similar to steel, a clean cloth is often enough. For critical applications, some welders use a dedicated stainless steel brush (never use a brush that has been used on carbon steel, as it can cause cross-contamination and rusting).
* **Aluminum:** This is where cleanliness is paramount. Always wipe aluminum filler rods with a clean cloth or paper towel. Some welders even use a dedicated aluminum cleaner or a degreaser on the rods before welding. Ensure the base metal is also thoroughly cleaned.
Techniques for Adding Filler Material
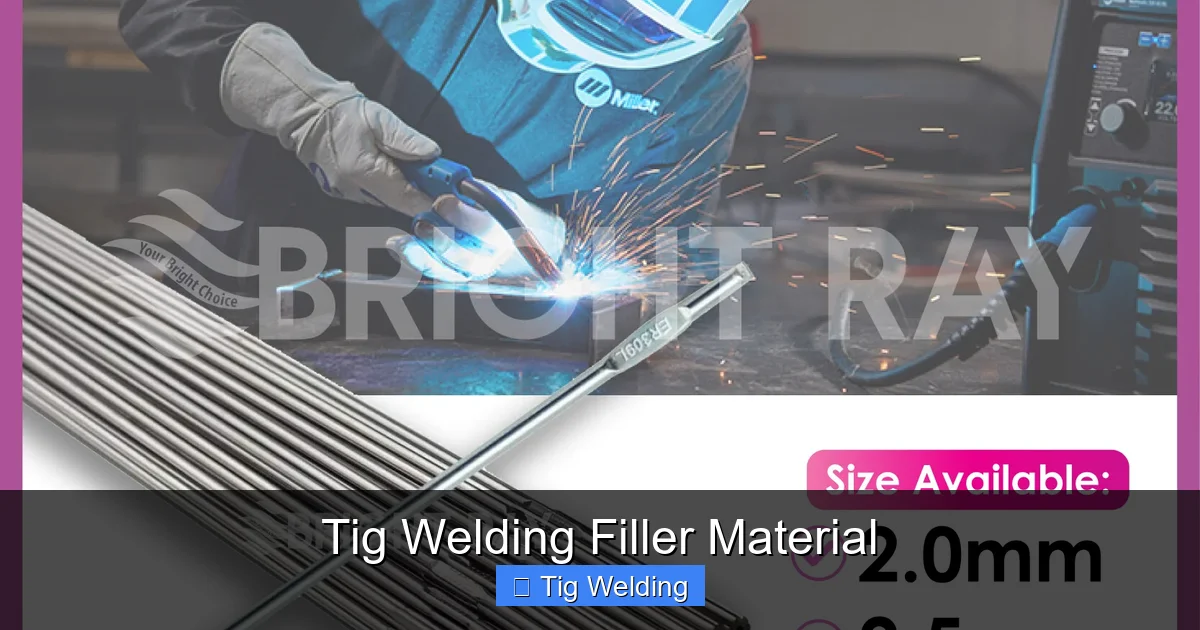
Visual guide about Tig Welding Filler Material
Image source: my-live-01.slatic.net
The best filler material in the world won’t help if you don’t add it correctly. This is where practice makes perfect.
1. Pre-Weld Preparation of the Joint
* **Cleanliness:** Thoroughly clean the base metal edges to be welded. Degrease, brush, or grind away any dirt, oil, paint, or oxides.
* **Fit-Up:** Ensure the joint has good fit-up. Gaps that are too wide will require more filler and can be harder to control.
2. Establishing the Weld Pool
* **Arc Initiation:** Start your TIG arc on the base metal.
* **Heat Control:** Allow the base metal to melt and form a stable weld puddle of the appropriate size. This is crucial. You need enough molten metal to accept the filler.
3. Adding the Filler Rod
* **Angle:** Hold the filler rod at a shallow angle (around 10-20 degrees) towards the direction of welding. This helps it melt into the puddle smoothly.
* **Cadence:** The key is a consistent, rhythmic addition of filler. As the puddle melts and moves forward, gently dip the end of the filler rod into the leading edge of the molten pool.
* **Dip and Retreat:** You’re essentially dipping the filler rod into the leading edge of the puddle, allowing it to melt and fuse, and then quickly withdrawing it slightly before it gets stuck in the arc. The goal is to add metal without disrupting the arc or the puddle excessively.
* **Puddle Control:** Watch the weld puddle closely. The filler rod should feed into the puddle without causing it to overflow or become turbulent. If the puddle starts to look unstable, stop adding filler and let it solidify slightly before resuming.
* **Tie-in:** As you move your torch, ensure each new dip of the filler rod ties into the already-solidified weld metal.
4. Controlling the Bead Size and Shape
* **Amount of Filler:** The amount of filler you add dictates the size and convexity of your weld bead. For structural welds, you want a bead that is well-fused to the base metal and has a slight, smooth convex shape. Avoid overfilling, which creates excessive reinforcement and can be prone to cracking.
* **Consistency:** Maintain a consistent speed of travel and a consistent rate of filler addition. This will result in a uniform bead.
Practical Tips for Filler Addition
* **One-Handed Operation:** Practice holding the TIG torch in one hand and the filler rod in the other. Your non-dominant hand is usually best for controlling the filler.
* **”Sticking” the Rod:** A common beginner mistake is to dip the filler rod directly into the arc, which can “stick” it to your tungsten or rod holder, extinguishing the arc and contaminating the electrode. The filler rod should go into the molten puddle, not the arc itself.
* **Breathing:** Don’t hold your breath! Consistent breathing helps with steady hand movements.
* **Practice on Scrap:** Before working on your actual project, practice on scrap pieces of the same material. Experiment with different filler rod diameters and addition rates.
Troubleshooting Common TIG Welding Filler Issues
Even with the best intentions, issues can arise. Here’s how to address them:
1. Porosity (Gas Pockets)
* **Cause:** Often due to contamination on the filler rod or base metal, or insufficient shielding gas. Can also happen if the filler rod is dipped too deep into the puddle, trapping gas.
* **Solution:** Ensure absolute cleanliness of both base metal and filler rod. Verify your shielding gas flow rate and ensure your torch is held at the correct angle to prevent drafts. Practice a controlled filler dipping technique.
2. Lack of Fusion or Incomplete Penetration
* **Cause:** Welding at too low an amperage, moving too fast, or not adding enough filler material to properly fill the joint. The filler rod may not be melting sufficiently into the base metal.
* **Solution:** Increase amperage. Slow down your travel speed. Ensure you’re using an appropriately sized filler rod for the joint and that it’s being properly melted into the base metal.
3. Cracking (Hot or Cold Cracking)**
* **Cause:** Can be due to incompatible filler metal, improper preheat or post-heat (especially on thicker materials or certain alloys), or residual stresses.
* **Solution:** Double-check filler metal compatibility. Consult welding procedure specifications for preheat/post-heat requirements. Ensure proper joint design and consider stress-relief techniques if necessary.
4. Undercutting**
* **Cause:** Too much amperage, moving the torch too fast, or the filler rod being held too far from the edge of the puddle, allowing excessive base metal to melt away.
* **Solution:** Reduce amperage slightly. Slow down your travel speed. Position the filler rod closer to the edge of the puddle, allowing it to fill the undercut area.
Conclusion
Mastering TIG welding filler material is a journey, but one that’s incredibly rewarding. By understanding the principles of base metal compatibility, alloying elements, and proper handling, you’ve taken a giant leap forward. Remember, cleanliness, consistency, and practice are your greatest allies.
Don’t be discouraged by initial challenges. Every weld is an opportunity to learn. Keep experimenting, keep practicing your filler addition technique, and always prioritize a clean weld environment. With the right filler material and a focused approach, you’ll be creating strong, beautiful TIG welds that stand the test of time. Happy welding!
