


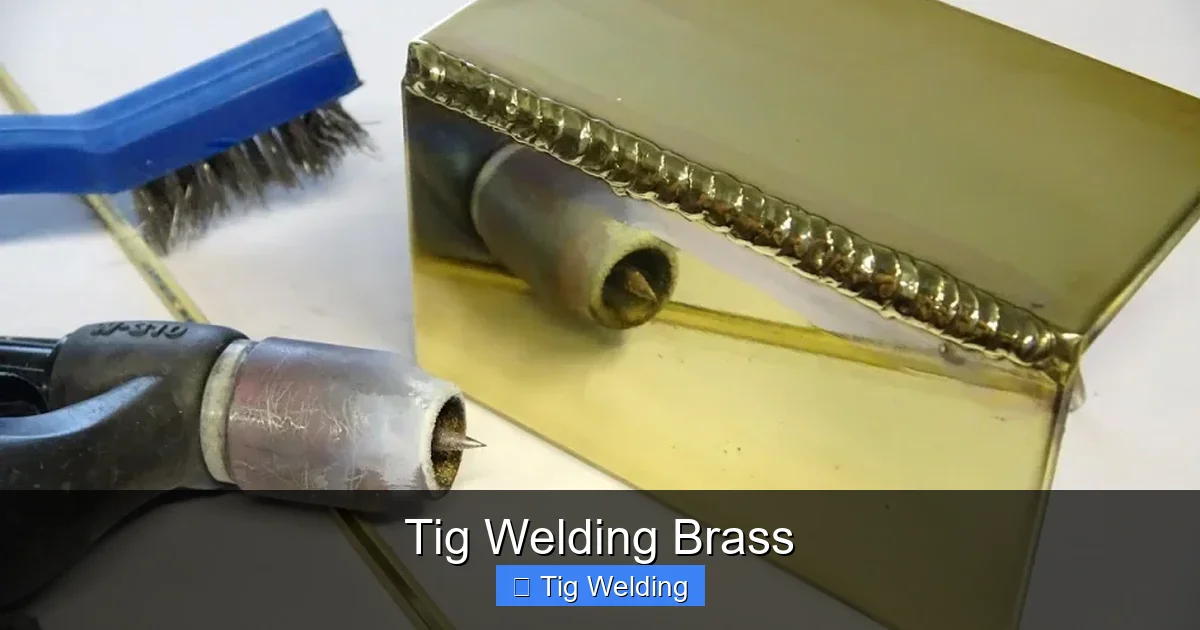
TIG welding brass offers a way to join this beautiful and conductive metal. This guide covers everything you need to know, from preparation to finishing. You’ll learn about the unique challenges of welding brass, including its high thermal conductivity and tendency to oxidize. With proper technique, you can achieve strong, aesthetically pleasing brass welds.
Tig Welding Brass
TIG welding brass might seem daunting at first, but with the right knowledge and practice, you can achieve beautiful and strong joints. Brass is a fascinating metal, an alloy primarily made of copper and zinc. It’s known for its attractive golden color, excellent conductivity, and good corrosion resistance. These properties make it a popular choice for decorative items, musical instruments, plumbing fixtures, and even some industrial applications. However, brass also presents unique challenges when it comes to welding.
In this comprehensive guide, we’ll walk you through everything you need to know to successfully TIG weld brass. We’ll cover the essential preparation steps, recommended equipment and settings, crucial welding techniques, and common problems you might encounter. By the end of this guide, you’ll have a solid understanding of how to approach TIG welding brass with confidence.
Key Takeaways
- Understand Brass Properties: Brass is an alloy of copper and zinc, possessing high thermal conductivity and a relatively low melting point, which significantly impacts TIG welding techniques.
- Proper Joint Preparation is Crucial: Thorough cleaning of brass surfaces to remove oxides and contaminants is essential for achieving a strong and clean weld.
- Choosing the Right Filler Metal is Key: Selecting a filler metal with a composition similar to the base metal, such as a silicon bronze or nickel bronze filler rod, is vital for good weldability and strength.
- Mastering Heat Input Control: Due to brass’s high thermal conductivity, managing heat input is critical to prevent excessive melting, burn-through, and zinc vaporization.
- Utilizing Argon Shielding Gas: A pure argon shielding gas is typically recommended to ensure good arc stability and prevent oxidation of the molten weld pool.
- Developing Appropriate Tungsten and Amperage Settings: Using a pointed tungsten electrode and adjusting amperage carefully based on material thickness are fundamental for successful brass TIG welding.
- Post-Weld Cleaning and Finishing: Proper cleaning and finishing techniques are necessary to remove any oxides or discoloration and to achieve the desired aesthetic appearance of the brass weld.
Understanding the Challenges of Welding Brass
Before we dive into the “how-to,” it’s important to understand why welding brass requires specific attention. Brass has a few key characteristics that differentiate it from steel or aluminum:
- High Thermal Conductivity: Brass conducts heat much faster than steel. This means heat dissipates quickly away from the weld zone. You’ll need to introduce more heat to melt the base metal and filler rod effectively, but you must also be careful not to overheat the surrounding material.
- Low Melting Point: Compared to steel, brass has a lower melting point. This, combined with its high thermal conductivity, makes it prone to burn-through if you’re not careful with your heat input.
- Zinc Vaporization: Brass contains zinc, which has a lower boiling point than copper. When heated, zinc can vaporize, creating fumes and potentially weakening the weld. Proper ventilation is crucial, and controlling the heat input helps minimize this.
- Oxidation: Brass readily forms oxides on its surface, especially when heated. These oxides can interfere with the welding process and lead to a weaker, less clean weld. Thorough cleaning is paramount.
Don’t let these challenges discourage you. With the right techniques, you can overcome them and achieve excellent results.
Essential Equipment and Preparation
Having the right tools and preparing your workpiece correctly are the first steps to success. Let’s break down what you’ll need and how to get your brass ready for welding.

Visual guide about Tig Welding Brass
Image source: weldingpros.net
Gathering Your TIG Welding Gear
For TIG welding brass, you’ll generally use similar equipment to welding steel or stainless steel, with a few specific considerations:
- TIG Welder: Any AC/DC TIG welder will work. For brass, you’ll primarily be using DC straight polarity (DCEN), similar to welding steel. Some welders might offer specific programs for exotic metals, but it’s not essential.
- Shielding Gas: Pure argon is the standard choice for TIG welding brass. It provides excellent arc stability and helps protect the molten puddle from atmospheric contamination. Ensure your argon cylinder is full and your regulator is set correctly.
- Tungsten Electrode: A pure tungsten electrode (green band) or a zirconiated tungsten electrode (brown band) is often recommended for DC welding. However, many welders find success with a 2% ceriated tungsten (grey band) as well. Aim for a clean, pointed tip. Grind it to a sharp point for better arc control.
- Filler Metal: This is a critical choice. For most brass TIG welding applications, you’ll want a filler rod with a composition similar to the base metal. Silicon bronze (e.g., ERCuSi-A) and nickel bronze filler rods are excellent choices. These rods offer good strength and color match. Avoid using plain copper filler rods if you can. Always use a new, clean filler rod.
- TIG Torch and Consumables: A standard TIG torch, collet, gas lens, and ceramic cup sized appropriately for your joint and material thickness will suffice. A larger gas lens can provide better shielding.
- Safety Gear: Always wear your welding helmet with the correct shade, flame-resistant clothing, gloves, and ensure good ventilation.
Preparing the Brass Workpiece
This is arguably the most crucial step when TIG welding brass. Thorough preparation is key to a strong, clean, and aesthetically pleasing weld.
Cleaning the Surfaces
Brass oxidizes easily. Any grease, oil, dirt, or oxides on the surface will cause weld defects. You need to ensure the metal is pristine.
- Mechanical Cleaning: Start by using a stainless steel wire brush dedicated solely to brass or copper alloys. This removes surface oxides and any visible contaminants. Brush in one direction.
- Degreasing: After brushing, use a clean cloth and a suitable solvent like acetone or denatured alcohol to wipe down the joint area. This removes any remaining oils or residues. Ensure the solvent evaporates completely before welding.
- Edge Preparation: For thicker materials (over 1/8 inch), you might want to bevel the edges to ensure full penetration. A V-groove or U-groove is common.
- Filler Rod Cleaning: Always use clean filler rods. If they look dull or tarnished, give them a quick wipe with a solvent or a light brush.
Tip: Don’t touch the cleaned surfaces with your bare hands. Skin oils can contaminate the metal, leading to porosity in the weld. Use clean gloves or a clean rag.
Setting Up Your TIG Welder for Brass
Correct machine settings are vital for controlling the heat and arc when welding brass. Here’s a general guideline, but always remember to adjust based on your specific material thickness and welder.
Visual guide about Tig Welding Brass
Image source: weldingpros.net
Amperage Settings
Brass has a lower melting point than steel, so you’ll generally use lower amperage settings. The exact amperage will depend heavily on the thickness of the brass you’re welding.
- Thin Brass (e.g., 20-gauge or 0.8mm): Start around 30-60 amps.
- Medium Brass (e.g., 1/8 inch or 3mm): Aim for 60-100 amps.
- Thicker Brass (e.g., 1/4 inch or 6mm+): You might need 100-150+ amps, and edge preparation (beveling) becomes more important for full penetration.
Rule of Thumb: A common starting point is around 1 amp per thousandth of an inch of material thickness. So, for 1/16 inch (0.0625 inches), you might start around 60 amps. This is just a guideline; fine-tuning is essential.
Polarity and AC Balance
Polarity: For brass, you’ll almost always use DC straight polarity (DCEN). This means the electrode is negative, and the workpiece is positive. This provides a focused arc and good penetration. You won’t typically use AC for welding brass unless you’re welding specific brass alloys or joining brass to aluminum, which is a much more complex process.
AC Balance: Since we’re using DCEN, AC balance is not a factor.
Gas Flow Rate
A flow rate of 15-20 CFH (Cubic Feet per Hour) for argon is a good starting point. If you’re using a gas lens, you might be able to get away with a slightly lower flow rate. Always ensure you have good shielding gas coverage over the molten puddle.
Pulse Settings (Optional but Recommended)
Using the pulse function on your TIG welder can be incredibly beneficial for welding brass. It helps control heat input and makes it easier to manage the molten puddle.
- Pulse Frequency: A lower frequency, such as 1-5 pulses per second (PPS), is often preferred for brass. This provides a rhythmic heating and cooling cycle.
- Peak Amperage: Set this to your desired welding amperage.
- Background Amperage: This is the lower amperage during the “off” cycle. A background amperage of 30-50% of your peak amperage is a good starting point.
- Pulse Width (or Peak Time): This controls how long the arc is at peak amperage. A setting of 50-75% is common.
How it helps: The pulsing action allows the weld puddle to solidify slightly during the background phase, preventing excessive heat buildup and reducing the risk of burn-through and zinc vaporization. It also creates a characteristic stacked-dime appearance.
TIG Welding Techniques for Brass
Now that your equipment is ready and your brass is prepped, it’s time to lay down some welds. The technique is crucial for success.

Visual guide about Tig Welding Brass
Image source: weldgears.com
Starting the Arc
Use your preferred arc starting method – either scratch start (gently scratch the tungsten on the metal like a match) or lift arc (lift the tungsten slightly after making contact). With a pointed tungsten and DCEN, you should get a clean arc.
Maintaining the Arc Length
Keep a consistent and short arc length, typically around the diameter of your tungsten electrode. A longer arc makes it harder to control the heat and can lead to wider, flatter welds.
Adding Filler Metal
This is where patience and a steady hand come in. Dip the filler rod into the leading edge of the molten puddle, just ahead of the arc. As the puddle forms, advance the filler rod into it. Aim to melt the filler rod with the heat from the puddle, not directly with the arc. The goal is to create a consistent bead width.
Torch Angle and Travel Speed
Hold your torch at a slight angle, typically 10-15 degrees, in the direction of travel. This helps with gas coverage and pushing the molten puddle. Maintain a consistent travel speed. Too fast, and you won’t get enough penetration or bead formation. Too slow, and you’ll overheat the brass, leading to burn-through and excessive zinc vaporization.
Managing the Molten Puddle
The molten puddle on brass can be a bit different than on steel. It might appear brighter and more fluid. Watch it closely. The high thermal conductivity means it can spread quickly. If you’re using pulse, you’ll see the puddle form and solidify rhythmically. If you’re not pulsing, you’ll need to be more deliberate with your filler rod additions and travel speed to control the puddle size.
Avoiding Burn-Through and Zinc Fumes
As mentioned, burn-through is a risk. If you see the puddle suddenly become very large and begin to sag through, back off the heat (or move the torch slightly faster) and be prepared to add filler to fill the hole if it occurs. For zinc fumes, ensure you have excellent ventilation – use an exhaust fan and consider a respirator if working in a confined space.
Welding Different Joint Types
- Butt Welds: Ensure edges are perfectly aligned. For thicker materials, beveling is recommended for full penetration.
- Lap Welds: Overlap the pieces evenly. Apply heat to both the top and bottom pieces simultaneously to create a good fusion.
- Fillet Welds: Ensure good fit-up. Apply heat to both pieces at the joint, then introduce the filler rod to build up the fillet.
Post-Weld Cleaning and Finishing
Once you’ve finished welding, the job isn’t quite done. Proper cleaning and finishing are essential for a professional look.
Cleaning the Weld Area
After the weld has cooled, you’ll likely see some discoloration and oxidation around the weld bead. Use a stainless steel wire brush (again, dedicated to copper alloys) to remove this. You can also use a mild pickling solution designed for copper alloys, but always follow safety instructions and ensure thorough rinsing. Acetone or denatured alcohol can be used to remove any remaining flux residue if you used a flux-cored filler rod (though this is less common for TIG brass welding).
Achieving the Desired Finish
Depending on your application, you might want to blend the weld bead. You can use finer grit sandpaper or a polishing wheel to match the surrounding brass. For a natural brass look, often just brushing is sufficient. If you want to prevent further tarnishing, you can apply a clear lacquer or sealant.
Troubleshooting Common TIG Welding Brass Problems
Even with the best intentions, you might run into some issues. Here are a few common problems and how to address them.
- Problem: Porosity (small holes in the weld)
- Cause: Contaminated base metal or filler rod, insufficient shielding gas, or improper arc length.
- Solution: Ensure meticulous cleaning of the base metal and filler rod. Check your gas flow rate and ensure you’re not experiencing any drafts. Maintain a short, consistent arc length.
- Problem: Burn-Through (hole in the base metal)
- Cause: Too much amperage, travel speed too slow, or insufficient joint preparation (for thicker materials).
- Solution: Reduce amperage. Increase travel speed. If welding thicker material, ensure proper beveling for better heat distribution and penetration control. Consider using pulse.
- Problem: Weak Weld
- Cause: Lack of fusion, insufficient filler metal, or incorrect filler rod choice.
- Solution: Ensure you’re achieving full fusion between the base metal and filler rod. Use the correct amount of filler metal. Double-check that you are using a suitable bronze filler rod.
- Problem: Excessive Zinc Fumes
- Cause: Overheating the brass, leading to zinc vaporization.
- Solution: Reduce amperage, increase travel speed, or use pulse to better control heat input. Ensure adequate ventilation.
- Problem: Poor Arc Stability
- Cause: Contaminated tungsten electrode, incorrect gas, or incorrect polarity.
- Solution: Ensure your tungsten is clean and properly ground. Verify you are using pure argon shielding gas. Confirm you are using DCEN.
Conclusion
TIG welding brass is a rewarding skill. While it presents unique challenges due to its thermal properties and zinc content, understanding these factors allows you to develop effective techniques. By focusing on meticulous preparation, selecting the right filler materials, mastering heat input control, and practicing a steady hand, you can achieve strong, beautiful brass welds.
Remember to prioritize safety, ensure excellent ventilation, and always adjust your settings based on the specific material and application. With practice, you’ll gain the confidence to tackle increasingly complex brass welding projects, from intricate decorative pieces to functional components.
