


This guide demystifies TIG welding stainless steel using the right tungsten. We cover essential aspects like choosing the correct tungsten electrode, setting up your TIG welder, and executing precise welding techniques. Whether you’re a beginner or looking to refine your skills, you’ll gain the knowledge to achieve strong, clean, and aesthetically pleasing stainless steel welds. Achieve professional results with this comprehensive walkthrough, ensuring your TIG welding projects are a success.
TIG Welding Stainless Steel Tungsten
TIG welding stainless steel can seem a bit intimidating at first, especially when you’re thinking about the tungsten electrode. But don’t worry! This guide is here to break down everything you need to know about TIG welding stainless steel tungsten. We’ll walk you through selecting the right tungsten, setting up your machine, and the techniques that lead to beautiful, strong welds.
By the end of this guide, you’ll feel confident in your ability to TIG weld stainless steel with precision and achieve professional-looking results. We’ll cover the ‘why’ behind each step, so you understand how to get the best possible outcome every time.
Key Takeaways
- Tungsten Electrode Selection is Crucial: Pure tungsten is generally not recommended for stainless steel; ceriated (blue), lanthanated (gold), or rare-earth (various colors) are preferred for their arc stability and longevity.
- Proper Tungsten Grinding Matters: A sharp, pointed tungsten electrode, ground to a pencil-like taper (not a ball), is essential for a focused and stable arc when welding stainless steel.
- Shielding Gas is Non-Negotiable: Argon is the most common and effective shielding gas for TIG welding stainless steel, preventing oxidation and ensuring weld purity.
- Amperage and Polarity are Key Settings: For DC TIG welding stainless steel, use DCEN (Direct Current Electrode Negative) polarity and set the amperage based on the thickness of the material.
- Mastering the Arc and Filler Rod: Maintaining a consistent arc length and introducing filler rod smoothly are vital for creating strong, clean stainless steel welds.
- Controlling Heat Input Prevents Issues: Managing heat input is important to avoid warping, discoloration, and loss of corrosion resistance in stainless steel.
Understanding Tungsten for Stainless Steel
Tungsten electrodes are the heart of the TIG arc. They don’t melt into the weld; instead, they carry the electrical current to the workpiece, creating the heat needed to melt the base metal and filler rod. When welding stainless steel, the type of tungsten you choose makes a big difference in arc stability, electrode life, and weld quality.
Types of Tungsten Electrodes
There are several types of tungsten electrodes, each with different properties. For TIG welding stainless steel, we generally want to avoid pure tungsten and opt for thoriated, ceriated, or lanthanated types.
- Pure Tungsten (Green Band): Primarily used for AC welding of aluminum and magnesium. It tends to ball up at the tip and is not ideal for stainless steel.
- Thoriated Tungsten (Red Band): Contains about 2% thorium oxide. It offers excellent arc starting and stability. However, thorium is radioactive, so it’s best to avoid it, especially if you have alternatives.
- Ceriated Tungsten (Blue Band): Contains about 2% cerium oxide. It’s a great all-around choice, especially for lower amperage DC welding of stainless steel. It provides a stable arc and good longevity.
- Lanthanated Tungsten (Gold Band): Contains about 2% lanthanum oxide. This is another excellent choice for DC welding of stainless steel. It offers superior arc starting, stability, and a longer electrode life. It’s often considered a good alternative to thoriated tungsten.
- Rare-Earth Tungsten (Various Colors): These electrodes contain a blend of rare-earth oxides, like lanthanum and yttrium. They offer excellent performance across a range of applications and amperages and are a solid option for stainless steel.
For TIG welding stainless steel, ceriated (blue) and lanthanated (gold) tungsten electrodes are highly recommended. They offer the best balance of arc stability, ease of starting, and electrode life for this material.
Tungsten Diameter
The diameter of your tungsten electrode should be matched to your welding amperage. A general rule of thumb is:
- 0.040″ (1.0mm) for 10-50 amps
- 1/16″ (1.6mm) for 50-150 amps
- 3/32″ (2.4mm) for 150-250 amps
- 1/8″ (3.2mm) for 250+ amps
Using a tungsten that’s too large for the amperage will result in an unnecessarily large and unstable arc. Too small, and it might overheat and contaminate the weld.
Grinding Your Tungsten Electrode
This step is critical! The way you grind your tungsten significantly impacts the stability and focus of your arc. For DC TIG welding of stainless steel, you want a pointed tungsten.

Visual guide about Tig Welding Stainless Steel Tungsten
Image source: raxindustry.com
The Correct Grind
Never grind your tungsten on a bench grinder, as this can embed grinding dust into the tungsten, leading to contamination. Use a dedicated tungsten grinder with a diamond grinding wheel.
Here’s how to grind your tungsten for stainless steel:
- Start with a Clean Electrode: Make sure the tungsten is clean and free of any previous contamination.
- Grind in One Direction: Place the tungsten electrode against the grinding wheel and move it in one direction to create a consistent taper. Do NOT use a back-and-forth motion. This creates long, fine grooves that help stabilize the arc.
- Create a Sharp Point: Grind the tungsten to a fine, sharp point, like a pencil tip. This helps to concentrate the arc.
- Avoid Balling: Do not let the tip ball up. A ball-shaped tip will result in a wide, erratic arc.
- Consider a Slight Flat (Optional): Some experienced welders leave a tiny flat spot (about the diameter of the tungsten) at the very tip. This can sometimes improve arc stability at higher amperages, but for general stainless steel work, a sharp point is usually best.
A well-ground tungsten provides a focused arc that penetrates precisely where you want it, which is essential for stainless steel, especially on thinner materials.
Setting Up Your TIG Welder for Stainless Steel
Proper machine setup is just as important as the tungsten. Here’s what you need to consider:
Visual guide about Tig Welding Stainless Steel Tungsten
Image source: weldguru.com
Polarity and Current Type
For TIG welding stainless steel (and most other metals except aluminum and magnesium), you’ll use DCEN (Direct Current Electrode Negative). This means the electrode is negative, and the workpiece is positive. DCEN provides deep penetration and a focused arc, which is ideal for stainless steel.
Avoid DCEP (Electrode Positive) for stainless steel, as it offers shallow penetration and a wide, unfocused arc that can easily contaminate the weld.
Amperage Settings
Amperage controls the heat input. The correct amperage setting depends on the thickness of the stainless steel you are welding and the type of joint you are making.
Here are some general guidelines for DCEN welding of stainless steel:
- Thin Stainless Steel (e.g., 22 gauge / 0.8mm): 30-60 amps
- Medium Stainless Steel (e.g., 16 gauge / 1.5mm): 60-100 amps
- Thicker Stainless Steel (e.g., 1/8″ / 3mm): 100-150 amps
Always start with the lower end of the recommended range and adjust as needed. You can get a feel for the correct amperage by observing the puddle. If it’s too hot and runny, turn it down. If you’re struggling to get good penetration or melting, turn it up.
Shielding Gas
Shielding gas is vital for TIG welding any metal, and stainless steel is no exception. It protects the molten weld puddle and the tungsten electrode from atmospheric contamination (oxygen and nitrogen), which can lead to oxidation, porosity, and a brittle weld.
- Recommended Gas: Pure Argon (100% Ar). Argon is the most common and effective shielding gas for TIG welding stainless steel. It provides excellent arc stability and good puddle control.
- Gas Flow Rate: A typical flow rate for 100% argon is between 15-25 cubic feet per hour (CFH), or about 7-12 liters per minute (LPM). You might need to adjust this based on your setup and the ambient conditions (e.g., windy conditions might require a higher flow rate). Too low a flow won’t provide adequate shielding; too high can cause turbulence and draw in air.
Ensure your gas lens is properly installed on your TIG torch. A gas lens helps to create a broader, more stable stream of shielding gas, which is especially beneficial for stainless steel. It also allows you to hold the torch at a slightly greater distance from the workpiece, improving visibility.
Torch Angle and Stick-Out
The angle of your torch and how far the tungsten sticks out (stick-out) are important for arc control and gas coverage.
- Torch Angle: For DCEN welding of stainless steel, aim for a torch angle of about 10-15 degrees, leaning in the direction of travel. This helps to direct the shielding gas effectively and guide the arc.
- Tungsten Stick-Out: Keep your tungsten stick-out as short as possible while still allowing for good visibility and arc control. For stainless steel, a stick-out of about 1/8″ to 1/4″ (3mm to 6mm) is usually sufficient. A shorter stick-out provides a more focused arc and better shielding.
TIG Welding Techniques for Stainless Steel
With your tungsten chosen, your machine set up, and your electrode ground, it’s time to focus on the welding technique itself.

Visual guide about Tig Welding Stainless Steel Tungsten
Image source: weldguru.com
Starting the Arc
There are two primary ways to start your TIG arc:
- Lift Start: Gently touch the tungsten to the workpiece and then “lift” it away quickly. This is a good method for avoiding tungsten contamination if your machine has good high-frequency starting.
- High-Frequency Start: This method uses a high-frequency spark to initiate the arc without touching the tungsten to the workpiece. This is preferred as it prevents tungsten contamination of the weld pool. Most modern TIG machines have a high-frequency start function.
For stainless steel, a clean start is crucial to prevent inclusions.
Maintaining the Arc Length
The distance between your tungsten electrode and the workpiece is your arc length. For stainless steel, you want a consistent, short arc.
- Short Arc: Aim for an arc length roughly equal to the diameter of your tungsten electrode. This provides a focused, stable arc that will give you good penetration and control.
- Consistent Arc Length: Try to maintain this distance consistently throughout the weld. Fluctuating arc length can lead to inconsistent penetration, wider beads, and potential contamination.
Adding Filler Rod
When joining stainless steel, you’ll typically use a filler rod of similar stainless steel alloy. The filler rod should be dipped into the leading edge of the molten puddle, not directly into the arc.
- Dip and Melt: Introduce the filler rod into the puddle, let it melt, and then pull it out slightly. This intermittent dipping action builds up the weld bead.
- Smooth Introduction: Avoid “splashing” the filler rod into the puddle, as this can introduce porosity. Let the heat of the puddle melt the filler rod smoothly.
- Coordination: You’ll need to coordinate your torch movement, filler rod dipping, and puddle control. This takes practice!
Travel Speed and Puddle Control
Your travel speed determines how quickly you move the torch along the joint. Puddle control refers to how you manage the molten weld pool.
- Consistent Travel Speed: Aim for a consistent travel speed that allows the puddle to form properly and the filler rod to fuse into the base metal without overheating or leaving gaps.
- Observe the Puddle: Watch the molten puddle closely. It should be fluid but not excessively runny. If it’s too hot, you’ll see excessive spatter or the puddle will try to run away from you. If it’s too cold, you won’t get good fusion.
- “Little Ripples”: Experienced welders often move the torch in a slight oscillating or “little ripple” motion to help spread the heat and control the puddle. Experiment to find what works best for you.
Preventing Issues with Stainless Steel
Stainless steel can be prone to certain problems if not TIG welded correctly. Being aware of these can help you avoid them.
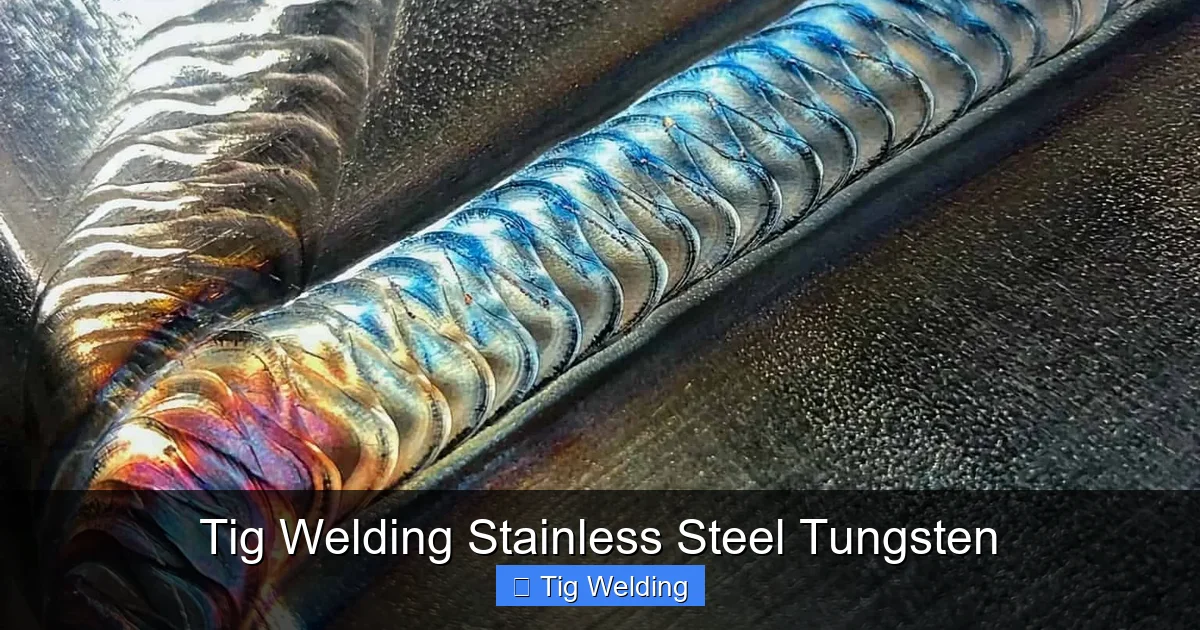
Discoloration (Heat Tint)
Stainless steel will discolor when heated, ranging from light straw to blue to dark gray or black. This is oxidation.
- Minimize Heat Input: Use the lowest amperage possible for the job and maintain a consistent travel speed.
- Proper Shielding Gas: Ensure you have adequate Argon coverage to prevent excessive oxidation.
- Post-Weld Cleaning: For critical applications, the discoloration will need to be removed using stainless steel-specific cleaners or passivation treatments.
Warping
Thin stainless steel is susceptible to warping due to heat.
- Clamping: Use adequate clamps or jigs to hold the pieces in place and absorb some of the heat.
- Back-Stepping: On longer welds, consider a back-stepping technique (welding a short segment, then moving backward to weld the next segment) to distribute heat.
- Lower Amperage: Keep amperage as low as possible.
Loss of Corrosion Resistance
Overheating or contamination can reduce stainless steel’s ability to resist corrosion.
- Cleanliness is Key: Always start with clean base metal and filler rod.
- Avoid Contamination: Use dedicated tools for stainless steel. Never use the same grinder or wire brush that you use for carbon steel.
- Proper Shielding: Ensure good gas coverage to prevent oxygen and nitrogen from entering the weld.
- Post-Weld Passivation: In some industries (like food processing or medical), a post-weld passivation process is required to restore the protective chromium oxide layer.
Troubleshooting Common TIG Welding Stainless Steel Tungsten Issues
Even with the best preparation, you might encounter issues. Here are some common problems and their solutions:
- Tungsten Contamination: If your tungsten tip touches the weld puddle or filler rod, it will get contaminated, leading to an unstable arc and weld defects.
- Solution: Stop welding immediately. Grind a new, clean point on your tungsten electrode. Ensure your arc length is consistent and you are not accidentally dipping the tungsten.
- Porosity: Small holes or voids in the weld bead.
- Cause: Insufficient shielding gas, drafts, dirty filler rod, or touching the tungsten to the puddle.
- Solution: Check your gas flow rate and ensure there are no drafts. Clean your filler rod and tungsten. Maintain proper arc length and technique.
- Erratic Arc: The arc jumps around and is unstable.
- Cause: Poorly ground tungsten, incorrect polarity, tungsten contamination, or insufficient shielding gas.
- Solution: Re-grind your tungsten to a sharp point. Verify your polarity is DCEN. Check your gas flow.
- Lack of Fusion: The filler metal or base metal hasn’t fully melted and bonded.
- Cause: Insufficient amperage, too fast travel speed, or poor joint preparation.
- Solution: Increase amperage gradually. Slow down your travel speed. Ensure the joint edges are clean and properly fitted.
Conclusion
TIG welding stainless steel tungsten might seem complex, but by understanding the role of each component and practicing the correct techniques, you can achieve excellent results. Remember to select the right tungsten electrode—ceriated or lanthanated are excellent choices—and always grind it to a sharp point. Proper machine settings, including DCEN polarity and appropriate amperage, along with a steady stream of Argon shielding gas, are paramount.
Focus on maintaining a consistent, short arc length, smooth filler rod addition, and controlled travel speed. By paying attention to these details and practicing diligently, you’ll soon be producing strong, clean, and visually appealing TIG welds on stainless steel. Happy welding!
