

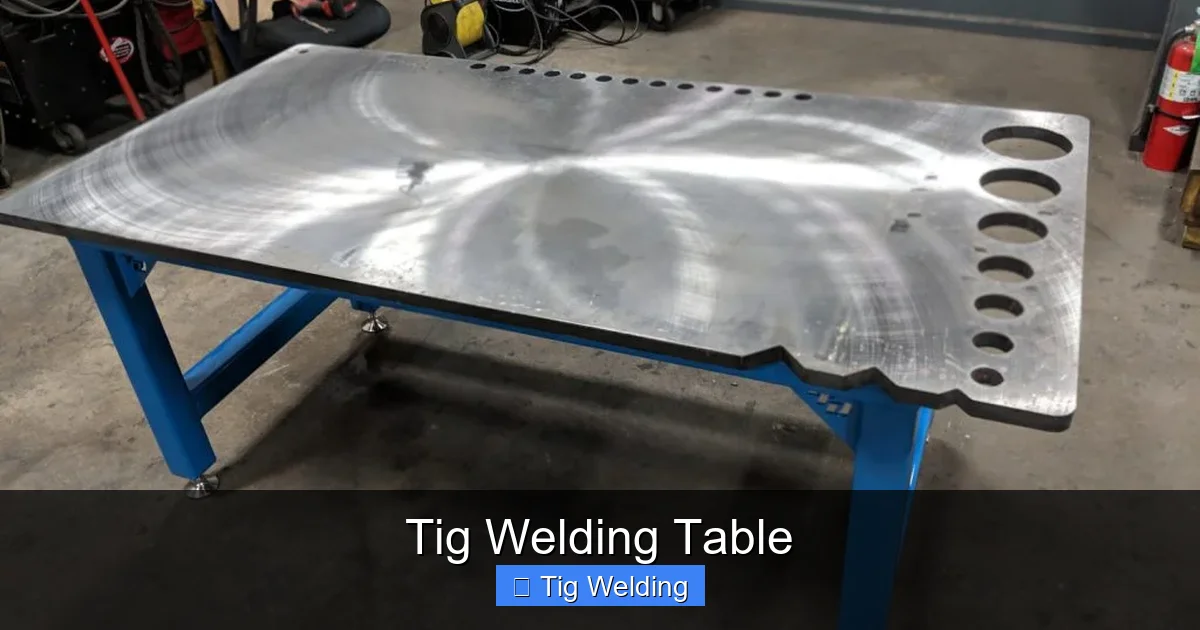
This guide provides a comprehensive how-to for building your own TIG welding table. Learn about essential design considerations, material selection, and step-by-step construction techniques. A well-built TIG welding table is a game-changer for any metal fabrication project, offering stability, accessibility, and functionality.
Tig Welding Table: Your Ultimate Guide to Building a Functional Workspace
Welcome to your comprehensive guide on building a TIG welding table! If you’re passionate about metal fabrication and looking to elevate your TIG welding experience, a dedicated welding table is an absolute game-changer. Forget trying to balance your work on rickety sawhorses or struggling with uneven surfaces. A well-designed and sturdy TIG welding table provides a stable, accessible, and versatile platform for all your projects.
In this guide, we’ll walk you through everything you need to know. We’ll cover the crucial design considerations, help you choose the right materials, and provide step-by-step instructions for building your own robust and functional TIG welding table. By the end, you’ll have the knowledge and confidence to create a workspace that perfectly complements your TIG welding skills. Let’s get started on building your ultimate metalworking hub!
Key Takeaways
- Choose the Right Design: Select a TIG welding table design that suits your available space, project types, and portability needs, considering factors like height, size, and features.
- Prioritize Sturdy Materials: Opt for robust materials like steel for the frame and tabletop to ensure durability, stability, and resistance to heat and spatter from TIG welding.
- Master Cutting and Welding Techniques: Accurately cut and precisely weld your chosen materials to create a strong, level, and functional TIG welding table.
- Incorporate Essential Features: Add features such as a flat, level surface, grounding points, and storage solutions to enhance the usability and efficiency of your welding workspace.
- Consider Optional Add-ons: Explore adding features like a swivel mount for your TIG torch, v-grooves for pipe work, or even a built-in dust collection system to further customize your TIG welding table.
- Safety First: Always adhere to proper safety protocols when cutting, welding, and operating tools during the construction of your TIG welding table.
1. Planning Your TIG Welding Table: Design and Dimensions
Before you even think about cutting metal, it’s essential to plan your TIG welding table. This phase is crucial for ensuring your table meets your specific needs and fits seamlessly into your workshop.
1.1. Assessing Your Needs and Space
The first step is to honestly assess what you’ll be using your TIG welding table for.
- Project Size: Will you be welding small, intricate parts or larger, bulkier fabrications? This will dictate the size of your tabletop.
- Frequency of Use: If you weld daily, you’ll want something incredibly durable and well-equipped. Occasional use might allow for a simpler design.
- Workshop Space: Measure your available space carefully. Consider how much room you need to move around the table, open doors, and access other tools.
- Portability: Do you need to move your table? If so, consider adding casters or designing it to be easily disassembled.
1.2. Common TIG Welding Table Designs
There are several popular TIG welding table designs, each with its advantages.
- Flat-Top Steel Table: This is the most common and versatile design. It features a solid steel plate top, offering a large, flat, and stable working surface.
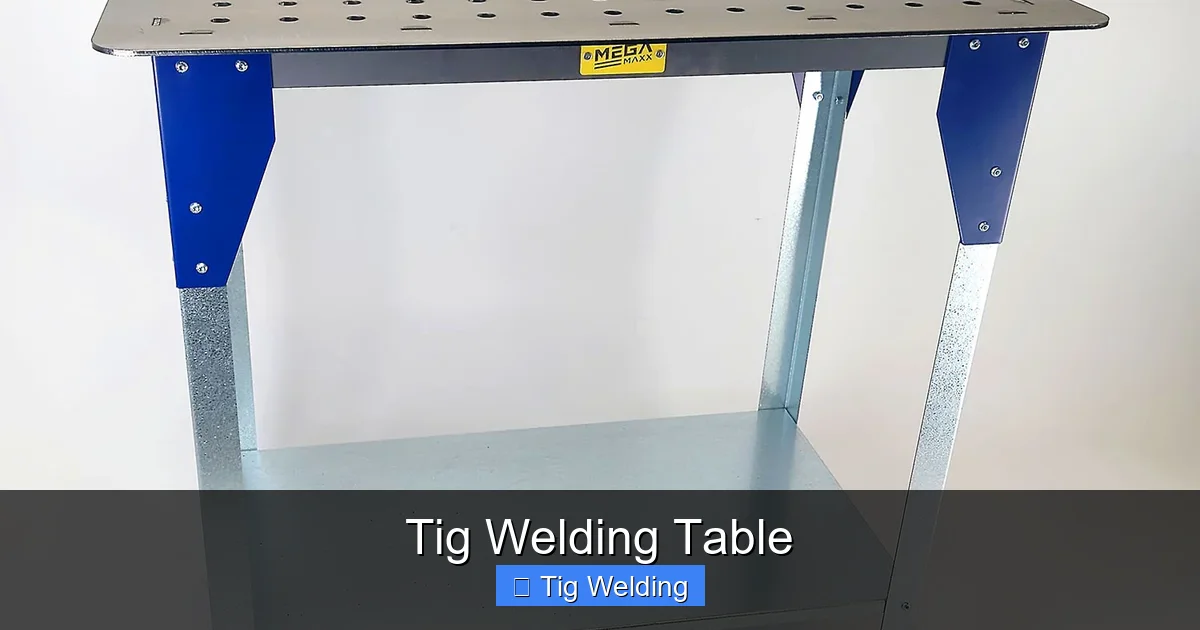
- Grid/Slotted Table: These tables have a surface made of steel bars with gaps or slots. This design is excellent for clamping, fixturing, and allowing debris to fall through. It’s particularly useful for TIG welding where precise positioning is often critical.
- Adjustable Height Table: For maximum ergonomics, an adjustable height table allows you to set the working surface to your ideal comfortable working level, reducing strain during long welding sessions.
- Compact/Foldable Table: Ideal for smaller workshops or for those who need to store their welding table when not in use, these designs prioritize space-saving.
1.3. Determining Ideal Dimensions
Once you have a design in mind, it’s time to decide on the dimensions.
- Height: A standard workbench height is around 34-36 inches (86-91 cm). However, for TIG welding, you might prefer it slightly lower, around 30-32 inches (76-81 cm), for better comfort when seated or leaning over. Measure your preferred comfortable working height.
- Length and Width: Aim for a tabletop large enough to accommodate your typical projects comfortably, with space around the edges for clamps and tools. Common sizes range from 2×3 feet (60×90 cm) to 4×8 feet (120×240 cm). A good starting point for many hobbyists is a 3×4 feet (90×120 cm) table.
2. Selecting Your Materials: Building a Robust Foundation
Visual guide about Tig Welding Table
Image source: 425fab.com
The materials you choose will directly impact the durability, stability, and longevity of your TIG welding table.
2.1. Tabletop Materials
The tabletop is the most critical surface of your TIG welding table.
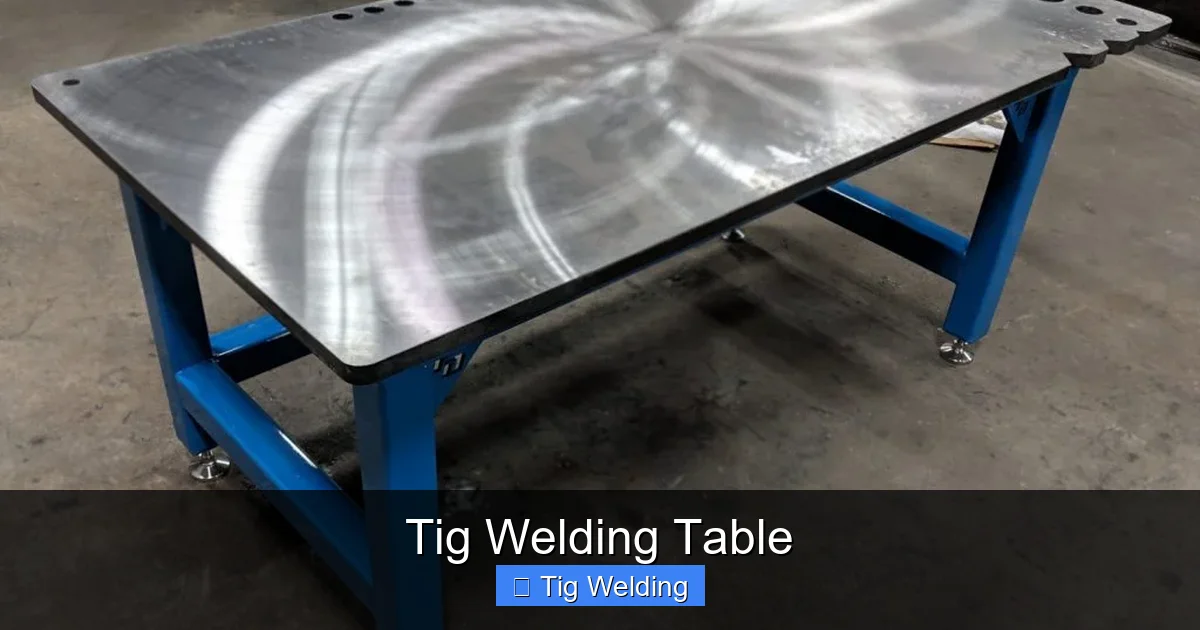
- Steel Plate: This is the go-to material for a TIG welding table.
- Mild Steel: Easily accessible and cost-effective. A 1/4 inch (6mm) to 1/2 inch (13mm) thick mild steel plate is excellent for most TIG welding applications. Thicker plates offer more rigidity and heat absorption.
- Stainless Steel: More expensive but offers excellent corrosion resistance and a cleaner aesthetic, which can be beneficial for certain TIG welding applications where contamination is a concern.
- Expanded Metal or Diamond Plate: While these can be used for certain table designs, a solid plate is generally preferred for the primary working surface of a TIG welding table for flatness and stability.
2.2. Frame Materials
The frame provides the necessary support and stability for your tabletop.
- Steel Tubing (Square or Rectangular): This is a popular choice due to its strength, ease of welding, and clean appearance. Common sizes include 2×2 inch (5×5 cm) or 1.5×3 inch (3.8×7.6 cm) tubing with a wall thickness of at least 1/8 inch (3mm).
- Steel Angle Iron: A more budget-friendly option, angle iron can also create a sturdy frame. It might require more bracing for equivalent rigidity compared to tubing.
- Steel Channel: Offers good strength and can be a suitable choice for the frame components.
2.3. Hardware and Accessories
Don’t forget the smaller but essential components.
- Fasteners: High-strength bolts, nuts, and washers if you’re planning for any demountable sections or accessory mounting.
- Casters (Optional): If you want a mobile TIG welding table, invest in heavy-duty, lockable casters rated for the total weight of your table plus the heaviest item you’ll place on it.
- Grounding Clamp: A must-have for TIG welding. Ensure you have a sturdy grounding point integrated into the table’s design.
- Leveling Feet: For stationary tables, adjustable leveling feet are essential to ensure a perfectly flat and stable surface, even on uneven workshop floors.
3. Construction Steps: Building Your TIG Welding Table
Visual guide about Tig Welding Table
Image source: i1.wp.com
Now for the exciting part – building your TIG welding table! This section assumes you have basic metalworking tools and skills.
3.1. Cutting Your Materials
Precision is key here. Ensure all cuts are square and accurate.
- Measure and Mark: Double-check all your measurements before marking your steel tubing, angle iron, and plate.
- Cut Frame Components: Using a metal chop saw, band saw, or even an angle grinder with a cutting disc, carefully cut all the pieces for your table frame according to your design.
- Cut Tabletop: If you’re cutting your own steel plate, use a plasma cutter, oxy-acetylene torch, or a heavy-duty angle grinder. For precise, straight cuts, consider having the steel supplier cut it for you.
3.2. Assembling the Frame
This is where your TIG welding skills will really shine.
- Lay Out Frame Pieces: Arrange the cut frame pieces on a flat surface to form the base and legs of your table.
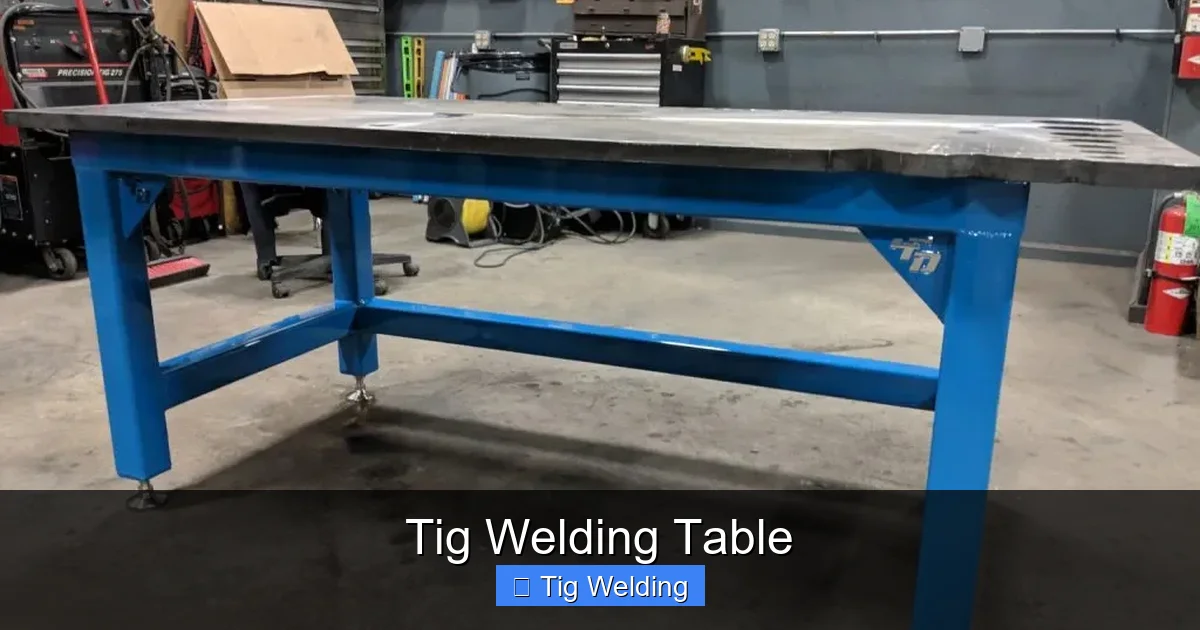
- Tack Weld: Start by tack welding the frame joints. This allows you to make adjustments before committing to full welds. Ensure all corners are square and that the frame is level.
- Weld Frame Joints: Once you’re satisfied with the layout and squareness, proceed with full TIG welds on all frame joints. Aim for strong, continuous welds for maximum rigidity.
- Attach Leg Supports: If your design includes cross-bracing or diagonal supports for the legs, weld these in place now.
3.3. Preparing and Attaching the Tabletop
The tabletop needs to be perfectly flat and securely attached.
- Clean the Tabletop: Thoroughly clean the steel plate to remove any mill scale, rust, or oil. A wire brush, grinder, or degreaser can be used.
- Position the Tabletop: Carefully place the tabletop onto the assembled frame. Ensure it’s centered and flush with the edges of the frame, or however your design dictates.
- Secure the Tabletop: There are a few ways to attach the tabletop:
- Welding: The most secure method is to weld the tabletop directly to the frame. Weld around the perimeter, ensuring a strong bond.
- Bolting: You can drill holes through the tabletop and frame and bolt them together. This allows for easier disassembly if needed, but ensure you use strong, high-grade bolts.
- Check for Flatness: After attachment, use a long, straight edge and a level to confirm the tabletop is perfectly flat. If there are any minor humps or dips, you might be able to grind them down or address them with shims if bolted.
3.4. Adding Essential Features
These additions make your TIG welding table truly functional.
- Grounding Point: Weld a sturdy lug or a thick piece of steel directly to the frame or tabletop. This will be where you attach your welding machine’s ground clamp. Ensure it’s easily accessible.
- Leveling Feet or Casters:
- Leveling Feet: If your table is stationary, weld threaded inserts into the bottom of the legs and screw in adjustable leveling feet.
- Casters: If making a mobile table, weld mounting plates to the bottom of the legs and bolt on your heavy-duty casters. Ensure at least two casters have brakes.
- Edge Clamping System (Optional but Recommended): Consider adding a series of holes or slots along the edges of the tabletop. These are invaluable for using various clamps, vises, and fixturing devices to hold your workpieces securely.
4. Customization and Optional Upgrades
Visual guide about Tig Welding Table
Image source: cdn.shopify.com
Once the basic TIG welding table is built, you can add features to make it even more specialized for your needs.
4.1. Built-in Vise Mount
A permanently mounted vise can be a huge convenience. Weld a robust steel plate or bracket to the tabletop or the side of the frame to securely mount your vise.
4.2. Storage Solutions
Maximize your workshop efficiency with integrated storage.
- Lower Shelf: Weld a simple steel shelf between the legs to store tools, materials, or your welding machine.
- Drawers or Cabinets: For more organized storage, you could integrate custom-built drawers or even bolt on a small metal cabinet underneath.
4.3. Torches and Cable Holders
Keep your TIG torch and cables tidy and within easy reach. Weld simple hooks or brackets onto the frame. You can even create a dedicated slot or magnetic holder for your torch.
4.4. Grid Table Enhancements
If you opted for a grid or slotted table design, consider adding a removable solid steel plate that can be placed over sections of the grid for flatter welding areas when needed.
5. Safety First: Best Practices for TIG Welding Tables
Safety should always be your top priority, both during construction and use.
5.1. During Construction
- Wear appropriate PPE: Always wear safety glasses or a face shield, gloves, and a welding helmet when cutting and welding.
- Ventilation: Ensure you’re working in a well-ventilated area to avoid inhaling fumes.
- Fire Safety: Keep a fire extinguisher nearby. Clear the work area of any flammable materials.
- Secure Workpiece: Ensure your metal is securely clamped before cutting or grinding.
5.2. During Use
- Grounding: Always ensure a solid, clean connection with your welding machine’s ground clamp to the TIG welding table. This is critical for arc stability and safety.
- Stability: Regularly check that your table is stable and level. Loose or wobbly tables are a hazard.
- Overloading: Do not overload your TIG welding table beyond its designed capacity.
- Spatter: While steel tables are durable, excessive spatter can accumulate. Clean your table regularly to maintain a safe working surface.
Conclusion: Your New TIG Welding Hub
Building your own TIG welding table is a rewarding project that significantly enhances your metalworking capabilities. By carefully planning your design, selecting appropriate materials, and executing precise construction, you’ll create a durable, functional, and personalized workspace. This TIG welding table will be the cornerstone of countless future projects, providing stability, accessibility, and the perfect platform for your TIG welding endeavors. Enjoy the process, and more importantly, enjoy the results of your newly improved welding station!
