

This guide walks you through the essentials of argon gas MIG welding, from setup to finishing touches. You’ll learn how to choose the right gas mix, adjust settings, and avoid common mistakes for professional-quality results.
Key Takeaways
- Argon gas enhances weld quality: It creates a stable arc, reduces spatter, and produces clean, smooth welds—ideal for aluminum and non-ferrous metals.
- Use the right gas mix: A 75% argon / 25% CO2 blend works best for steel, while 100% argon is standard for aluminum welding.
- Proper machine setup is crucial: Correct voltage, wire speed, and polarity ensure consistent penetration and bead appearance.
- Maintain a clean workspace: Remove oil, rust, and moisture from metal surfaces to prevent porosity and weak welds.
- Welding technique matters: Hold the gun at a 10–15 degree angle and move steadily for even heat distribution.
- Safety first: Always wear a welding helmet, gloves, and protective clothing, and work in a well-ventilated area.
- Troubleshoot common issues: Learn to fix problems like porosity, undercutting, or erratic arcs by adjusting gas flow or cleaning contact tips.
What Is Argon Gas MIG Welding?
MIG welding, or Metal Inert Gas welding, uses a continuous wire electrode and a shielding gas to join metals. When that gas is argon—or a mix containing argon—it creates a clean, controlled environment around the weld pool. This prevents contamination from oxygen and nitrogen in the air, which can weaken the weld or cause defects.
Argon is an inert gas, meaning it doesn’t react with molten metal. That makes it perfect for welding sensitive materials like aluminum, magnesium, and stainless steel. It also improves arc stability, reduces spatter, and gives you a smoother, more aesthetically pleasing bead. Whether you’re working on automotive parts, fabrication projects, or DIY repairs, argon gas MIG welding offers precision and reliability.
In this guide, you’ll learn how to set up your MIG welder for argon gas, choose the right materials, and execute strong, professional welds. We’ll also cover common mistakes and how to fix them—so you can weld with confidence.
Why Use Argon Gas in MIG Welding?
Argon isn’t just a filler gas—it’s a game-changer for weld quality. Here’s why welders prefer it:

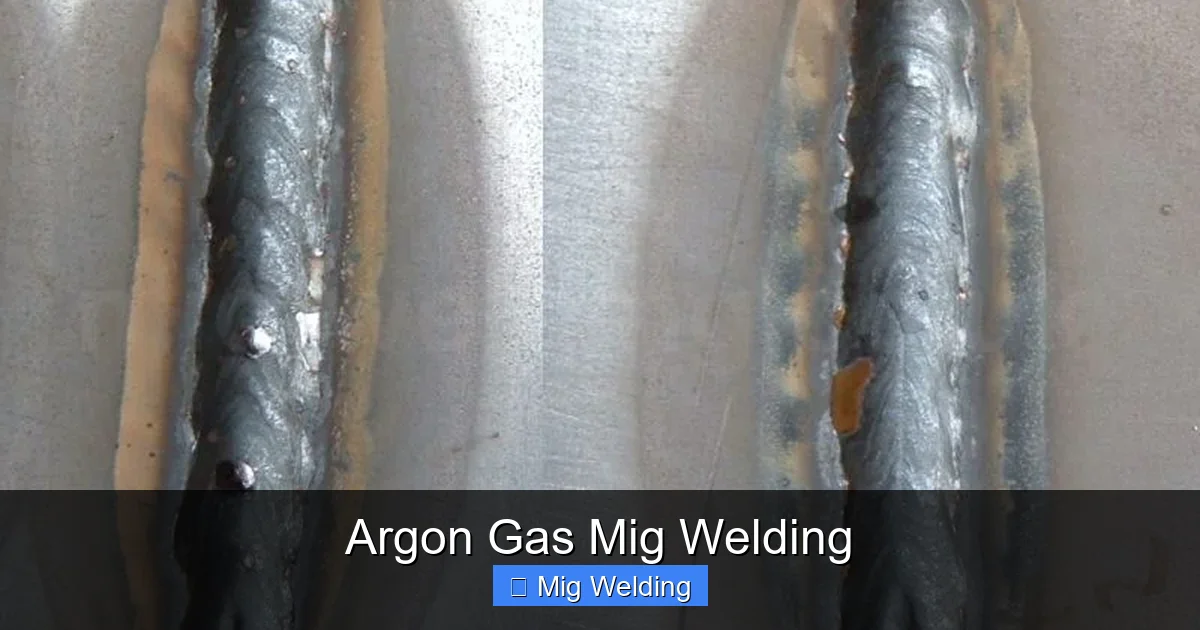
Visual guide about Argon Gas Mig Welding
Image source: mig-welding.co.uk
- Stable arc: Argon creates a smooth, consistent arc that’s easier to control, especially for beginners.
- Less spatter: Less cleanup means more time welding and less time grinding.
- Better penetration: When mixed with CO2, argon improves penetration on steel without excessive heat.
- Cleaner welds: No oxidation means stronger, more durable joints.
- Versatility: Works well with ferrous and non-ferrous metals.
For example, if you’re welding aluminum, 100% argon is the go-to choice. It prevents oxidation and ensures a clean fusion. For mild steel, a 75/25 argon-CO2 mix gives you the best of both worlds: argon’s stability and CO2’s deeper penetration.
Equipment and Materials Needed
Before you start, gather the right tools and materials. Here’s what you’ll need:
Visual guide about Argon Gas Mig Welding
Image source: mig-welding.co.uk
- MIG welder: Ensure it’s compatible with argon or argon blends.
- Argon gas cylinder: Available in various sizes; a 125 cubic foot tank is common for hobbyists.
- Regulator and flow meter: Controls gas flow—aim for 20–25 cubic feet per hour (CFH).
- Welding gun and nozzle: Check for proper fit and cleanliness.
- Wire electrode: Use ER70S-6 for steel or ER4043/5356 for aluminum.
- Work clamps and ground cable: Ensure a solid electrical connection.
- Safety gear: Auto-darkening helmet, welding gloves, flame-resistant clothing, and safety glasses.
Pro tip: Always inspect your gas cylinder for leaks before use. Apply soapy water to the valve—if bubbles form, there’s a leak. Tighten connections or replace faulty parts.
Step-by-Step Guide to Argon Gas MIG Welding
Step 1: Prepare Your Workspace
Start with a clean, dry, and well-ventilated area. Remove any flammable materials and ensure your workpiece is secure. Use clamps to hold metal pieces in place—this prevents movement during welding.
Clean the metal surface thoroughly. Use a wire brush or grinder to remove rust, paint, oil, or dirt. Even a thin layer of contamination can cause porosity or weak welds. For aluminum, use a stainless steel brush dedicated solely to aluminum to avoid cross-contamination.
Step 2: Set Up Your MIG Welder
Turn off the welder and connect the gas cylinder. Attach the regulator and flow meter, then open the valve slowly. Set the flow rate to 20–25 CFH. Too little gas won’t protect the weld; too much can cause turbulence and draw in air.
Next, load the wire electrode. Make sure the wire spool spins freely and the drive rolls are properly tensioned. Insert the wire into the liner and feed it to the welding gun. Trim the wire so it sticks out about ½ inch from the contact tip.
Step 3: Adjust Welding Settings
Refer to your welder’s chart for recommended voltage and wire speed based on material thickness and type. For example:
- 1/8-inch steel: 18–20 volts, 200–250 inches per minute (IPM)
- 1/4-inch aluminum: 20–22 volts, 300–350 IPM
Set the polarity correctly. For most MIG welding with argon blends, use DC electrode positive (DCEP). If you’re using a spool gun for aluminum, confirm polarity settings in your manual.
Step 4: Test Your Setup
Before welding your actual project, do a test weld on a scrap piece of metal. This helps you fine-tune settings and check for issues like poor gas coverage or wire feed problems.
Look for a smooth, consistent bead with minimal spatter. If the weld looks porous or the arc is erratic, adjust gas flow or check for leaks.
Step 5: Begin Welding
Put on your safety gear and position yourself comfortably. Hold the welding gun at a 10–15 degree angle, pointing in the direction of travel. Keep the nozzle ½ to ¾ inch from the workpiece.
Start the weld by pulling the trigger. Move the gun steadily along the joint—don’t rush. Use a push or drag technique depending on the material. For flat welds, a slight push angle often gives better visibility and flatter beads.
Maintain a consistent travel speed. Too slow causes burn-through; too fast leads to lack of fusion. Listen for a steady “frying” sound—that’s a good sign your arc is stable.
Step 6: Finish and Clean Up
Once the weld is complete, release the trigger and let the weld pool cool. Avoid moving the piece too quickly—thermal stress can cause cracking.
After cooling, remove slag (if using flux-core wire) with a wire brush or chipping hammer. Inspect the weld for cracks, undercutting, or porosity. If needed, grind and re-weld problem areas.
Troubleshooting Common Issues
Even experienced welders run into problems. Here’s how to fix the most common argon gas MIG welding issues:
- Porosity (holes in the weld): Usually caused by poor gas coverage. Check for leaks, increase gas flow slightly, or clean the base metal better.
- Erratic arc or wire burn-back: Often due to a worn contact tip or incorrect wire speed. Replace the tip and adjust wire feed.
- Undercutting (grooves along the weld edge): Caused by too high voltage or fast travel speed. Reduce voltage and slow down.
- Excessive spatter: Check voltage settings and ensure the work clamp is secure. Also, verify gas mix and flow rate.
- Weak or incomplete fusion: Increase voltage or slow travel speed. Make sure the joint is clean and properly fit-up.
Remember: small adjustments make a big difference. Keep a welding log to track settings and results—this helps you improve over time.
Safety Tips for Argon Gas MIG Welding
Welding is safe when done correctly, but argon gas and high heat require caution. Follow these safety practices:
- Always wear a welding helmet with the proper shade (at least shade 10).
- Use flame-resistant clothing—no synthetic fabrics that can melt.
- Wear welding gloves and closed-toe shoes.
- Work in a well-ventilated area. Argon is non-toxic but can displace oxygen in confined spaces.
- Never weld near flammable materials or liquids.
- Turn off the gas cylinder when not in use.
Bonus tip: Keep a fire extinguisher nearby and never leave your welder unattended while in use.
Conclusion
Argon gas MIG welding is a powerful technique that delivers clean, strong, and professional-looking welds. By using the right gas mix, setting up your machine correctly, and practicing good technique, you can tackle a wide range of projects with confidence.
Whether you’re welding steel or aluminum, argon improves arc stability, reduces spatter, and protects your weld from contamination. With the steps and tips in this guide, you’re well on your way to mastering argon gas MIG welding. Keep practicing, stay safe, and enjoy the craft!