

This guide walks you through MIG welding stainless steel with 100% argon, a less common but viable method for specific applications. You’ll learn proper setup, welding techniques, and how to avoid common pitfalls for clean, strong welds.
Key Takeaways
- Use the right filler metal: Choose ER308L or ER316L wire for most stainless steel grades to ensure compatibility and corrosion resistance.
- Cleanliness is critical: Always clean base metal and wire with acetone or a dedicated stainless steel cleaner to prevent contamination.
- Adjust voltage and wire speed: Start with lower voltage (16–18V) and moderate wire feed speed (200–300 IPM) for thin materials.
- Maintain consistent travel speed: Move steadily to avoid burn-through or lack of fusion, especially on thin stainless sheets.
- Post-weld cleaning matters: Remove oxide discoloration with a stainless wire brush or pickling paste to preserve corrosion resistance.
- Ventilation is essential: Welding stainless produces hexavalent chromium—always weld in well-ventilated areas or use fume extraction.
- 100% argon works best on thin materials: It’s ideal for sheet metal under 1/8 inch; thicker sections may need tri-mix gases for better penetration.
Introduction: Why Weld Stainless Steel with 100% Argon?
MIG welding stainless steel is a skill that demands precision, the right tools, and the correct shielding gas. While most welders use tri-mix gases (like 98% argon / 2% CO₂ or argon-helium mixes) for stainless steel, 100% argon can be a surprisingly effective choice—especially for thin materials and specific applications. This guide will show you exactly how to MIG weld stainless steel using 100% argon, from setup to finishing touches.
You’ll learn the ideal machine settings, proper welding techniques, and how to avoid common mistakes like warping, discoloration, or weak welds. Whether you’re working on automotive parts, kitchen equipment, or custom fabrication, this method offers clean, spatter-free results when done right.
Understanding 100% Argon for Stainless Steel
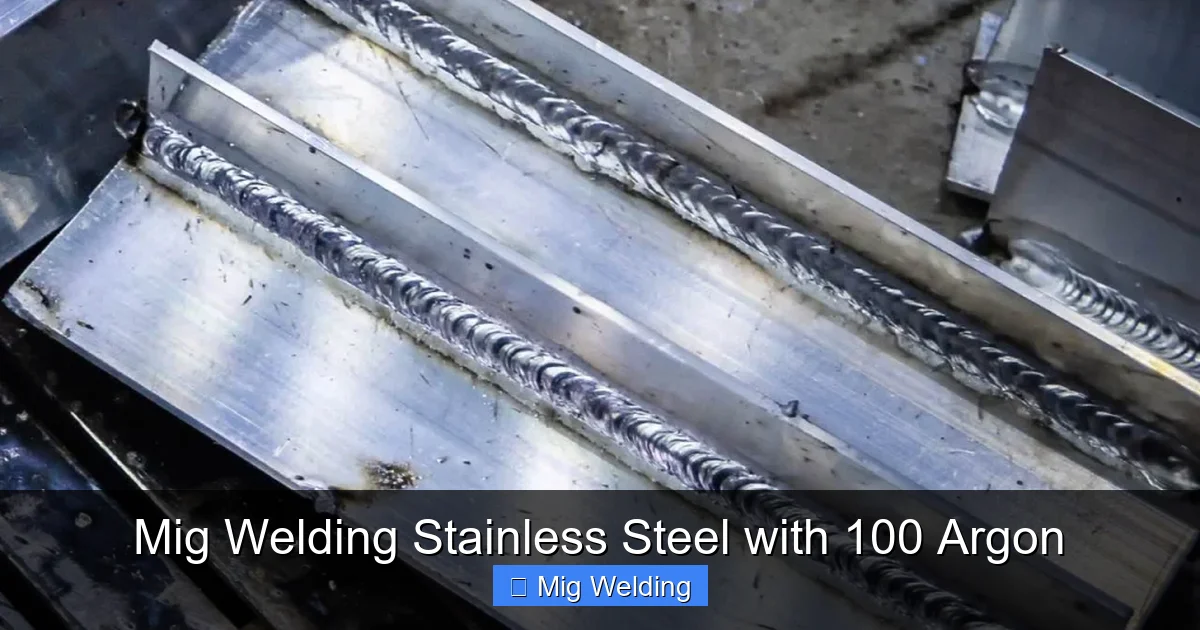
Visual guide about Mig Welding Stainless Steel with 100 Argon
Image source: weldguru.com
Most MIG welding of stainless steel uses a mix of argon and a small amount of reactive gas (like CO₂ or oxygen) to stabilize the arc and improve penetration. However, 100% argon creates a softer, more controlled arc that’s perfect for thin-gauge stainless steel—typically under 1/8 inch (3 mm).
The benefits? Less spatter, smoother bead appearance, and reduced risk of burn-through. The downside? Slightly less penetration and a narrower bead profile. That’s why 100% argon is best suited for sheet metal, tubing, and cosmetic welds where appearance matters.
When to Use 100% Argon
- Welding thin stainless steel (18 gauge to 1/8 inch)
- Projects requiring minimal spatter and clean beads
- Automotive exhaust systems or decorative railings
- When tri-mix gas isn’t available
When to Avoid It
Avoid 100% argon on thick sections (over 1/4 inch), high-stress joints, or when deep penetration is needed. For those, switch to a tri-mix gas like 90% helium / 7.5% argon / 2.5% CO₂.
Equipment and Materials You’ll Need
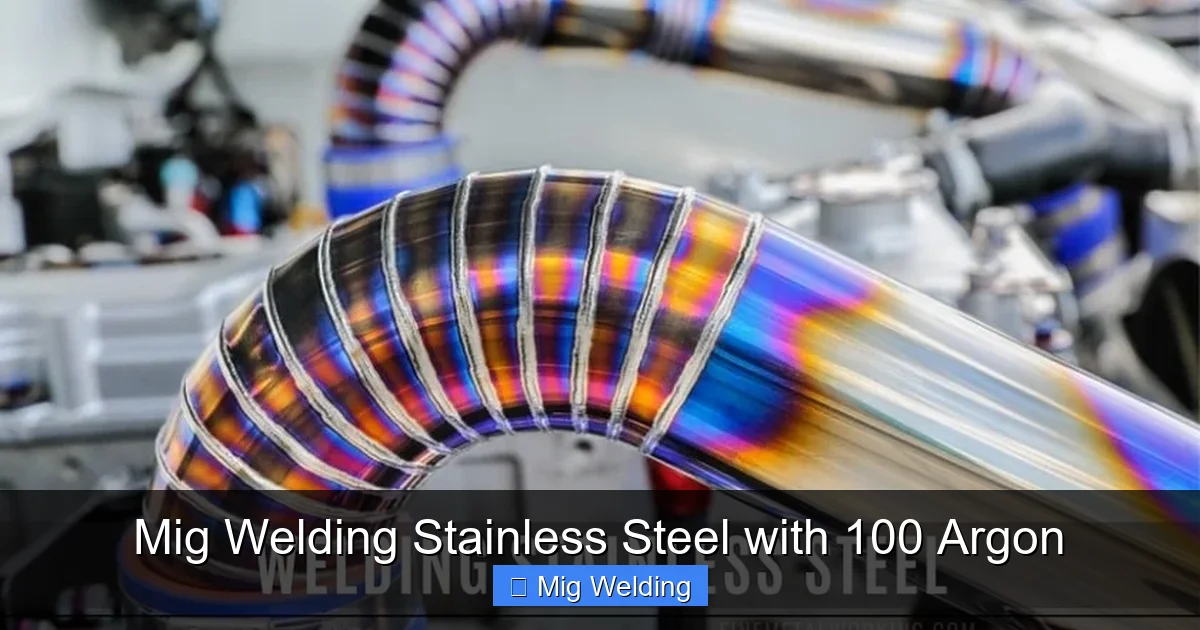
Visual guide about Mig Welding Stainless Steel with 100 Argon
Image source: finemetalworking.com
Before you strike an arc, gather the right tools and materials. Using the wrong setup can lead to poor welds or equipment damage.
Essential Equipment
- MIG welder: A machine capable of welding stainless steel (preferably with adjustable voltage and wire feed speed).
- 100% argon gas tank and regulator: Ensure your regulator is compatible with argon and has a flow meter.
- Stainless steel MIG wire: Use ER308L for 304 stainless or ER316L for 316 stainless. Avoid carbon steel wire—it will corrode.
- Wire feeder and liner: Use a stainless steel liner or Teflon liner to prevent wire jamming.
- Ground clamp: A heavy-duty clamp ensures good electrical contact.
Safety Gear
Never skip safety! Stainless steel welding produces harmful fumes and bright UV light.
- Auto-darkening welding helmet (shade 10–13)
- Flame-resistant welding jacket and gloves
- Respirator or fume extractor (hexavalent chromium is toxic)
- Closed-toe shoes and safety glasses
Step-by-Step: Setting Up Your Welder
Proper setup is the foundation of a good weld. Follow these steps carefully.
1. Prepare the Workpiece
Clean both sides of the stainless steel with acetone or a stainless-specific cleaner. Remove oil, grease, paint, or rust. Even small contaminants can cause porosity or weaken the weld.
Use a dedicated stainless steel wire brush (never used on carbon steel) to scrub the joint area. This prevents cross-contamination.
2. Choose the Right Wire
Match your filler wire to the base metal:
- ER308L: Best for 304/304L stainless steel (most common).
- ER316L: Use for 316/316L stainless (marine or chemical environments).
Load the wire into your MIG welder, making sure it feeds smoothly. Use a stainless liner if your machine has one.
3. Set Gas Flow Rate
Set your argon flow rate to 20–25 cubic feet per hour (CFH). Too little gas leads to porosity; too much causes turbulence and air contamination.
Purge the gas line for 10–15 seconds before welding to remove air.
4. Adjust Voltage and Wire Speed
Start with these baseline settings for thin stainless steel (18–16 gauge):
- Voltage: 16–18 volts
- Wire feed speed: 200–300 inches per minute (IPM)
For 14–12 gauge, increase to 18–20V and 300–400 IPM. Always test on scrap metal first.
5. Set Polarity
Ensure your MIG welder is set to DCEN (direct current electrode negative). This is standard for MIG welding and ensures proper heat distribution.
Welding Technique: How to Weld Like a Pro
Now that your machine is ready, it’s time to weld. Technique makes all the difference.
1. Position the Gun Correctly
Hold the MIG gun at a 10–15 degree angle in the direction of travel. Keep the nozzle ½ inch from the workpiece.
Use a drag (pull) technique—pulling the gun toward you creates a smoother, flatter bead with better control.
2. Maintain Consistent Travel Speed
Move at a steady, moderate pace. Too slow = burn-through. Too fast = lack of fusion.
For thin materials, a slight side-to-side weave can help distribute heat and prevent warping. Keep the weave narrow—no more than 1/4 inch.
3. Watch the Puddle
Look for a shiny, fluid puddle that flows smoothly into the base metal. If it’s bubbly or dark, you may have contamination or incorrect settings.
A good weld will have a clean, silver or light straw color. Dark blue or gray indicates oxidation—clean the area and re-weld.
4. Overlap Welds Properly
When making multiple passes, overlap each bead by about 50%. This ensures full fusion and a strong joint.
Troubleshooting Common Problems
Even with perfect setup, issues can arise. Here’s how to fix them.
Porosity (Bubbles in the Weld)
Cause: Contaminated base metal, moisture, or low gas flow.
Solution: Clean the metal thoroughly, check gas flow (20–25 CFH), and ensure no drafts are blowing away the shield.
Burn-Through
Cause: Too much heat or slow travel speed on thin metal.
Solution: Reduce voltage, increase travel speed, or use a copper backing bar to dissipate heat.
Lack of Fusion
Cause: Too fast travel speed or incorrect angle.
Solution: Slow down, use a slight weave, and ensure the arc is penetrating both sides of the joint.
Discoloration (Blue or Gray Oxide)
Cause: Oxygen contamination or overheating.
Solution: Increase gas coverage, reduce heat input, and clean the weld with a stainless wire brush or pickling paste.
Post-Weld Cleaning and Finishing
A great weld isn’t finished until it’s cleaned and protected.
1. Remove Oxide Scale
Use a stainless steel wire brush (dedicated to stainless only) to scrub the weld and heat-affected zone. This removes surface oxides and restores corrosion resistance.
2. Apply Pickling Paste (Optional)
For critical applications, apply stainless steel pickling paste to dissolve oxides and passivate the surface. Rinse thoroughly with water afterward.
3. Polish for Appearance (If Needed)
Use progressively finer abrasives (up to 400+ grit) to polish the weld for a mirror finish. Always follow the grain direction.
Safety Reminders
Stainless steel welding isn’t just about technique—it’s about health.
- Always weld in a well-ventilated area or use a fume extractor.
- Wear a respirator rated for welding fumes (P100 filter recommended).
- Never touch the weld immediately—it can cause severe burns.
- Store gas cylinders upright and secured.
Conclusion: Mastering 100% Argon MIG Welding
Welding stainless steel with 100% argon may not be the most common method, but it’s a valuable skill for thin-gauge work where appearance and control matter. By using the right filler wire, maintaining cleanliness, and dialing in your machine settings, you can produce strong, clean welds with minimal spatter.
Remember: practice on scrap metal first, always prioritize safety, and don’t skip post-weld cleaning. With these tips, you’ll be confidently MIG welding stainless steel like a pro—even with just argon on your side.