
Mig welding stainless steel with 75/25 shielding gas is possible but requires careful setup and technique. This guide walks you through proper equipment, settings, and best practices to avoid common pitfalls and achieve strong, corrosion-resistant welds.
Key Takeaways
- Use the right gas mix: While 75/25 (75% argon, 25% CO₂) is common for mild steel, it can work for stainless steel in a pinch—but it increases oxidation risk.
- Choose the correct filler wire: ER308L or ER316L wire matches most stainless steels and ensures corrosion resistance.
- Adjust voltage and wire speed: Lower settings than mild steel prevent burn-through and distortion.
- Keep travel speed steady: Slow, consistent movement helps control heat input and reduces warping.
- Clean joints are essential: Remove oils, dirt, and oxides before welding to avoid contamination.
- Post-weld care matters: Clean the weld with a stainless steel brush and consider pickling paste for best appearance and corrosion resistance.
- Consider tri-mix gas for better results: For professional-quality welds, switch to 90% helium, 7.5% argon, and 2.5% CO₂ when possible.
Introduction: Can You MIG Weld Stainless Steel with 75/25?
Yes, you can MIG weld stainless steel using 75/25 shielding gas—but it’s not ideal. Many welders default to this common argon/CO₂ mix because it’s affordable and widely available. However, stainless steel demands more precision due to its sensitivity to heat and oxidation. This guide will show you how to adapt your MIG setup and technique to successfully weld stainless steel with 75/25 gas, while minimizing defects and maintaining corrosion resistance.
You’ll learn the right equipment, optimal settings, joint prep, and post-weld care. Whether you’re repairing a stainless sink, building a custom exhaust, or working on food-grade equipment, these steps will help you get strong, clean welds—even with less-than-perfect gas.
Why 75/25 Gas Isn’t Perfect for Stainless Steel
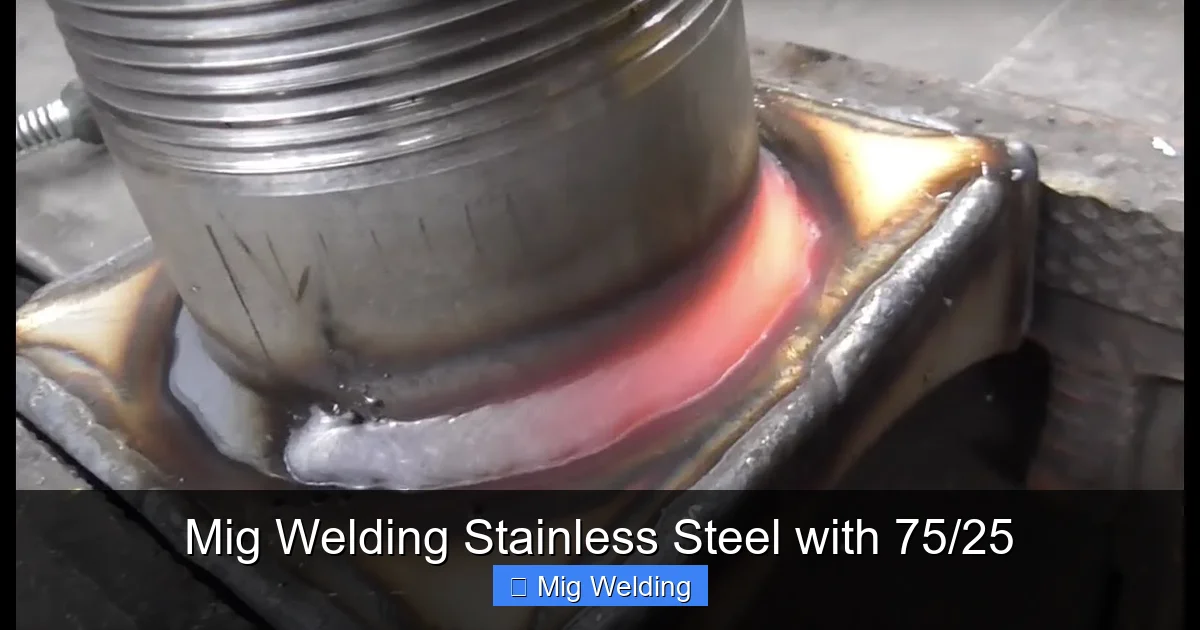
Visual guide about Mig Welding Stainless Steel with 75/25
Image source: i.ytimg.com
Stainless steel contains chromium, which gives it corrosion resistance—but only if the chromium isn’t oxidized during welding. The CO₂ in 75/25 gas promotes oxidation, which can form a dark, scaly layer on the weld (called “sugaring” or “coking”). This not only looks bad but can weaken corrosion resistance.
That said, 75/25 can work for non-critical applications like decorative work or short production runs where appearance isn’t top priority. For food, medical, or marine environments, consider upgrading to a tri-mix gas (helium/argon/CO₂), which reduces oxidation and improves arc stability.
Step 1: Choose the Right Filler Wire
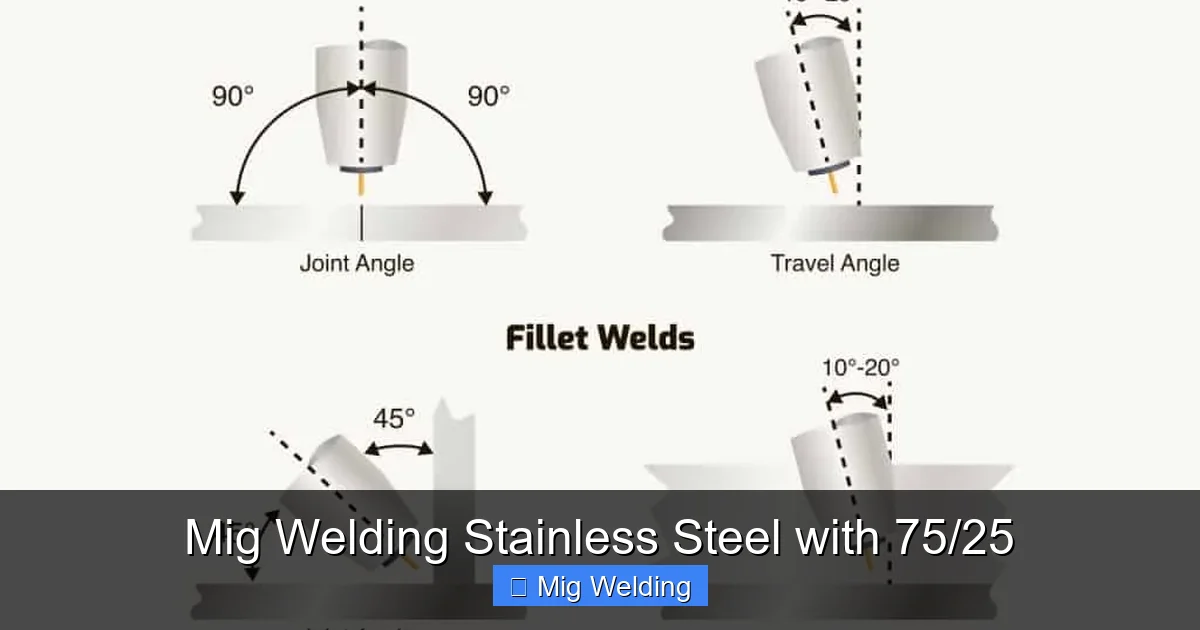
Visual guide about Mig Welding Stainless Steel with 75/25
Image source: weldguru.com
Using the correct filler metal is just as important as gas selection.
Match the Base Metal
Most stainless steels fall into the 300 series (austenitic). For these, use:
– ER308L: Best for 304 and 304L stainless steel (common in kitchen appliances and tanks).
– ER316L: Use for 316 and 316L stainless (better corrosion resistance, ideal for marine or chemical environments).
Avoid mild steel wires—they’ll contaminate the weld and cause rust.
Wire Diameter Matters
For most stainless projects, 0.030″ or 0.035″ diameter wire works well. Thinner wire (0.023″) gives better control on thin materials, while thicker wire handles heavier sections.
Step 2: Set Up Your MIG Welder Correctly
Stainless steel conducts heat differently than mild steel—it expands more and cools slower. This means you need lower heat input to avoid warping and burn-through.
Voltage and Wire Feed Speed
Start with these general settings (adjust based on material thickness):
| Material Thickness | Voltage (V) | Wire Speed (IPM) |
|——————–|————-|——————|
| 18 gauge (1.2 mm) | 16–18 V | 180–220 IPM |
| 16 gauge (1.5 mm) | 18–20 V | 220–260 IPM |
| 14 gauge (2.0 mm) | 20–22 V | 260–300 IPM |
Use a short-circuit or spray transfer mode. Avoid globular transfer—it causes spatter and poor penetration.
Polarity Check
Make sure your welder is set to DCEN (Direct Current Electrode Negative)—this is standard for MIG welding. DCEP will cause poor arc stability and excessive spatter.
Step 3: Prepare the Joint Properly
Cleanliness is critical when welding stainless steel.
Remove Contaminants
Wipe the joint area with acetone or a dedicated stainless cleaner. Never use shop rags that may have oil or grease. Even fingerprints can introduce carbon, which leads to carbide precipitation and reduced corrosion resistance.
Grind or Wire Brush
Use a stainless steel wire brush (dedicated only to stainless) to remove oxides. Don’t use a brush that’s been on mild steel—it will transfer iron particles and cause rust spots.
Fit-Up and Clamping
Stainless steel warps easily. Use tight fit-up and strong clamps to minimize gaps. For butt joints, a 0–1/16″ gap is ideal. Use backing bars or copper chill bars on thin materials to control heat.
Step 4: Welding Technique Tips
Your welding motion and angle make a big difference.
Travel Angle
Hold the gun at a 10–15 degree push angle (pushing the puddle away from you). This helps protect the weld pool with gas and reduces oxidation.
Travel Speed
Move steadily—not too fast (which causes lack of fusion) or too slow (which causes excessive heat and warping). A good rule: you should see a slight ripple pattern form just behind the arc.
Welding Position
– Flat/Horizontal: Easiest. Use a slight weave if needed for wider beads.
– Vertical: Weld upward with a slight oscillation to control the puddle.
– Overhead: Use shorter arcs and lower heat to prevent dripping.
Step 5: Post-Weld Cleaning and Finishing
Even with 75/25 gas, you can improve the weld’s appearance and performance.
Brush the Weld
Immediately after welding, use a clean stainless steel brush to remove surface oxides. Brush in one direction along the weld.
Use Pickling Paste (Optional)
For a professional finish, apply stainless steel pickling paste (available at welding supply stores). It chemically removes heat tint and restores the passive chromium layer. Rinse thoroughly with water afterward.
Avoid Grinding Too Much
Heavy grinding can embed contaminants. If you must grind, use a clean, dedicated disc and finish with a fine-grit flap wheel.
Troubleshooting Common Problems
Even with careful setup, issues can arise. Here’s how to fix them.
Problem: Dark, Scaly Weld (Sugaring)
Cause: Oxidation from CO₂ in 75/25 gas.
Fix: Improve gas coverage by increasing flow rate (20–25 CFH), shortening nozzle-to-work distance, or switching to tri-mix gas.
Problem: Burn-Through on Thin Metal
Cause: Too much heat.
Fix: Reduce voltage, increase travel speed, or use a pulsed MIG setting if available.
Problem: Poor Penetration
Cause: Low heat or incorrect angle.
Fix: Increase voltage slightly, ensure proper joint fit-up, and use a drag angle if needed.
Problem: Excessive Spatter
Cause: High voltage, dirty metal, or incorrect wire.
Fix: Clean the base metal, reduce voltage, and check wire feed tension.
When to Upgrade to Tri-Mix Gas
If you weld stainless steel regularly, consider investing in a tri-mix gas (90% helium, 7.5% argon, 2.5% CO₂). Benefits include:
– Reduced oxidation and cleaner welds
– Better arc stability and penetration
– Less post-weld cleanup
It’s more expensive, but the improved results are worth it for critical or visible welds.
Conclusion: Smart Welding with 75/25
MIG welding stainless steel with 75/25 gas is a practical compromise for hobbyists and light fabrication. While it’s not the best gas for stainless, you can still achieve strong, functional welds by using the right wire, settings, and techniques.
Focus on cleanliness, controlled heat input, and proper post-weld care. And remember: if your project demands high corrosion resistance or a polished finish, upgrading to tri-mix gas is a smart long-term investment.
With practice, you’ll gain confidence in welding stainless steel—even with less-than-ideal gas. Keep these tips handy, and you’ll be laying down clean, reliable beads in no time.