

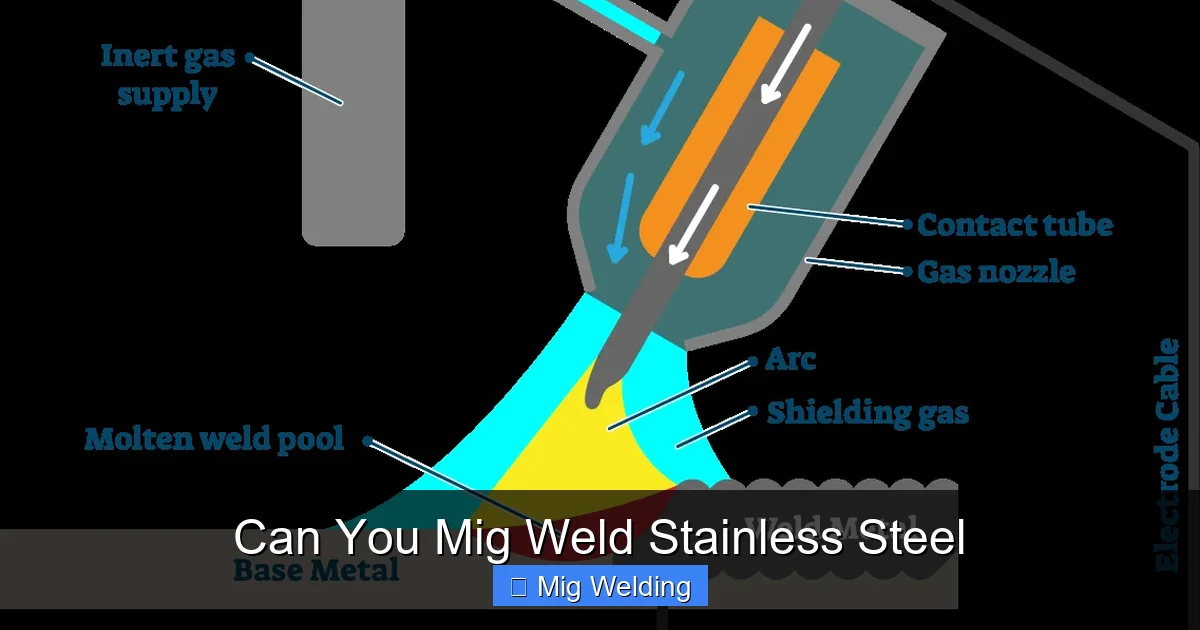
Can you MIG weld stainless steel? Yes, you can. MIG welding is a popular method for stainless steel because it offers clean, precise welds. This guide will walk you through the process step-by-step, ensuring you get professional results with proper techniques and safety tips.
Can You MIG Weld Stainless Steel?
Absolutely! MIG welding is one of the most effective methods for welding stainless steel. It’s fast, precise, and produces clean welds, making it a favorite among professionals and DIY enthusiasts alike. Whether you’re repairing a stainless steel appliance or fabricating a new piece, understanding the right techniques and materials is key to success. In this guide, we’ll explore everything you need to know about MIG welding stainless steel, from equipment setup to troubleshooting common issues.
Key Takeaways
- Yes, MIG welding can be used for stainless steel: It’s a popular choice for its speed and clean finish.
- Use the right shielding gas: Typically, a mixture of argon and CO2 or 100% argon provides optimal results.
- Choose the appropriate wire: ER308L or ER316L are common stainless steel MIG wires.
- Maintain proper welding parameters: Adjust voltage, wire feed speed, and travel speed for best results.
- Preheat and clean your materials: Remove rust and oils, and preheat if necessary for thicker sections.
- Practice safety precautions: Use proper PPE and work in a well-ventilated area.
Understanding MIG Welding for Stainless Steel
MIG (Metal Inert Gas) welding, also known as GMAW (Gas Metal Arc Welding), involves feeding a continuous wire electrode into the weld pool while shielding it from contamination with an inert or semi-inert gas. When welding stainless steel, it’s essential to select the right wire, gas, and settings to achieve strong, corrosion-resistant welds.
Equipment and Materials Needed
- MIG welder: Make sure it’s capable of welding stainless steel and adjustable for different settings.
- Welding wire: ER308L, ER316L, or other stainless steel wires suitable for your application.
- Shielding gas: Usually, 98% pure argon, or a mix of argon and CO2 (such as 98% argon/2% CO2).
- Welding helmet, gloves, and protective clothing: Always prioritize safety.
- Cleaning tools: Wire brushes, grinders, or chemical cleaners to clean the metal before welding.
- Clamps and fixtures: To secure your workpieces in place.
Step-by-Step Guide to MIG Welding Stainless Steel
Step 1: Prepare Your Materials
Proper preparation ensures strong, clean welds. Begin by cleaning the stainless steel surfaces thoroughly. Remove any rust, oil, grease, or dirt using a stainless steel wire brush or a chemical cleaner. For thicker or heavily contaminated materials, consider using a grinder to remove surface impurities.

Visual guide about Can You Mig Weld Stainless Steel
Image source: weldguru.com
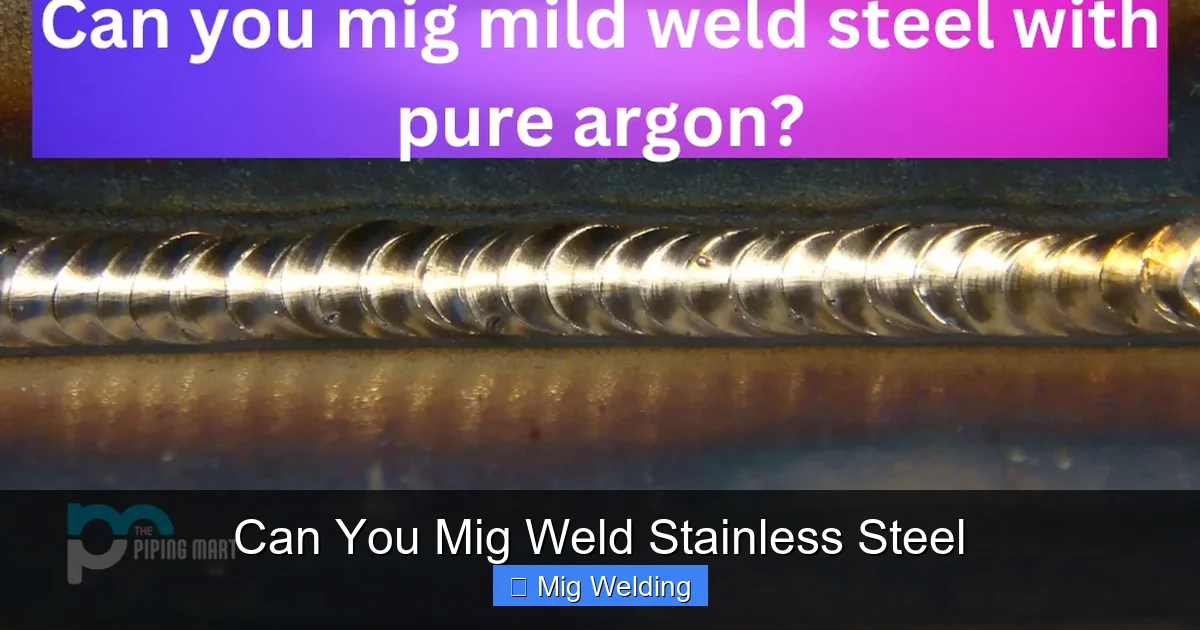
Visual guide about Can You Mig Weld Stainless Steel
Image source: blog.thepipingmart.com
Step 2: Set Up Your MIG Welder
- Select the correct wire: Use ER308L for general-purpose stainless steel welding, or ER316L for marine-grade or more corrosion-resistant welds.
- Choose the right shielding gas: Use pure argon or a mix with CO2. For stainless steel, pure argon or a mix with a small percentage of CO2 (like 98% argon/2% CO2) provides good results.
- Adjust your welder settings: Typical voltage for stainless steel is around 17-22 volts, with wire feed speeds of 200-400 inches per minute, depending on thickness.
Step 3: Set Up Your Workspace
Work in a well-ventilated area to avoid inhaling fumes. Secure your workpieces with clamps to prevent movement. Ensure your PPE is on, including a welding helmet with the appropriate shade, gloves, and protective clothing.
Step 4: Start Welding
- Position your torch: Hold it at a 10-15 degree angle in the direction of travel.
- Maintain a steady travel speed: Too slow may cause excess buildup; too fast can result in weak welds.
- Keep a consistent arc length: About the diameter of the wire for optimal heat transfer.
Step 5: Monitor and Adjust
Watch the weld puddle closely. It should be smooth and shiny. Adjust wire feed or voltage if the weld is too rough, too cold, or too hot. Practice on scrap pieces to fine-tune your settings.
Step 6: Post-Weld Cleaning
After welding, clean the weld area with a stainless steel wire brush to remove any slag or oxidation. This step helps reveal the quality of your weld and prevents corrosion.
Practical Tips for Successful MIG Welding Stainless Steel
- Use the right wire and gas combo: Always match your wire type to your stainless steel grade.
- Maintain proper shielding gas coverage: Keep the gas flow steady, typically between 20-30 CFH (cubic feet per hour).
- Control heat input: Too much heat can cause warping or burn-through. Use lower heat settings for thin materials.
- Practice good technique: Short, steady pushes or pulls produce better welds than long, inconsistent movements.
- Clean thoroughly: Never weld over dirty or greasy surfaces, as this causes porosity and weak welds.
Common Challenges and Troubleshooting
- Porosity in welds: Caused by contaminated surfaces or insufficient shielding gas. Ensure cleanliness and proper gas flow.
- Cracks or weak welds: Usually due to excessive heat or improper settings. Adjust heat input and ensure correct wire feed speed.
- Undercutting: When the weld bead erodes the base metal, often from high heat. Lower your voltage and use a faster travel speed.
- Inconsistent welds: Practice maintaining a steady hand, consistent travel speed, and proper torch angle.
Conclusion
MIG welding stainless steel is an accessible and effective method for many projects. With the right equipment, preparation, and technique, you can produce strong, clean, and corrosion-resistant welds. Remember to practice safety at all times, and don’t hesitate to experiment with settings on scrap pieces before working on your actual project. Happy welding!

Visual guide about Can You Mig Weld Stainless Steel
Image source: cdn.thepipingmart.com
Final Tips
- Always use the appropriate stainless steel wire and shielding gas.
- Keep your workspace clean and well-ventilated.
- Practice makes perfect—test your settings and technique on scrap first.
- Regularly inspect your equipment to ensure it’s in good condition.
Additional Resources
For more detailed tutorials, consider consulting welding courses, manufacturer manuals, or professional welding forums. Staying informed helps you improve your skills and achieve top-quality welds every time.
