

This guide teaches you how to MIG weld 22 gauge sheet metal safely and effectively. You’ll learn the right equipment, settings, and techniques to avoid burn-through and warping while achieving strong, clean welds.
Key Takeaways
- Use the right wire and gas: 0.023″ or 0.030″ ER70S-6 solid wire with 75% argon / 25% CO2 shielding gas ensures clean, stable welds on thin metal.
- Lower your voltage and wire speed: Start with 16–18 volts and 200–250 IPM wire feed speed to prevent burn-through on 22 gauge steel.
- Employ a push technique: Pushing the MIG gun (rather than pulling) gives better visibility and reduces heat input, minimizing warping.
- Use tack welds and stitch welding: Short tacks and intermittent welds help control distortion and maintain alignment.
- Keep the gun at a 10–15° angle: A slight work angle improves penetration without burning through the thin material.
- Clean the metal thoroughly: Remove rust, paint, and oil before welding to ensure strong, defect-free joints.
- Practice on scrap first: Always test your settings on similar scrap metal to fine-tune your technique before welding the actual project.
How to MIG Weld 22 Gauge Sheet Metal: A Complete Guide
If you’re working on automotive panels, HVAC ducts, or custom metal fabrication, knowing how to MIG weld 22 gauge sheet metal is a must. This thin steel—just 0.031 inches thick—can be tricky to weld without burning through or warping. But with the right tools, settings, and techniques, you can achieve strong, clean, and professional-looking welds every time.
In this guide, we’ll walk you through everything you need to know—from setting up your MIG welder to mastering the correct welding technique. Whether you’re a beginner or an experienced welder tackling thin metal for the first time, this step-by-step tutorial will help you avoid common pitfalls and get great results.
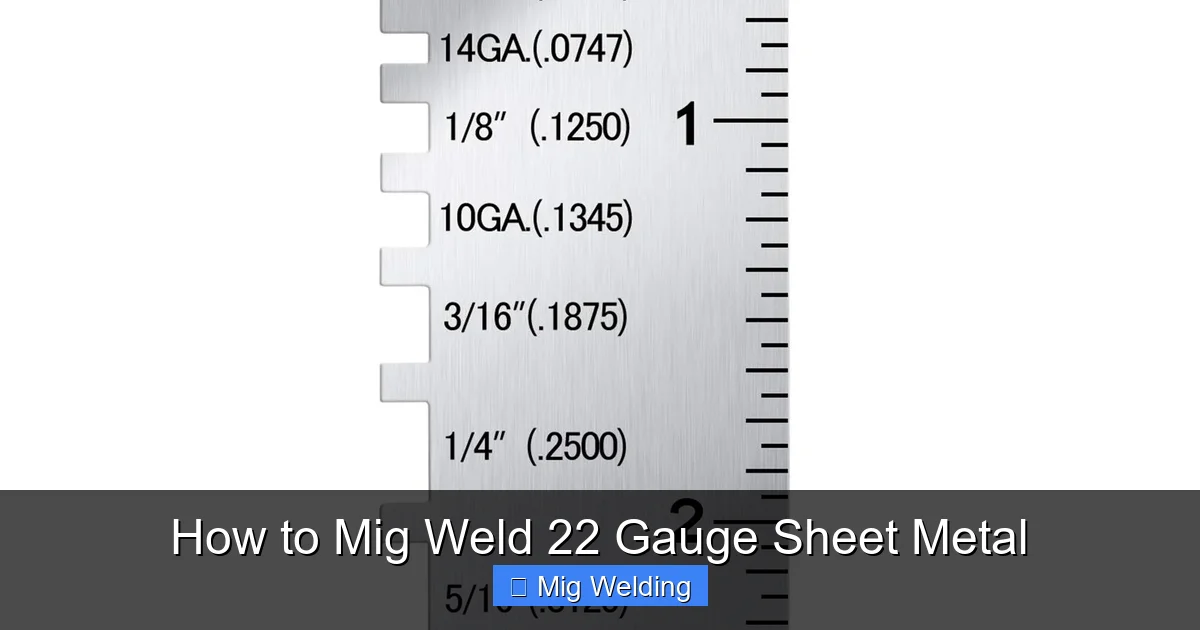
Understanding 22 Gauge Sheet Metal
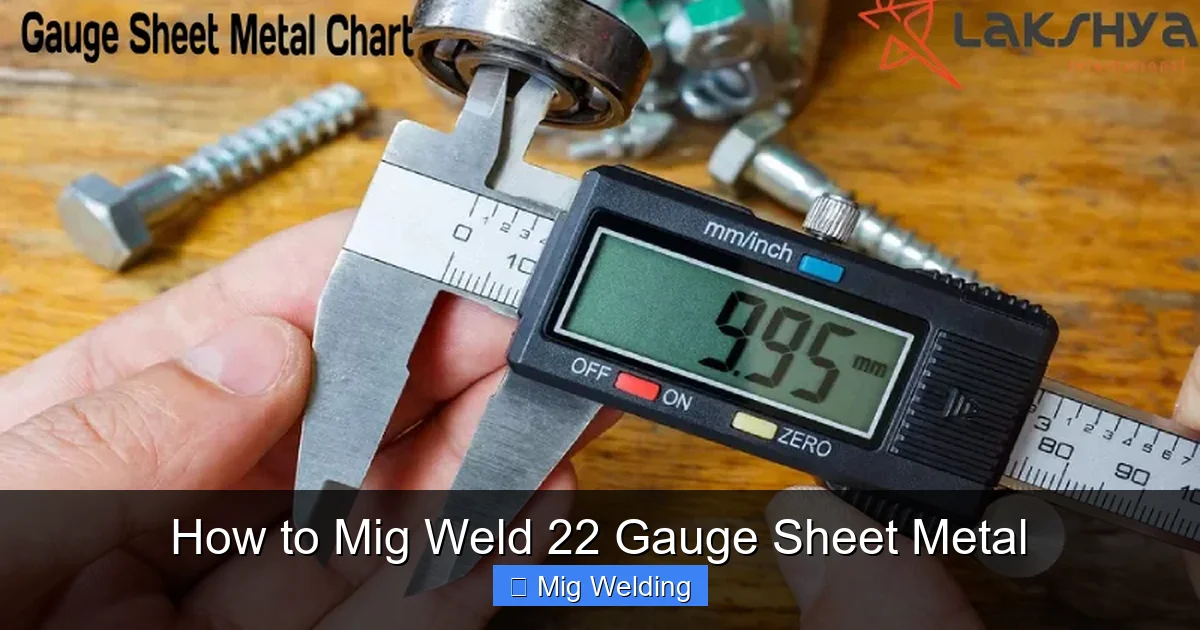
Visual guide about How to Mig Weld 22 Gauge Sheet Metal
Image source: lakshyasteel.com
Before you strike an arc, it’s important to understand what you’re working with. 22 gauge steel is one of the thinnest commonly used sheet metals in fabrication and repair work. It’s lightweight, easy to form, and widely used in car body panels, ductwork, and appliance enclosures.
Because it’s so thin, 22 gauge metal heats up quickly and loses heat slowly. This makes it prone to burn-through, warping, and distortion if you’re not careful. That’s why MIG welding this material requires precision, low heat input, and proper technique.
Essential Equipment and Setup
Visual guide about How to Mig Weld 22 Gauge Sheet Metal
Image source: m.media-amazon.com
Choose the Right MIG Welder
Not all MIG welders are created equal—especially when it comes to thin metal. For 22 gauge steel, you need a welder with fine control over voltage and wire feed speed. Look for a machine with:
- A wide voltage range (ideally down to 13–14 volts)
- Adjustable wire feed speed (IPM)
- Spool gun or push-pull capability (optional but helpful)
Many modern MIG welders, including inverter-based models, offer excellent control for thin-gauge welding. Machines like the Millermatic 211 or Hobart Handler 140 are popular choices.
Select the Correct Wire and Gas
For 22 gauge steel, use:
- Wire: 0.023″ or 0.030″ ER70S-6 solid mild steel wire. The smaller diameter helps reduce heat input.
- Shielding gas: 75% argon / 25% CO2 mix (also called C25). This blend provides a stable arc, good penetration, and minimal spatter.
Avoid flux-core wire unless you’re welding outdoors—it generates more heat and spatter, which can damage thin metal.
Prepare Your Work Area
Set up in a clean, dry, and well-ventilated space. Secure your workpiece with clamps or a magnetic welding table to prevent movement. Use a backing bar (like copper or aluminum) behind the joint if possible—it helps dissipate heat and reduces burn-through.
Step-by-Step Welding Process
Step 1: Clean the Metal
Dirty metal is the enemy of good welds. Use a wire brush, grinder, or sandpaper to remove rust, paint, oil, and mill scale from both sides of the joint. Wipe the area with acetone or a degreaser to eliminate any residue.
Pro tip: Even small amounts of oil or dirt can cause porosity or weak welds. Take the time to clean thoroughly.
Step 2: Set Your Welder Settings
Start with these baseline settings for 22 gauge steel:
- Voltage: 16–18 volts (lower is better to avoid burn-through)
- Wire feed speed: 200–250 inches per minute (IPM)
- Gas flow rate: 20–25 CFH (cubic feet per hour)
These settings may vary depending on your welder, so always test on scrap metal first. Adjust in small increments—increase voltage if the weld is too cold (doesn’t penetrate), or decrease if you’re burning through.
Step 3: Use the Right Technique
Gun Angle and Travel Speed
Hold the MIG gun at a 10–15° work angle, pointing in the direction of travel. Keep the nozzle ½ inch from the workpiece. Move the gun steadily—too slow causes burn-through; too fast results in weak fusion.
Push vs. Pull Technique
For thin metal, use the push technique (also called forehand welding). Push the puddle away from you. This gives better visibility, reduces heat input, and helps prevent warping.
Tack Welding First
Before making a continuous weld, tack the pieces together every 1–2 inches. Use short, small tacks (about ¼ inch long). This keeps the metal aligned and reduces distortion.
Step 4: Weld in Short Stitches
Instead of one long weld, use the stitch welding method:
- Weld ½ to 1 inch, then skip ahead 1–2 inches.
- Go back and fill in the gaps.
- This allows the metal to cool between passes, reducing warping.
For longer seams, you can also use a backstep technique—weld a short section, then move backward to weld the next, overlapping slightly.
Step 5: Control Heat and Cooling
Let the metal cool between passes. If the metal starts to glow red or warp, stop and let it cool. You can also use a damp (not wet) rag to gently cool the area—but avoid rapid quenching, which can cause cracking.
Common Problems and Troubleshooting
Even with the best setup, issues can arise. Here’s how to fix the most common problems when MIG welding 22 gauge sheet metal:
Burn-Through
Symptoms: Holes in the metal, excessive spatter, or a blown-out puddle.
Causes: Too much voltage, slow travel speed, or dirty metal.
Solutions:
- Reduce voltage by 1–2 volts.
- Increase travel speed.
- Use a backing bar to absorb excess heat.
- Clean the metal thoroughly.
Warping and Distortion
Symptoms: Metal bends or twists after welding.
Causes: Excessive heat input, long continuous welds.
Solutions:
- Use stitch welding instead of continuous beads.
- Clamp the workpiece firmly.
- Weld in a backstep or skip sequence.
- Allow cooling between passes.
Poor Penetration or Cold Laps
Symptoms: Weld sits on top of the metal without fusing underneath.
Causes: Too low voltage, fast travel speed, or incorrect wire size.
Solutions:
- Increase voltage slightly.
- Slow down your travel speed.
- Ensure proper wire stick-out (¼ to ½ inch).
Excessive Spatter
Symptoms: Molten metal droplets sticking to the surface.
Causes: Incorrect voltage, dirty metal, or wrong gas mix.
Solutions:
- Fine-tune voltage and wire speed.
- Clean the metal and contact tip.
- Check gas flow and mixture.
Tips for Professional-Looking Welds
- Practice on scrap metal: Always test your settings and technique on similar scrap before welding your project.
- Use a welding table with a ground clamp nearby: This ensures a clean electrical connection and reduces arc blow.
- Keep your contact tip clean: A clogged tip causes erratic wire feeding and poor arcs.
- Wear proper PPE: Safety glasses, welding gloves, and a flame-resistant jacket are essential.
- Grind or file welds if needed: For cosmetic projects, you can smooth out welds with a flap disc or file.
Conclusion
Welding 22 gauge sheet metal with MIG may seem intimidating at first, but it’s absolutely achievable with the right approach. By using the correct equipment, fine-tuning your settings, and applying proper techniques like stitch welding and the push method, you can produce strong, clean, and distortion-free welds.
Remember: practice makes perfect. Start with scrap metal, adjust your settings gradually, and focus on controlling heat input. Over time, you’ll develop the feel for welding thin metal like a pro.
Whether you’re repairing a car fender, building a custom enclosure, or tackling a DIY project, mastering how to MIG weld 22 gauge sheet metal opens up a world of possibilities. So fire up your welder, stay safe, and happy welding!