

Welding aluminum can be tricky, but using the right technique makes all the difference. This guide walks you through the best methods—especially TIG welding—and shares essential tips for success. Whether you’re a beginner or experienced welder, you’ll learn how to get clean, strong aluminum welds safely and efficiently.
Key Takeaways
- Use TIG welding for precision and control: TIG (Tungsten Inert Gas) welding is the most recommended method for aluminum due to its clean, high-quality results and excellent control over heat input.
- Clean the metal thoroughly before welding: Aluminum forms an oxide layer that melts at a higher temperature than the base metal. Always scrub with a stainless-steel brush and use acetone to remove oils and dirt.
- Choose the right filler rod: Match the filler rod to the aluminum alloy you’re welding. Common choices include 4043 and 5356, each suited for different applications and strength needs.
- Use AC (Alternating Current) on your TIG welder: AC helps break up the oxide layer during welding, ensuring better fusion and penetration.
- Control heat with proper travel speed and amperage: Aluminum conducts heat quickly. Use the right amperage and move steadily to avoid warping or burn-through.
- Preheat thick aluminum if needed: For sections over 1/4 inch thick, preheating to 300–400°F reduces thermal stress and improves weld quality.
- Store filler rods properly: Keep filler rods in a dry, sealed container to prevent moisture absorption, which can cause porosity in the weld.
Best Welding Technique for Aluminum: A Complete How-To Guide
Welding aluminum is a skill that many welders find challenging—but it doesn’t have to be. With the right technique, tools, and preparation, you can achieve strong, clean, and professional-looking welds every time. Whether you’re working on automotive parts, boat repairs, or custom metal projects, knowing the best welding technique for aluminum is essential.
In this guide, you’ll learn why TIG welding is the top choice for aluminum, how to prepare your materials, select the right equipment, and execute a flawless weld. We’ll also cover common mistakes and how to avoid them. By the end, you’ll have the confidence and knowledge to tackle aluminum welding like a pro.
Why Aluminum Is Tricky to Weld
Aluminum has unique properties that make it more difficult to weld than steel. It conducts heat up to five times faster, which means heat spreads quickly and can lead to warping or burn-through if not managed. It also forms a hard oxide layer on the surface that melts at a much higher temperature than the aluminum underneath—around 1,200°F higher. This oxide layer can trap impurities and prevent proper fusion if not removed.
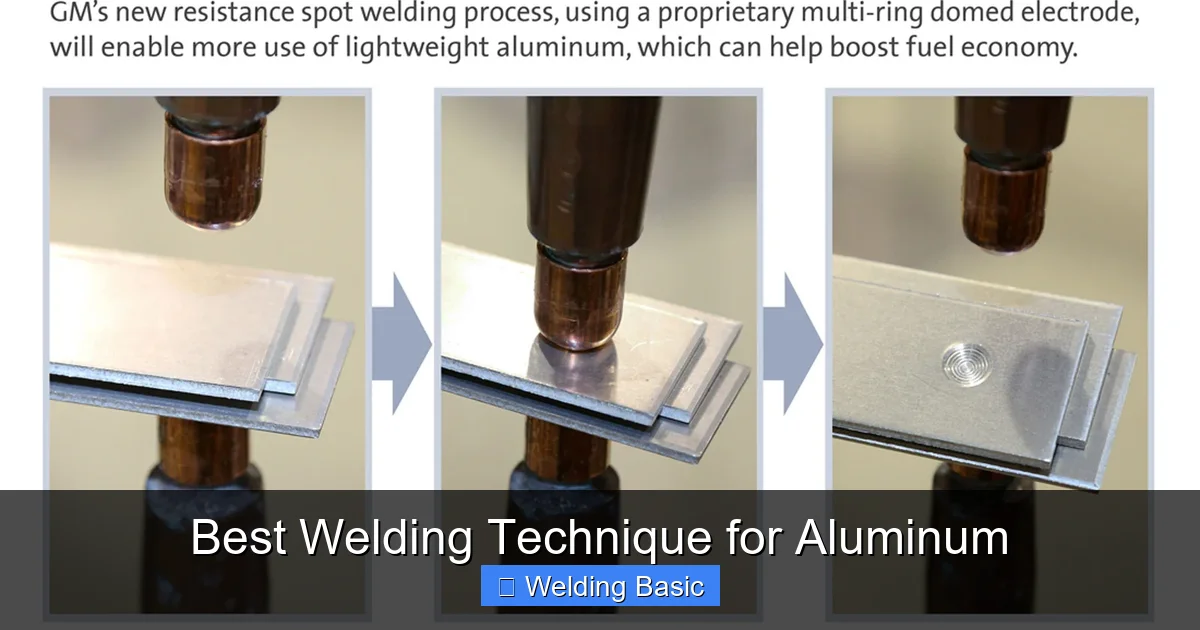
Visual guide about Best Welding Technique for Aluminum
Image source: images.hgmsites.net
Additionally, aluminum is softer and more prone to contamination from moisture, oil, or dirt. Even a small amount of moisture can cause porosity in the weld, leading to weak spots. That’s why preparation and technique are so critical when welding aluminum.
Choosing the Best Welding Technique for Aluminum
While several welding methods can be used on aluminum—including MIG, stick, and TIG—the best welding technique for aluminum is widely considered to be TIG welding (Gas Tungsten Arc Welding or GTAW). Here’s why:
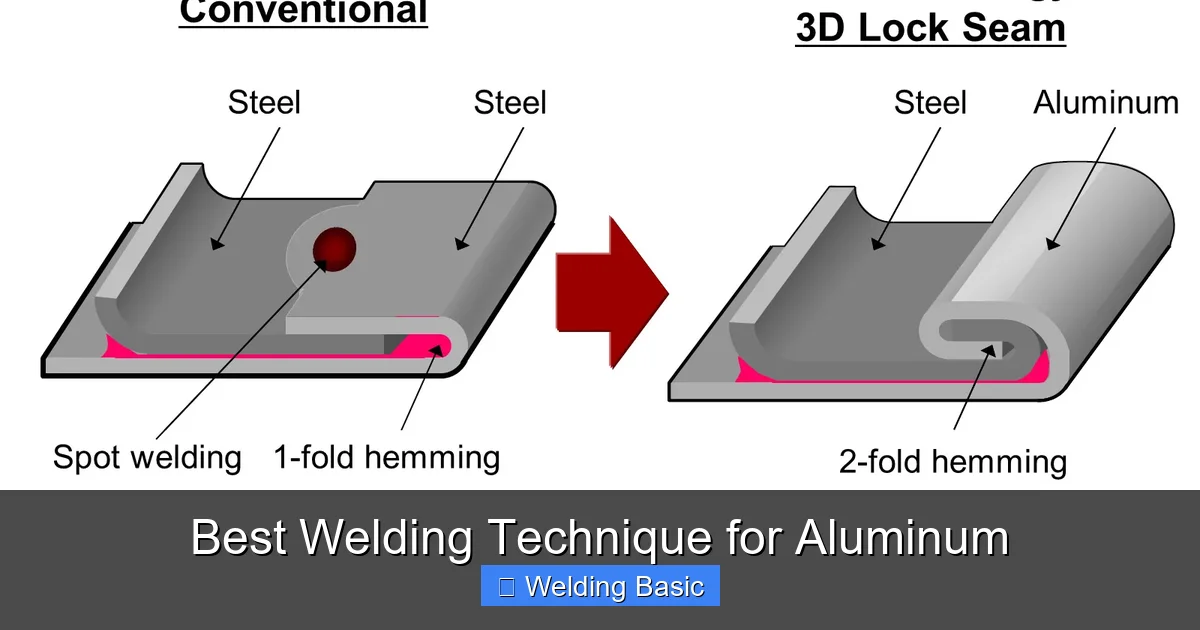
Visual guide about Best Welding Technique for Aluminum
Image source: images.hgmsites.net
- Precision and control: TIG allows you to fine-tune heat input, which is crucial for thin or heat-sensitive aluminum.
- Clean welds: With no spatter and full visibility of the weld pool, you can monitor and adjust your technique in real time.
- Strong, high-quality results: TIG produces deep penetration and excellent fusion, especially when done correctly.
- Works on thin and thick materials: From sheet metal to thicker plates, TIG is versatile and effective.
MIG welding can also be used, especially for thicker aluminum or faster production work, but it requires specialized equipment like a spool gun and argon-helium shielding gas. For most hobbyists and professionals, TIG remains the gold standard.
Step-by-Step Guide to TIG Welding Aluminum
Step 1: Gather Your Equipment
Before you start, make sure you have the right tools:
- TIG welder with AC/DC capability (AC is essential for aluminum)
- Argon shielding gas (100% argon recommended)
- Tungsten electrode (2% thoriated or ceriated for better arc stability)
- Filler rods (4043 or 5356, depending on your project)
- Stainless-steel wire brush (dedicated to aluminum only)
- Acetone or aluminum cleaner
- Safety gear: welding helmet, gloves, and flame-resistant clothing
Step 2: Clean the Aluminum Thoroughly
This step cannot be skipped. Contamination is the number one cause of failed aluminum welds.
- Use a stainless-steel brush to scrub the surface and remove the oxide layer. Never use a brush that’s been used on steel—cross-contamination will ruin your weld.
- Wipe the area with acetone on a clean cloth to remove oils, grease, or dirt.
- Clean both the base metal and the filler rod. Even a fingerprint can introduce moisture and cause problems.
Step 3: Set Up Your TIG Welder
Proper machine settings are key to success.
- Switch your welder to AC (Alternating Current). This creates a cleaning action that breaks up the oxide layer during welding.
- Adjust the amperage based on material thickness. A general rule is 1 amp per 0.001 inch of thickness. For example, 1/8-inch aluminum needs about 125 amps.
- Set the AC balance. A 70/30 balance (70% electrode positive, 30% electrode negative) is a good starting point. More EP helps with cleaning, while more EN increases penetration.
- Use a gas lens and #6 or #8 cup for better gas coverage and visibility.
Step 4: Prepare the Joint
Fit-up is important for a strong weld.
- Ensure tight, gap-free joints. Aluminum expands and contracts more than steel, so poor fit-up can lead to cracking.
- Use clamps or fixtures to hold pieces in place.
- For butt joints, a slight root gap (0.020–0.040 inches) helps with penetration.
Step 5: Start Welding
Now it’s time to weld. Follow these tips for a smooth process:
- Hold the torch at a 15-degree angle and maintain a short arc length (about 1/8 inch).
- Use a foot pedal or fingertip control to adjust heat in real time.
- Dip the filler rod into the leading edge of the weld pool, not directly into the arc.
- Move steadily—too slow causes burn-through, too fast leads to lack of fusion.
- Keep the argon flowing until the weld cools to prevent oxidation.
Step 6: Post-Weld Care
After welding, let the piece cool naturally. Avoid quenching with water, as rapid cooling can cause cracking. Inspect the weld for signs of porosity, cracks, or incomplete fusion. If needed, grind down and re-weld problem areas.
Tips for Success
- Practice on scrap metal first. Aluminum welding takes practice. Don’t expect perfection on your first try.
- Use a push technique. Push the torch away from the weld pool for better gas coverage and visibility.
- Keep your tungsten sharp. A balled or contaminated tungsten causes arc instability. Re-grind if needed.
- Work in a draft-free area. Wind or fans can disrupt the argon shield and cause porosity.
- Preheat thick aluminum. For materials over 1/4 inch, preheat to 300–400°F to reduce thermal stress and improve weld quality.
Troubleshooting Common Problems
Porosity (Bubbles in the Weld)
Cause: Moisture, oil, or poor gas coverage.
Fix: Clean the metal thoroughly, ensure proper gas flow (15–20 CFH), and check for leaks in your gas line.
Lack of Fusion
Cause: Low amperage, fast travel speed, or dirty base metal.
Fix: Increase heat, slow down, and re-clean the joint.
Warpage or Burn-Through
Cause: Too much heat or slow travel speed.
Fix: Reduce amperage, use a copper backing bar to dissipate heat, or switch to pulse welding.
Discoloration or Oxidation
Cause: Poor shielding gas coverage or post-weld exposure to air.
Fix: Use a trailing shield or increase post-flow gas time.
Conclusion
Mastering the best welding technique for aluminum—TIG welding—opens up a world of possibilities for metal fabrication and repair. While aluminum presents unique challenges, proper preparation, the right equipment, and careful execution lead to strong, clean, and professional results.
Remember: cleanliness is critical, AC power is essential, and practice makes perfect. With the tips and steps in this guide, you’re well on your way to becoming confident in welding aluminum. So grab your TIG welder, prep your materials, and start building something amazing.