
A spot welder joins metal sheets using heat and pressure from electrical resistance. This guide explains how it works, key components, and safe operation tips.
Key Takeaways
- Spot welding uses electrical resistance to create heat at the contact point between metal sheets. This melts the metal, forming a strong bond when cooled under pressure.
- Two copper alloy electrodes apply pressure and conduct current. One electrode is stationary, while the other moves to clamp the metal pieces together.
- Welding time, current, and pressure must be balanced. Too little current won’t melt the metal; too much can burn through or damage the surface.
- Common materials include low-carbon steel, stainless steel, and some aluminum alloys. Thickness typically ranges from 0.5 mm to 3 mm per sheet.
- Safety gear like gloves, goggles, and ventilation are essential. High currents and hot metal pose serious risks if proper precautions aren’t taken.
- Maintenance includes cleaning electrodes and checking connections. Dirty or worn electrodes reduce weld quality and consistency.
- Spot welders are widely used in automotive, appliance, and sheet metal industries. They’re fast, efficient, and ideal for repetitive tasks.
Introduction: What Is Spot Welding and Why It Matters
If you’ve ever wondered how car bodies are held together or how metal boxes are sealed so neatly, chances are spot welding played a role. Spot welding is a fast, reliable method of joining two or more metal sheets by applying heat and pressure at specific points. It’s one of the most common welding techniques in manufacturing, especially in industries like automotive, aerospace, and appliance production.
In this guide, you’ll learn exactly how a spot welder works—from the science behind it to the step-by-step process of making a strong weld. Whether you’re a DIY enthusiast, a student, or someone curious about welding basics, this guide breaks it down in simple, easy-to-follow steps. By the end, you’ll understand the key components, how to operate a spot welder safely, and how to troubleshoot common issues.
How Does a Spot Welder Work? The Science Behind the Weld
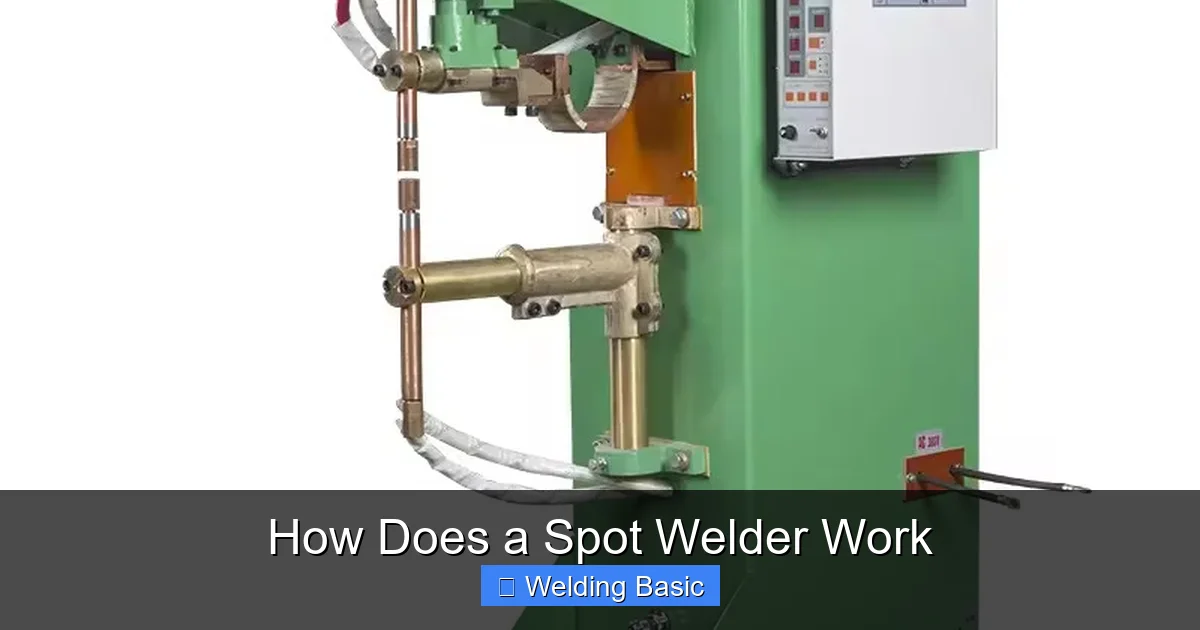
Visual guide about How Does a Spot Welder Work
Image source: welder-machines.com
At its core, spot welding relies on a simple principle: electrical resistance generates heat when current passes through metal. When two metal sheets are placed between two copper electrodes and squeezed together, electricity flows through them. The point where the metals touch has higher resistance than the rest of the material, causing it to heat up rapidly.
As the temperature rises—often reaching over 2,000°F (1,093°C)—the metal at the contact point melts, forming a small pool of molten material. Once the current stops, the pressure from the electrodes holds the pieces together while the molten metal cools and solidifies, creating a strong, permanent bond called a weld nugget.
This entire process happens in just a fraction of a second, making spot welding incredibly fast and efficient. It’s especially useful for thin sheets of metal, where other welding methods might cause warping or burn-through.
Key Components of a Spot Welder
To understand how a spot welder works, it helps to know its main parts:
- Electrodes: Made of copper alloys, these conduct electricity and apply pressure. One is fixed, the other moves to clamp the metal.
- Transformer: Steps down high-voltage household or industrial power to low-voltage, high-current electricity needed for welding.
- Control Unit: Regulates the amount of current, duration of the weld, and sometimes the pressure applied.
- Welding Head or Arm: Holds the electrodes and delivers the clamping force, often powered by pneumatic or hydraulic systems.
- Cooling System: Many industrial spot welders use water cooling to prevent electrodes and transformers from overheating.
These components work together to deliver precise, repeatable welds with minimal operator effort.
Step-by-Step: How to Use a Spot Welder
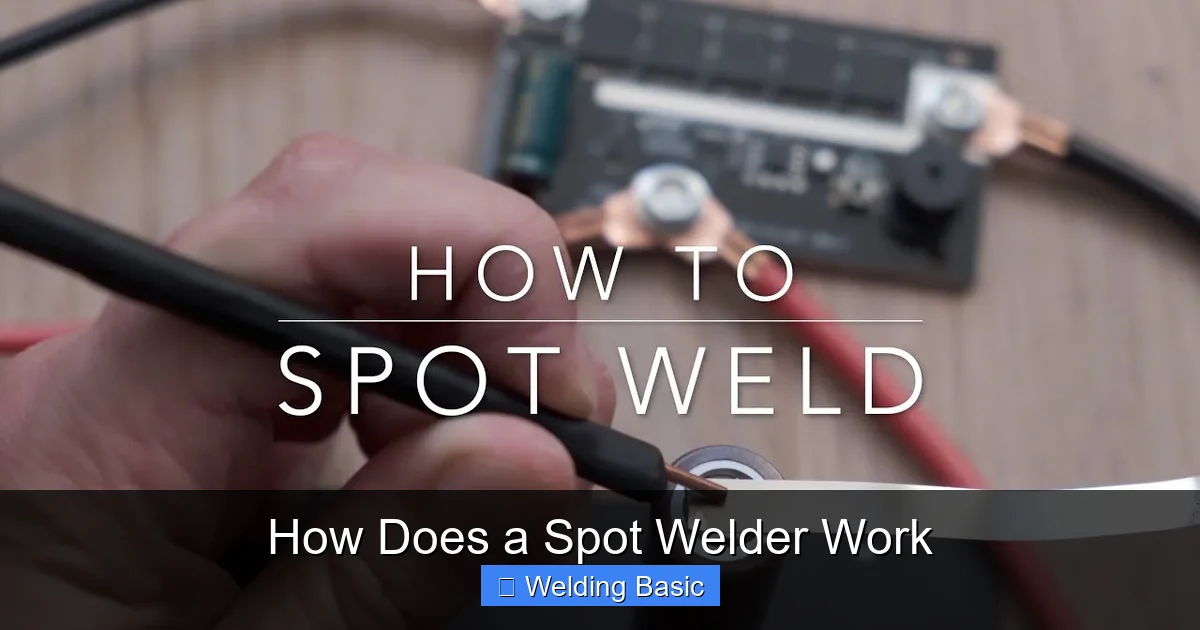
Visual guide about How Does a Spot Welder Work
Image source: i.ytimg.com
Using a spot welder may seem intimidating at first, but with the right preparation and technique, it’s straightforward. Follow these steps to make a clean, strong weld every time.
Step 1: Prepare the Workpieces
Before welding, clean the metal surfaces thoroughly. Any dirt, oil, rust, or paint can interfere with electrical conductivity and weaken the weld. Use a wire brush, sandpaper, or solvent to remove contaminants. For best results, the surfaces should be flat and tightly aligned.
If you’re welding two sheets, make sure they overlap properly—typically by at least 10 times the thickness of the thinner sheet. This ensures good contact and even pressure distribution.
Step 2: Set Up the Spot Welder
Turn on the welder and allow it to warm up if required. Adjust the settings based on the metal type and thickness:
- Current (amperage): Higher for thicker or less conductive metals.
- Weld Time: Measured in cycles (1 cycle = 1/60 of a second in the U.S.). Start with 5–10 cycles for thin steel.
- Electrode Pressure: Enough to hold the metal firmly without bending it. Too little pressure causes arcing; too much can crush thin sheets.
Consult the manufacturer’s chart or do a test weld on scrap metal to fine-tune settings.
Step 3: Position the Electrodes
Place the metal sheets between the upper and lower electrodes. Make sure the contact points are centered and aligned. The electrode tips should be clean and dressed (shaped) to match the surface—flat for flat sheets, domed for curved surfaces.
Tip: Use electrode holders with adjustable angles to reach tight spots or awkward joints.
Step 4: Initiate the Weld
Press the foot pedal or trigger to start the cycle. The electrodes will clamp down, current will flow, and the weld will form in milliseconds. You’ll hear a brief buzz or click, and possibly see a small flash or spark—this is normal.
After the cycle completes, the electrodes will release. Do not move the workpiece until the weld has fully cooled, usually within a second or two.
Step 5: Inspect the Weld
Check the weld nugget by gently tapping or prying at the edge. A good weld will resist separation and leave a small indentation (called a “weld button”) when pulled apart. If the metal tears cleanly or the nugget is too small, adjust your settings and try again.
Practical Tips for Better Spot Welds
Even small changes can improve weld quality. Here are some expert tips:
- Keep electrodes clean: Wipe them with a dry cloth between welds. Buildup reduces conductivity and causes inconsistent results.
- Dress worn electrodes: Use a electrode dresser or file to reshape rounded or pitted tips.
- Use proper spacing: Space welds at least 25 mm (1 inch) apart to avoid weakening the metal.
- Cool between welds: On manual welders, pause to prevent overheating, especially on thin materials.
- Match electrode size to material: Larger tips distribute current over a bigger area, reducing surface damage.
Troubleshooting Common Spot Welding Problems
Even experienced welders run into issues. Here’s how to fix the most common ones:
Problem: Weak or No Weld
Cause: Insufficient current, poor contact, or dirty surfaces.
Solution: Increase current slightly, clean metal and electrodes, and ensure tight clamping.
Problem: Burn-Through or Holes
Cause: Too much current or too long a weld time.
Solution: Reduce current or shorten the weld duration. Use lower settings for thin materials.
Problem: Electrodes Stick to Metal
Cause: Excessive current or poor electrode material.
Solution: Clean electrodes more often, use copper-chromium or copper-zirconium alloys, and reduce current.
Problem: Inconsistent Weld Size
Cause: Worn electrodes or fluctuating power supply.
Solution: Dress electrodes regularly and check electrical connections.
Safety First: Essential Precautions
Spot welding involves high electrical currents, hot metal, and potential sparks. Always follow these safety rules:
- Wear insulated gloves and safety goggles to protect against burns and flying debris.
- Use ventilation or fume extraction to avoid inhaling metal vapors, especially when welding galvanized steel.
- Keep the work area dry and free of flammable materials.
- Never touch electrodes or metal pieces immediately after welding—they can be extremely hot.
- Ensure the welder is properly grounded and inspected regularly.
Conclusion: Mastering the Art of Spot Welding
Spot welding is a powerful, efficient way to join metal sheets with speed and precision. By understanding how a spot welder works—using electrical resistance to create heat and pressure to form a strong bond—you can produce clean, reliable welds for countless applications.
From automotive panels to battery packs and household appliances, spot welding plays a vital role in modern manufacturing. With the right setup, proper technique, and attention to safety, even beginners can achieve professional-quality results.
Remember: practice on scrap metal, maintain your equipment, and always prioritize safety. Whether you’re building a custom project or learning welding basics, mastering spot welding opens the door to stronger, more durable metalwork.